How to Make a Boot Jack
Tired of wrestling off muddy boots or bending awkwardly after a long day on your feet? A handmade boot jack solves that frustration with simple physics and basic woodworking. You can build one in just a few hours using a single piece of hardwood and common shop tools. This guide covers everything from selecting lumber to final sanding, helping you create a durable tool that makes boot removal effortless.
Below, you will learn how to choose materials, shape the body, carve the fork notch, attach the base, and finish your project. Whether you are a first-time builder or an experienced woodworker, this design balances function, durability, and classic style.
Choose the Right Wood for Your Boot Jack
Select Durable Hardwood
Start with 3/4-inch thick hardwood such as Red Oak, Walnut, Maple, or Poplar. These species resist splitting and handle repeated pressure without denting. Pine works for a quick prototype but tends to crack under heavy use.
Pick a Design Size
Three common sizes fit different needs:
– Compact (12″ x 3″): Great for small spaces or children’s boots.
– Standard Tapered (14″–18″ x 5″ tapering to 4¼”): The most popular option for everyday use.
– Large (24″ using 1×6): Best for tall riding or hunting boots.
Scrap wood often works perfectly, making this a low-waste project.
Cut the Main Body
Mark and Taper the Sides
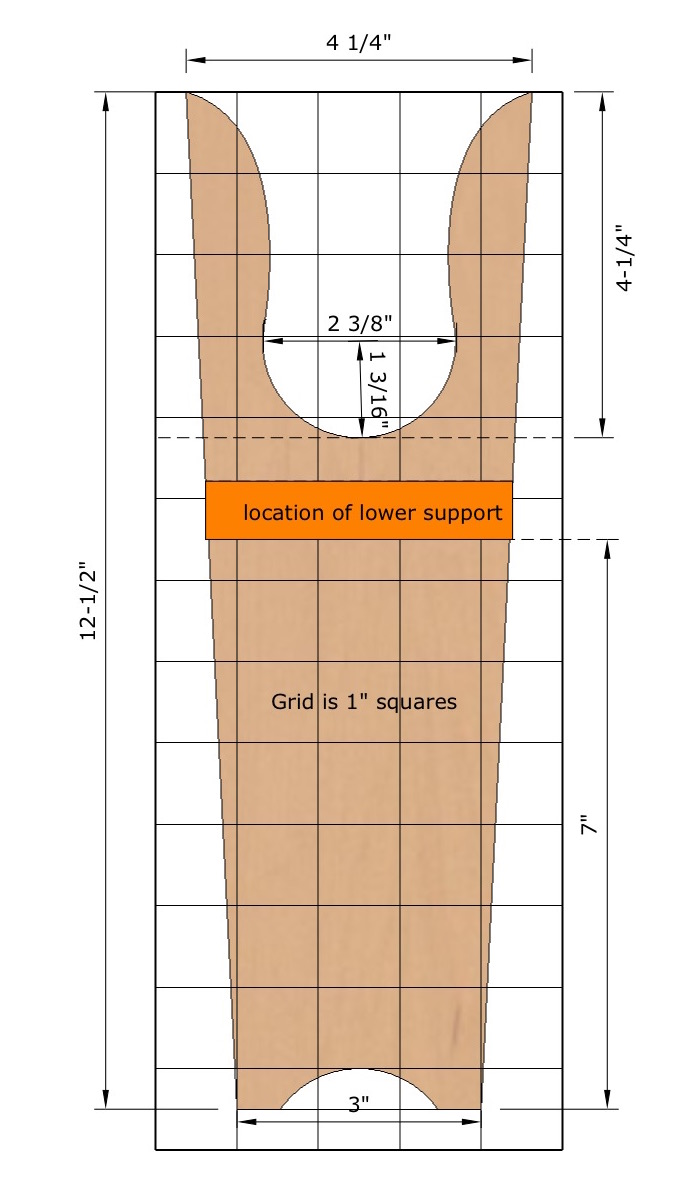
For the standard design, begin with a board 5 inches wide and at least 17 inches long. Trim to your final length (14–18″), then taper the sides so the front stays 5″ wide and the back narrows to 4¼”. Each side should taper about 5/8 inch.
Use a table saw with a guide, or draw clean lines and cut with a jigsaw. A bandsaw gives the cleanest results, but any straight cut works.
Alternative: Skip the Taper
For a beginner version, keep the body rectangular at 12 inches long x 3 inches wide. It is less elegant but fully functional and faster to complete.
Create the Fork Notch
Drill the Center Hole
Measure 3½ inches from the front end and mark the center. Use a 1-1/2-inch Forstner bit to drill a clean hole through the board. Place a scrap backing board underneath to prevent splintering on the exit side.
This hole forms the arc of the fork that grips the boot heel.
Cut the Fork Fingers
From the edge of the drilled hole, make two vertical saw cuts extending to the front edge of the board. Start each cut ½ inch from the outer edges (or ¾ inch from the corners) to leave centered fingers.
Use a jigsaw or bandsaw for these cuts. The result is two sturdy “fingers” that pinch the heel when you apply pressure.
Pro Tip: Test fit your boot heel right away. If too tight, widen the cuts slightly with a file. If too loose, aim for a snug fit since wood wears in over time.
Add Traction Kerfs (Optional)
Prevent Slippery Surfaces
Smooth wood can slide on hard floors. Add grip by cutting shallow grooves across the top surface near the rear.
Mark 15 lines, starting 2 inches from the back, spaced every ¼ inch. Set your table saw blade to 1/16-inch depth and cut a kerf at each line.
Finish the Grooves
Sand lightly with 150-grit paper to remove sharp edges, but leave a slight ridge for traction. Over-sanding removes the gripping effect.
Note: Skip this step for rustic or kid-friendly versions where sharp edges are a concern.
Build and Attach the Foot
Cut the Support Foot
Cut a separate block from the same 3/4″ stock, 2¼ inches long. This acts as the fulcrum where you step to create leverage.
Bevel the Back Edge
Tilt your table saw blade to 11–12 degrees and bevel the back end of the foot. This angle ensures the boot jack sits flat on the floor when assembled.
Without this angle, the device tilts backward and loses efficiency.
Join Methods: Dado vs Surface Mount
Use a Dado Joint (Strongest)
Cut a ¾-inch wide x ¼-inch deep groove across the bottom of the main body, positioned about 3 inches from the back. Slide the foot into the slot.
Secure with wood glue and reinforce with two 2-inch No. 10 brass flat-head screws driven through the body into the foot.
Or Surface Mount (Easier)
Glue and screw the foot directly to the bottom rear. Drill 3/8-inch pilot holes, ¾ inch deep, to avoid splitting and prevent screws from poking through.
Use water-resistant glue and 3/8-inch screws. Brass screws add a classic look, though steel works fine too.
Warning: Never drill all the way through, especially if building on a finished surface.
Trim and Final Fit
Align and Trim Excess
If the foot extends beyond the tapered sides, loosely assemble it first. Then use a fine-point handsaw (like a Japanese pull saw) to trim the foot flush with the body.
Use the main board as a cutting guide for a clean, even edge.
Reassemble with Care
Disassemble, reapply glue, and reattach the foot. Clamp lightly and wipe away excess glue with a damp cloth.
Let dry at least 2 hours before handling.
Troubleshooting Tip: If the foot does not sit flat, rub the bottom gently over 120-grit sandpaper taped to a flat surface until level.
Sand for Comfort and Safety
Progress Through Grits
Start with 120-grit sandpaper to remove tool marks and sharp corners. Move to 150-grit, then finish with 220-grit for a smooth feel.
Focus on edges, corners, and the finger notches, since these areas contact skin and boots.
Skip Fine Sanding for Work Boots?
For utility-only models used in barns or garages, stop at 150-grit. Heavy wear will smooth it naturally. For gifts or indoor use, go all the way to 220-grit.
Clean all dust with a tack cloth before applying any finish.
Apply Finish or Leave Natural

Option 1: Leave Unfinished
Many boot jacks age beautifully without finish. Let it get dirty and worn through use, then clean and oil later for a rugged, lived-in look.
This works well for outdoor or workshop settings.
Option 2: Oil for Protection
Apply wipe-on oil, linseed oil, or tung oil with a clean rag. Let it soak for 15 minutes, then wipe off excess. Repeat for a richer appearance.
Oiling enhances grain and resists moisture from wet boots.
Option 3: Seal with Polyurethane
For maximum protection against mud and slush, use water-based polyurethane. Apply 2–3 coats, sanding lightly between coats with 220-grit.
This is best for high-moisture environments like mudrooms or hunting lodges.
Pro Tip: Rub screw threads with beeswax before driving to prevent stripping, especially with soft brass screws.
Add a Hanging Hole
Drill for Easy Storage
Near the top rear of the boot jack, drill a ¾-inch diameter hole using a Forstner bit.
This lets you hang it by a hook near the door, keeping it off the floor and always within reach.
Position the hole high enough so the jack hangs level when suspended.
Test and Adjust
Try It With Your Boots
Place the jack on a hard floor. Wedge your boot heel between the fingers and press down firmly with your other foot on the base.
The boot should slide off smoothly. If not:
– Too tight? Widen the notch slightly with a file or chisel.
– Slipping? Add more traction kerfs or roughen the surface.
– Wobbly? Check foot alignment and re-bevel if needed.
User Note: Works best with ankle-high to mid-calf boots. Slip-ons and work boots also come off easily with practice.
Customize Your Design
Scale for Kids or Tall Boots
Make a smaller version (10–12 inches) for children. For tall riding or hunting boots, extend the length to 20–24 inches for greater leverage.
Try Different Shapes
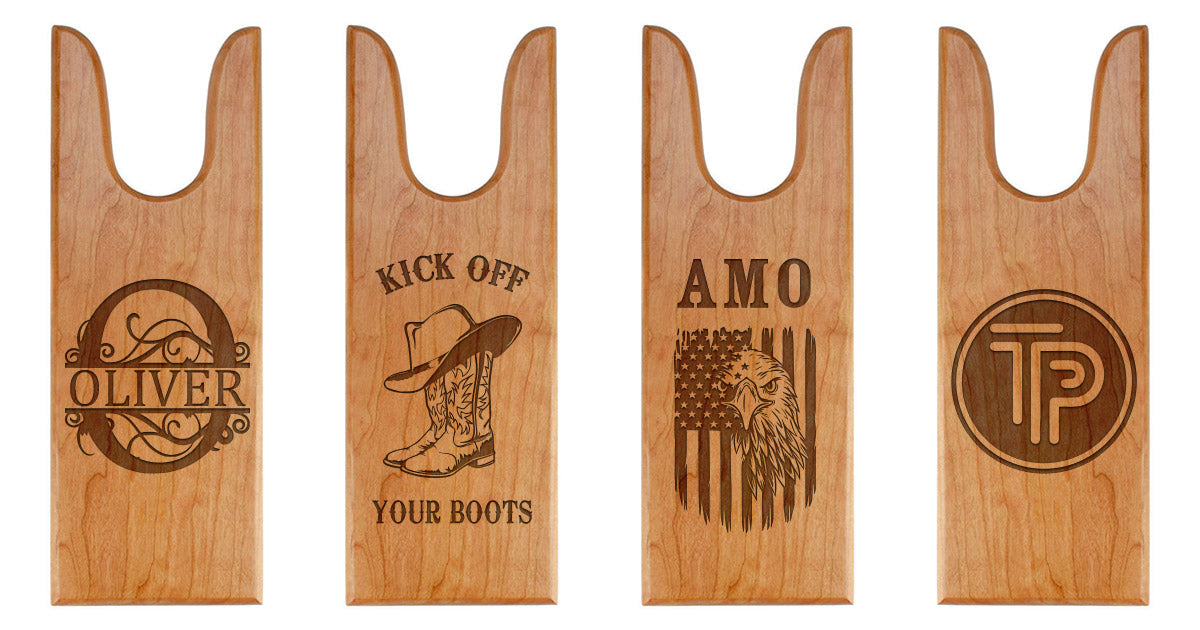
Sketch your own silhouette. Some builders prefer curved sides or rounded fronts. Templates can be printed or drawn on grid paper and attached with spray adhesive.
Use MDF or thin plywood as a template base for repeat builds.
Reinforce Weak Points
If the fork fingers feel thin, thicken the stock to 1 inch or reinforce the notch with a wooden dowel glued across the back.
Safety and Best Practices
Backing Board for Clean Drilling
Always place scrap wood under your workpiece when drilling large holes. This prevents tear-out and keeps edges clean.
Limit Drill Depth
When boring pilot holes for screws, mark your drill bit with tape to control depth. Stop at ¾ inch to avoid breaking through the top.
Test Cuts First
Before cutting your final piece:
– Test the dado width on scrap.
– Confirm taper angles.
– Check fork spacing with an actual boot.
Clamp Securely
Use quick-release clamps when gluing or drilling to prevent movement and ensure accuracy.
Why This Project Works
Leverage Over Labor
The boot jack uses simple physics. Your foot applies downward force on the fulcrum, creating upward lift on the heel. This mechanical advantage makes removing tight boots effortless.
No Bending Required
It eliminates strain on knees and back, which is especially helpful for older users or anyone with mobility issues.
Hygienic and Practical
It keeps hands clean of mud, snow, and pet mess. Hunters, farmers, gardeners, and winter homeowners all benefit from this simple tool.
Final Touches and Care
Clean After Heavy Use
Wipe down with a dry cloth if used with muddy boots. For deep cleaning, scrub gently with a stiff brush and let air dry.
Avoid soaking or washing with water.
Refresh the Finish
Every 6–12 months, reapply oil or polyurethane if the wood looks dry or faded.
Repair Worn Notches
If the fork widens over time, insert a thin wood spline or dowel, glue it in place, and re-cut the notch.
Build at a Glance
| Feature | Standard Design | Compact Version | Heavy-Duty Option |
|---|---|---|---|
| Material | Red Oak, Walnut | Hardwood Scrap | Poplar, 1×6 |
| Thickness | 3/4″ | 1″ | 3/4″ |
| Length | 14″–18″ | 12″ | 24″ |
| Front Width | 5″ | 3″ | 5.5″ |
| Fork Method | Drill + Cut | Vertical Notch | Drilled Arc |
| Foot Type | Beveled (11°–12°) | Flat/Curved | Beveled |
| Joinery | Dado + Screws | Glue + Dowel | Glue + Screws |
| Finish | Oil or Unfinished | Wipe-on Oil | Polyurethane |
| Hanging Hole | ¾” (Yes) | Optional | Yes |
Frequently Asked Questions About Making a Boot Jack
What is the best wood for a boot jack?
Hardwoods like Red Oak, Walnut, Maple, and Poplar work best at 3/4-inch thickness. They resist splitting and wear well under repeated use. Pine is softer and may dent or crack over time.
How long does it take to build a boot jack?
Most builders complete a standard boot jack in under three hours, including cutting, drilling, gluing, and sanding. Adding finish may extend the time by another hour plus drying.
Do I need a table saw to make a boot jack?
No. A jigsaw or bandsaw handles the tapered cuts and fork fingers just fine. You only need a table saw if you choose to cut traction kerfs or a dado joint for the foot.
Can I make a boot jack without a Forstner bit?
You can substitute a spade bit or hole saw, though the edges may be rougher. A Forstner bit gives the cleanest hole for the fork arc and hanging hole.
How do I stop my boot jack from sliding on the floor?
Cut shallow traction kerfs across the top surface near the rear. Mark 15 lines spaced ¼ inch apart and cut 1/16-inch-deep grooves with a table saw. These ridges grip the sole and prevent slipping.
What finish should I use on a boot jack?
For a rustic look, leave it unfinished. For moisture protection, apply wipe-on oil, linseed oil, or tung oil. For maximum durability in wet environments, use 2–3 coats of water-based polyurethane.
Key Takeaways for Building Your Own Boot Jack
Building a boot jack is one of the most rewarding beginner woodworking projects. It is fast, functional, and frequently used. With just a few hours and less than $5 in materials, you create a tool that simplifies daily life. The classic tapered design delivers the best leverage, while a simple notched block works for quick builds. Once finished, hang it by the door and enjoy effortless boot removal every day.