How to Make a Boot: Step-by-Step Guide
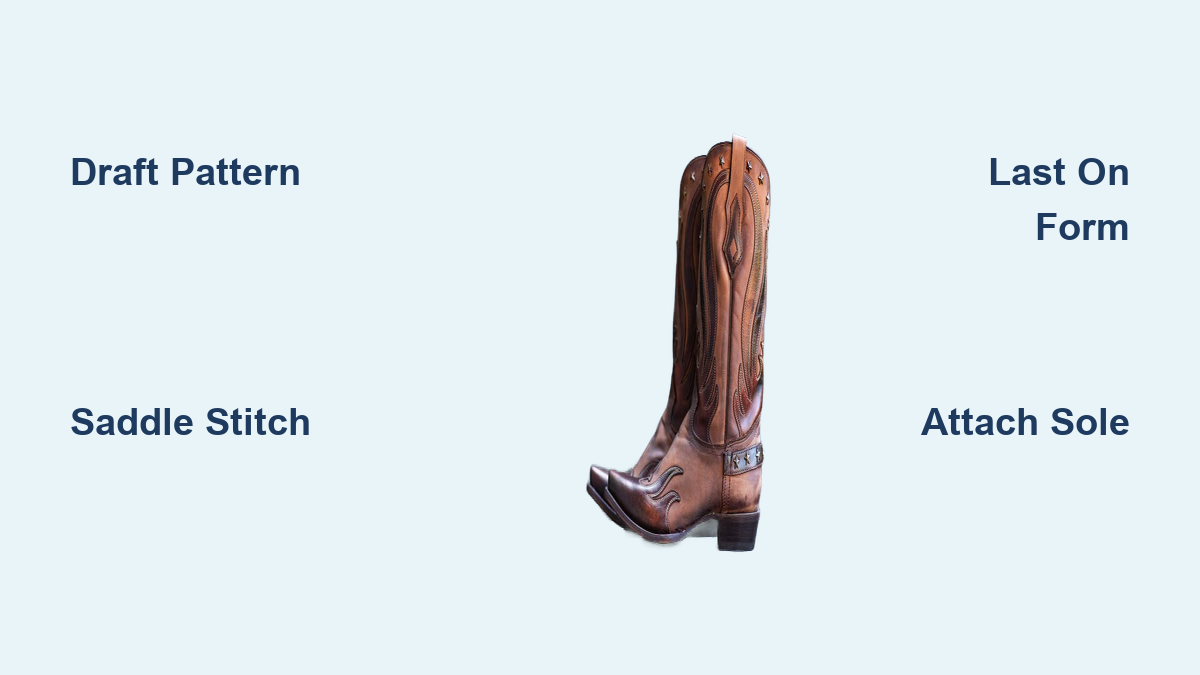
You’ve watched a pair of handcrafted boots age beautifully over years of wear, the leather molding to every contour of the foot. But how to make a boot that achieves that same character, one built entirely by your own hands? Whether you’re drawn to the understated profile of a Chukka or the dramatic flair of a cowboy boot, the journey from raw hide to finished footwear demands patience, precision, and respect for tradition. This guide walks you through every stage of professional boot construction, from initial pattern drafting to the final mirror shine. You’ll learn the techniques that transform flat leather into a three-dimensional form shaped to a last.
This is not a weekend project. Bootmaking involves multiple drying stages, specialized tools, and decisions that compound throughout the process. But each stitch, each pull of the pliers, and each burnished edge brings you closer to a creation that fits not just your foot, but your craftsmanship. Let’s begin.
Draft Accurate Boot Patterns
Create a Chukka Boot Template
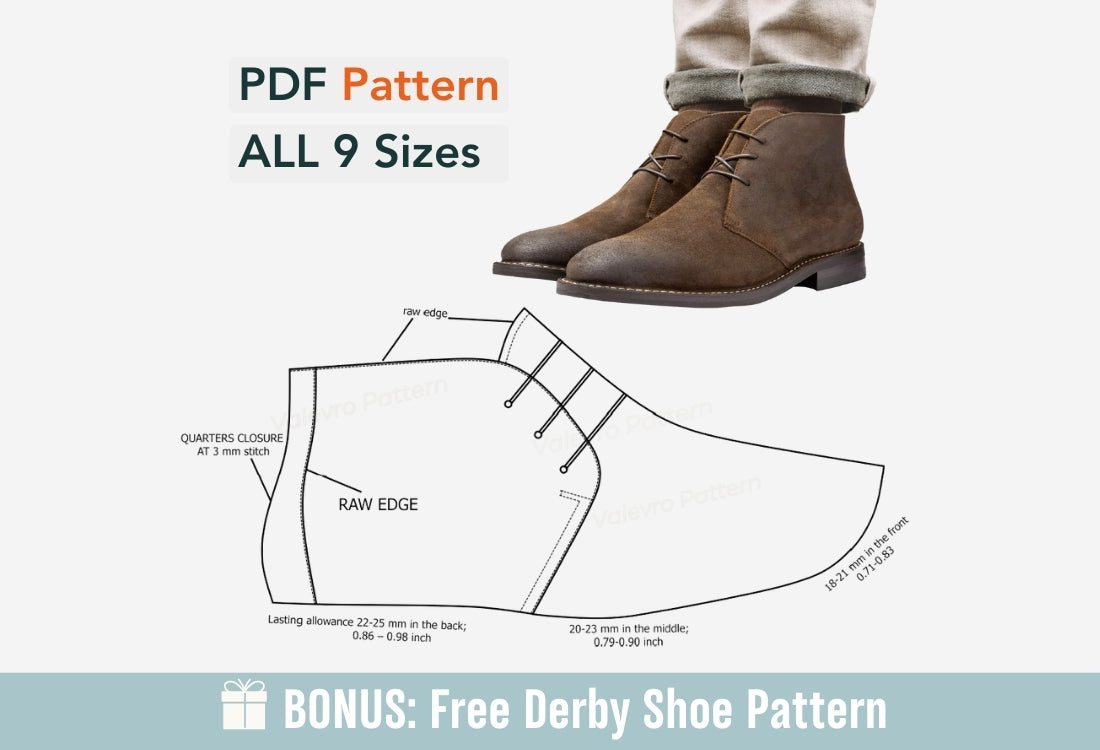
Start with paper before you ever touch leather. The Chukka’s clean design forgives minor imperfections, but only if the pattern matches your last precisely. Reference J.H. Thornton’s Textbook of Footwear Manufacture, then adapt dimensions to your specific last. Cut a trial pattern from old trousers to test fit, adjust, and re-test until volume, toe box depth, and heel cup alignment all feel correct.
Once the fabric mock-up fits well, transfer the shape to sturdy paper. Add a half-inch seam allowance around all edges, then label each piece: vamp, quarters, tongue. Store this master pattern for future pairs.
Scale Cowboy Boot Tops by Measurement
Cowboy boot shafts require precise math. Begin with the short heel measurement, wrapping a tape around the instep and base of the heel. Divide this number by four to calculate quarter-widths on folded paper.
Draw the seam line half an inch up from the fold. Its width equals the short heel measurement minus three-eighths of an inch, divided by four. Draw the pass line two and a half inches above that, using the short heel plus three-quarters of an inch, divided by four. The top line sits at your desired height, calculated as the short heel plus one inch, divided by four.
Mark the front opening starting 5.2 cm up from the bottom line, flaring outward to 1.3 cm from center. Leave at least 1.5 cm of clearance along the edge for side seams and decorative elements.
Cut and Adjust Vamps and Counters
Cowboy vamps and counters come in Small, Medium, or Large sizes, with excess trimmed during assembly. The hard counter, cut from stiff soling leather, mirrors the counter cover but terminates in a point. If the tongue obscures planned inlay designs, shorten it. Cut four pull tabs per pair, reinforcing each with nylon tape or leather strips to prevent stretching.
Select and Prepare Leather Materials
Choose the Right Leather for Each Component
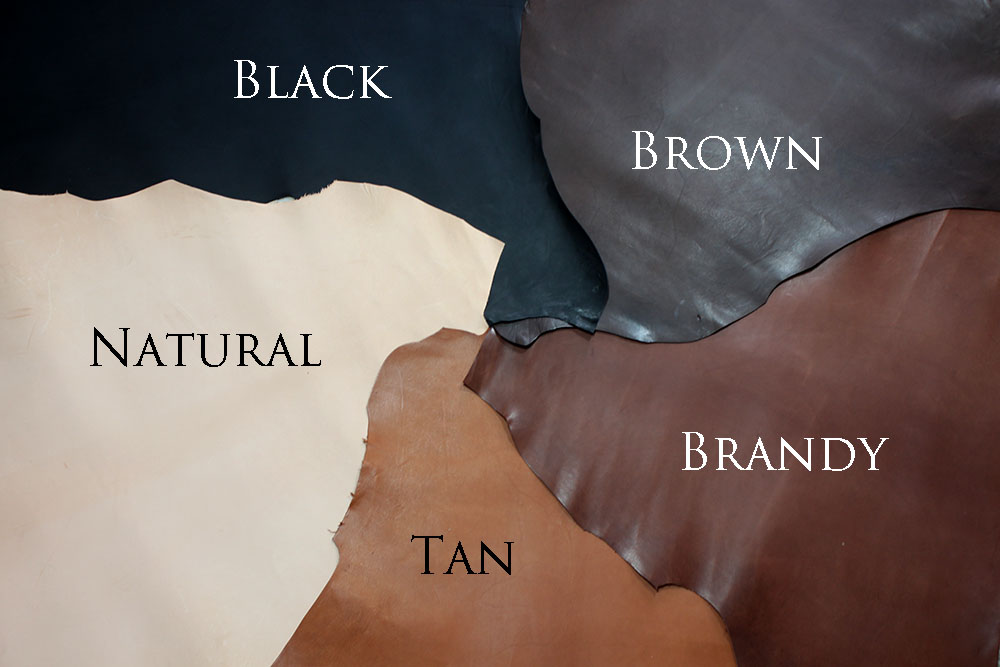
Leather selection determines both durability and feel. For Chukka uppers, use standard vegetable-tanned upper leather that accepts dye readily. Cowboy boot tops benefit from waxed flesh kangaroo leather, which holds shape well during stitching but requires re-waxing after turning.
Line interiors with soft leather; baby calf works well for heel slides due to its slippery texture. Insoles should be vegetable-tanned to soak, mold, and hold nails effectively. Hard counters need soling leather for stiffness. Cut welts from strip leather for Chukkas, or 2 cm kidskin strips with twine cores for cowboy boots to add volume. Build soles and heels from stacked leather, then cap with rubber for longevity.
Transfer Patterns Without Smudging
Avoid smearing waxed leather during pattern transfer. For perforation transfer, stitch over the paper pattern with an empty needle, then dust with talc to reveal dotted lines. For direct tracing, cut the paper and trace edges with a pencil. On waxed flesh, scratch stitch lines directly with an awl for clean, permanent marks.
Cut with Precision and Skive for Smoothness
Use a clicking chisel for stitch-line accuracy, or a clicking knife for hand cutting. Cut completely through the leather in one pass, double-passing corners when needed. Never shift the paper while cutting.
Skiving reduces bulk in multi-layer areas. Use a Landis 5-in-1 skiver for hard counters, since regular knives struggle with thick soling leather. Skive inlay areas, counter edges, and top cutouts. Preserve the skin side of waxed flesh if you want to maintain the natural finish.
Assemble Uppers with Reinforced Stitching
Stitch Clean Corners and Secure Thread Ends
Use saddle stitching with two needles and waxed thread for durable seams. Never backstitch; instead, tie off with double knots, looping each knot twice to lock the thread securely. This prevents bulky tips inside the boot.
At corners, pull your points by extending the stitch slightly beyond the perceived corner to keep angles sharp. Use curved needles for welting, or heat straight needles over a flame and bend them into curve.
Build Chukka Uppers in Sequence
- Back seam: Stitch the quarters together, glue the seam flat, and cover with a strip.
- Separate stitching: Sew upper and lining components individually for clean interior seams.
- Join and trim: Align upper and lining, stitch along the top edge, then trim excess material.
Construct Cowboy Boot Uppers
- Attach lining: Skive the lining’s bottom edge, then glue tops to lining, leaving excess on sides and top for alignment.
- Install stays and slides: Glue a front stay along the seam line. Add a heel slide over the lining and stitch it down to prevent heel abrasion.
- Join vamps and tops: Stitch vamps to tops. If using contact cement, this first line defines the glue zone.
- Triple stitch: Stitch vamp-to-lining through all layers, then trim excess lining.
- Trim vamps correctly: Mark three-sixteenths of an inch above the top line on the front panel, extend down to the seam line, then cut. Never trim from the base of the tops, as this misaligns the counter.
- Shape rear panel: Trim the upper to match the hard counter’s curve.
- Install pull tabs: Glue and fold tabs, punch a split hole, mark the base at 2 inches and the slice at 2.5 inches, stitch the base, cut the slice, pull the flap through with needle-nose pliers, and secure with two vertical stitches along the side seam.
- Add side welts: Cut a 2 cm kidskin strip with twine core, attach to front or back half first, align halves, mark with pen, staple temporarily, hand-stitch or use a cylinder arm machine placing stitches about 5 mm inward, remove staples, pull thread, tie off, and trim.
Attach Hard Counters Properly
Mark center and seam lines on the counter. Skive edges heavily and sand smooth. Fold tops over the counter to add heel curvature, then glue and double-stitch to secure. When trimming, start from the seam line rather than parallel to the pattern edge to avoid misalignment during insole attachment.
Last the Boot to a Custom Fit
Prepare the Insole for Lasting
- Rough-cut the insole.
- Soak thoroughly.
- Nail to the last’s bottom, wrap with elastic, and dry for 24 hours.
- Carve the holdfast: For standard boots, make the first cut 7mm deep and the second 6mm. For cowboy style, cut 3mm on the first pass to create a welt that appears to emerge from the side.
- Mark stitching holes with an awl.
- Trim the waist: Remove sharp corners and use a broken piece of glass to bevel the edge.
Last Chukka Boots with Puff Integration
- Dampen uppers with a paintbrush.
- Add heel stiffener with paste.
- Stretch over the last, nail in place, and dry for over 24 hours.
- Insert toe puff: Lift the front, re-last the lining, apply paste to the puff, press into the toe, hammer until paste soaks in, dry for one day, trim the bottom, file smooth, re-wet, re-last, and dry another day.
Use a Lasting Stand for Cowboy Boots
Due to shaft height, use a lasting stand with an angled board. Tacks work better than thin nails because they allow one-handed setting and strong pulls.
- Wet lasting: Soak uppers for 20 to 30 minutes to make the hard counter pliable.
- Center on the last and align side seams.
- Tack the heel one-quarter inch above the insole.
- Pull the toe, tack center, then sides.
- Check alignment by removing to verify even seams and centered tops.
- Drop the heel: Remove the initial tack, pull the heel down, re-tack, and ensure the saw tooth of the counter is seated. Match height between boots.
- Pull sides: Work down to the waist. If the last is canted, pull the opposite side first. Use pliers to pull tops inward toward the heel.
- Waist pull: Use bulldog pliers protected with folded leather for high force. Use leg leverage if needed.
- Secure the heel: Stretch material over the heel, hammer down, and tack.
- Verify the angle: The front side of the top should form a 90-degree angle when properly lasted.
Attach Welt and Sole Securely

Prepare and Stitch Chukka Welt
- Cut a leather strip for the welt.
- Soak and wrap in newspaper for 24 hours.
- Mark the stitch line; dye if desired.
- Saddle stitch through holdfast, lining, upper, and welt.
- Glue a steel shank in place.
- Fill the void with cork and rasp flat, leaving a slight round at the ball of the foot.
Peg Cowboy Boot Waists Instead of Stitching
In high-stress areas, pegging replaces continuous stitching.
- Wet the insole along the waist.
- Punch holes with a waxed welting awl.
- Thread through, then place the shank and cover.
- Mark holes 7 mm apart in staggered rows. Punch and hammer one peg at a time, since pre-punching shifts the leather. Replace broken pegs immediately.
- Trim and sand smooth after drying, before heel building.
Attach Outsoles Correctly
For Chukkas:
1. Glass the sole to remove shine.
2. Mark holes with a wing divider.
3. Awl the holes.
4. Glue and stitch to the welt.
5. Add a rubber cap from a cobbler.
For cowboy boots:
1. Fiddleback waist: Shave the flesh side of the sole for a slimmer profile.
2. Notch for heel transition, either shaping damp or cutting the final form.
3. Glue and stitch or peg to the welt.
Build and Shape the Heel

Stack and Nail Chukka Heels
- Glue and stack leather lifts.
- Skive each layer flat.
- Level with a knife, glass, or rasp.
- Nail every second lift with three nails in a triangle. On the final lift, place nails in a U shape one-quarter inch from the edge and one-half inch apart, angled inward, plus three center nails.
Create Slanted Cowboy Heels
- Stack and plane to remove last curvature.
- Level all lifts.
- Trace the bottom using the top lift as a guide.
- Sand or use a finisher to create the slant.
- Drive long nails through stacks and glue on the top lift.
Smooth and Finish Edges
- Rough shape with a knife.
- Peen and rasp to refine.
- Glass the surface smooth.
- Sand with 120 grit in two directions, 220 grit in one direction, and wet 1000 grit for final smoothing.
- Iron edges with a waist iron back for angles to harden them.
- Burnish with a wooden rod and water until shiny.
- Apply shoe cream, then hard wax melted in, and finish with polish.
- Install a rubber cap by gluing on and sanding flush.
- Add toe taps after edge setting but before final polish: Line up the recessed tap, slice around it, peel back leather, screw in place, and sand metal flush.
Finish, Dye, and Protect
Achieve Glossy Cowboy Soles
- Scrape the dried sole with glass.
- Sand thoroughly.
- Dye.
- Burnish aggressively with a wooden rod.
- Repeat the sand-dye-burnish cycle.
- Apply edge wax such as Fiebing’s for a mirror shine.
Antique Chukka Uppers
Use alcohol-based dye like ROC brand. Mix red-brown and dark-brown at a 1:3 ratio for depth. Apply multiple layers, starting with full coverage and decreasing coverage with each pass to highlight creases and edges.
Condition and Polish for Longevity
Apply three rounds of Saphir Creme followed by one round of Saphir Pate de Luxe wax. Re-wax tops if using kangaroo leather, since wax wears off during lasting.
Reshape Cowboy Tops After Lasting
Tops often wrinkle during turning and lasting. Use a Mallory Stretcher:
1. Spray tops lightly with water.
2. Insert and expand the stretcher.
3. Let sit overnight.
4. Check the short heel measurement and stretch back if it shrunk during seaming.
Frequently Asked Questions About Making Boots by Hand
How long does it take to make a boot from scratch?
The process spans several days to weeks depending on workflow. Multiple steps require 24-hour drying periods, including insole setting, toe puff integration, and upper settling. Cowboy boots take longer than Chukkas due to their height and complexity.
What is the most difficult part of bootmaking?
Lasting the upper over the last is often considered the most challenging stage. It requires significant force, precise alignment, and the ability to pull leather in specific directions to avoid bunching in the waist. For cowboy boots, the height of the tops adds complexity that requires a lasting stand.
Can I make boots without industrial tools?
Yes, though some tools are essential. A clicking knife replaces a machine-driven chisel, and straight needles can be heated and bent into curved shapes for hand-welting. However, a lasting stand significantly eases the process for tall cowboy boots, and bulldog pliers are necessary for waist pulls.
What leather works best for beginner bootmakers?
Standard vegetable-tanned upper leather is forgiving for Chukkas because it dyes easily and forgives minor mistakes. Avoid waxed flesh kangaroo for your first pair, since it requires re-waxing after turning and is more expensive.
How do I prevent my boot from leaking water?
Achieve waterproofing through a multi-step edge finishing process. After sanding, iron the edges to harden them, burnish with water until shiny, apply shoe cream, then melt in hard wax and finish with polish. This creates a seal that resists moisture penetration.
Why do cowboy boots use pegging instead of stitching in the waist?
Pegging offers superior durability in high-stress areas where continuous stitching might fail. The staggered rows of wooden pegs distribute force more evenly across the narrow waist section, which experiences significant flexing during walking.
Key Takeaways for Your First Bootmaking Project
Start with a Chukka pattern before attempting cowboy boots, since the simpler design forgives minor errors and teaches fundamental techniques. Invest time in pattern drafting and fabric mock-ups, because fit problems become exponentially harder to fix once leather is cut. Master saddle stitching with proper knot tying rather than backstitching, since bulky thread tips create discomfort inside the boot.
Plan for multiple drying stages and resist the urge to rush. Each 24-hour waiting period serves a purpose, allowing leather to memorize its new shape. Finally, accept that your first pair will have imperfections, and let those flaws teach you where to adjust on the second pair. The reward is a pair of boots that fits your foot, your aesthetic, and your skill level, something no store-bought pair can replicate.
Word Count: ~2,650 words