
How to Clean Salomon Hiking Boots
There’s nothing worse than slipping into damp, stinky boots after a long hike—especially when you know they’re caked with dried mud and salt residue. If your Salomon hiking boots have seen their fair share of muddy trails, rocky ridges, or coastal scrambles, learning how to clean Salomon hiking boots properly is the key to keeping them supportive, dry, and odor-free for years. Skipping this essential step doesn’t just leave your gear looking rough—it risks permanent damage to waterproof membranes, stitching, and cushioning.
Cleaning isn’t just about appearance. Dirt, sweat, and moisture break down materials over time, stiffen flexible zones, and create the perfect breeding ground for bacteria. The good news? A few simple tools and consistent care can make all the difference. Whether you own the lightweight X Ultra 4, rugged Quest 4, or stylish XT-6, this guide gives you a complete, step-by-step process for cleaning, drying, deodorizing, and maintaining your Salomon boots—without damaging their advanced technologies like Gore-Tex or Quick Lace systems.
Follow these proven steps to protect your investment, extend boot life, and ensure every hike starts with fresh, trail-ready footwear.
Remove Mud and Debris Immediately After Hiking
Don’t wait until your boots are rock-hard with dried mud—clean them as soon as possible.
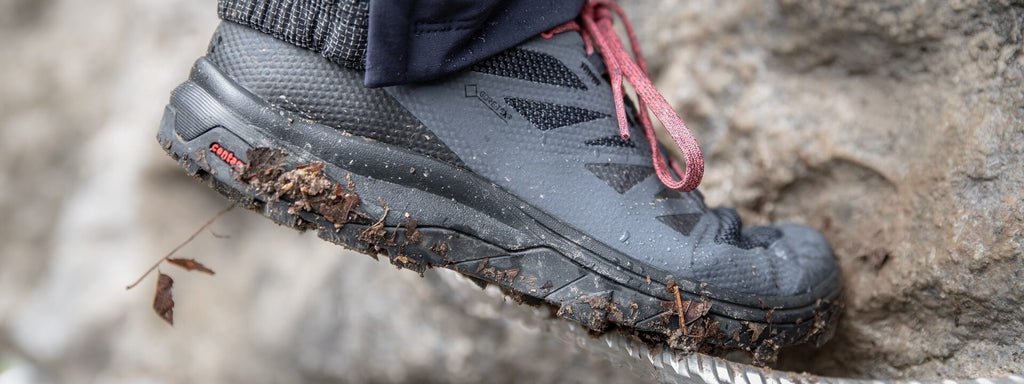
Knock Off Caked-On Dirt Before It Sets
As soon as you return from a muddy trail, remove loose debris. Hold each boot by the heel and gently bang the soles together to dislodge packed dirt from the lugs. Then, rinse under lukewarm running water or dunk in a bucket. Avoid hot water—it can weaken adhesives and damage synthetic fibers.
Use a soft cloth or sponge to wipe down high-wear areas like the toe cap and heel counter. This field cleaning prevents grit from grinding into fabric during storage, which accelerates wear.
✅ Pro Tip: Clean your boots right at the trailhead if possible. Delaying cleaning increases stiffness and makes deep cleaning much harder.
Deep Clean Your Boots at Home
A thorough cleaning restores performance and prevents long-term damage.
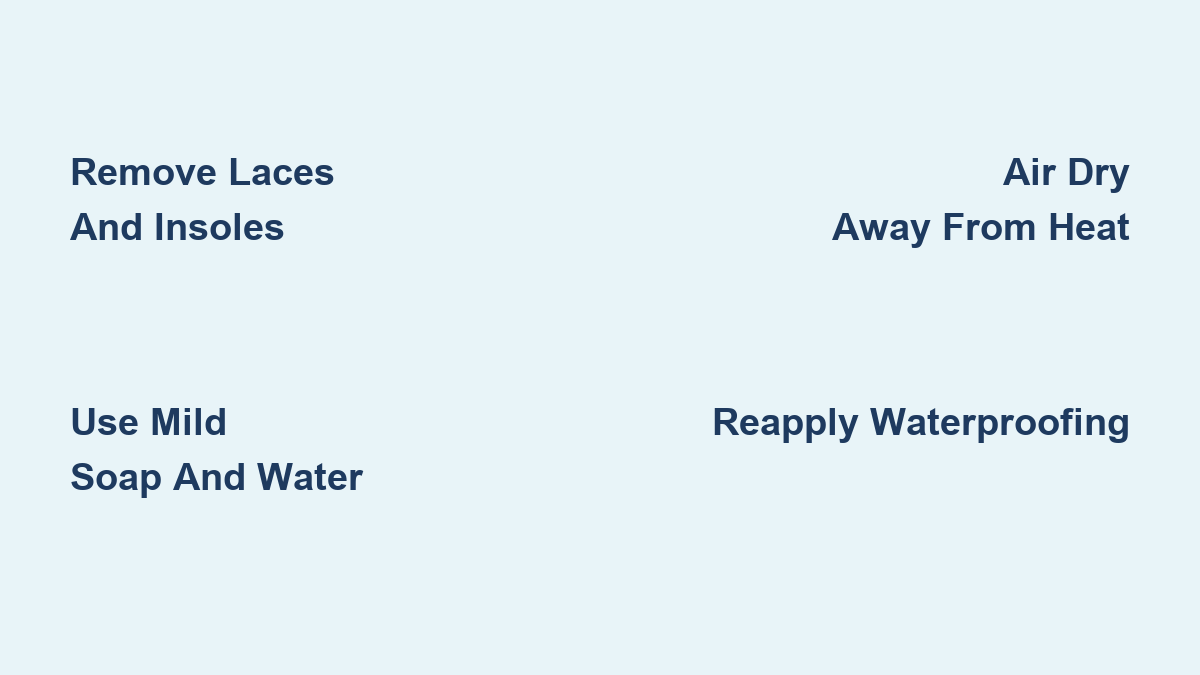
Take Out Laces and Insoles for Full Access
Start by removing the laces and insoles (also called sock liners). This lets you reach hidden grime and ensures everything dries completely. Soak laces in soapy water or replace them if frayed. Quick Lace systems should be wiped clean—do not submerge them.
Insoles can be machine washed: place them in a laundry bag, use cold water and mild detergent, then air dry. Never machine dry—heat warps the foam and ruins cushioning.
Scrub the Exterior with a Gentle Cleaner
Mix warm water with a few drops of mild dish soap or use a specialized cleaner like Nikwax Footwear Cleaning Gel or Salomon NST Wash. Dip a soft-bristle brush or sponge into the solution and scrub the upper, focusing on seams, eyelets, and rubber overlays.
For salt stains from beach hikes, use a 4:1 water-to-vinegar solution to neutralize corrosive minerals. An old toothbrush works perfectly for cleaning tight spots like stitching and crevices.
⚠️ Avoid: Harsh detergents, bleach, or steel wool—they strip protective coatings and damage synthetic fibers.
Wipe the Interior Without Soaking
Never soak the inside of your boots or use soap internally. Residue attracts bacteria and is nearly impossible to rinse fully.
Dampen a clean cloth with a 4:1 water-vinegar mix and wipe the interior lining from toe to heel. This kills odor-causing microbes and removes sweat buildup. For mold or strong smells, let the solution sit for 5 minutes before wiping dry.
Do not scrub the inner fabric—this can tear padding or compromise moisture-wicking properties.
Rinse Until All Soap Is Gone
Rinse the entire boot under running water until no suds remain, especially near seams and tongue folds. Leftover soap breaks down materials and creates a sticky environment for bacteria.
Shake out excess water and move to drying.
Dry Your Boots the Right Way
Improper drying is one of the most common—and damaging—mistakes hikers make.
Stuff with Newspaper or Towels to Absorb Moisture
Immediately after rinsing, stuff boots with crumpled newspaper or paper towels. These absorb moisture and help maintain shape. Replace the paper once it becomes damp—repeat 2–3 times for best results.
Avoid colored newspaper—ink can transfer to light-colored linings.
Air Dry at Room Temperature Away from Heat
Place boots in a well-ventilated area, away from direct sunlight, radiators, or fireplaces. Ideal drying time is 12–72 hours, depending on humidity.
Hang boots upside down using a clothesline or boot hanger to improve airflow and drain trapped water from the heel.
❌ Never use: Hair dryers, space heaters, or ovens. High heat damages adhesives, melts glue, and cracks synthetic bonds.
Use a Low-Heat Boot Dryer if Needed
If you’re in a hurry, use a fan-only or low-heat boot dryer. Models with UV light offer added hygiene by killing fungi and bacteria. Avoid commercial dryers with high heat settings—they can ruin waterproof membranes like Gore-Tex.
✅ Alternative: DIY boot dryer with small fans inserted into each boot—safe, effective, and affordable.
Eliminate Odors and Prevent Future Smells
Stinky boots don’t have to be inevitable. Use natural, effective deodorizing methods.
Spray Interior with Vinegar Solution
Once dry, spray the inside with a 1:1 water-vinegar solution. Let sit for 10 minutes, then air out. Vinegar kills bacteria without leaving a strong odor.
Use Baking Soda Overnight
Sprinkle 1–2 tablespoons of baking soda inside each boot. Leave for 12–24 hours, then shake out thoroughly. Baking soda neutralizes acidic odor compounds and absorbs moisture.
⚠️ Warning: Don’t leave baking soda inside long-term—it can clump if exposed to humidity.
Try Activated Charcoal or Pine Bags
Slip activated charcoal pouches or pine-scented rodent deterrent bags into boots when storing. Both absorb moisture and leave a fresh, woodsy scent. Reusable and chemical-free.
✅ Prevention Tip: Always air out boots after use—even 30 minutes of ventilation reduces bacterial growth.
Clean Based on Your Boot’s Material

Salomon uses different materials—cleaning methods must match.
Textile and Fabric Uppers (e.g., X Ultra 4, XT-6)
These lightweight models use synthetic mesh with Gore-Tex liners. Clean with mild soap and water or NST Wash. Avoid prolonged soaking—while water-resistant, extended immersion may degrade DWR (durable water repellent) coatings.
Scrub gently with a sponge and rinse well. Reapply waterproofing spray after cleaning.
Leather Uppers
Full-grain or nubuck leather boots need extra conditioning. After cleaning and partial drying (slightly damp), apply Nikwax Liquid Conditioner for Leather or a water-based wax treatment.
Conditioning prevents cracking, maintains flexibility, and restores water resistance. It may darken leather slightly—but this doesn’t affect performance.
Nubuck and Suede
Use a specialized nubuck brush and cleaner. Avoid soaking—spot clean with a damp cloth and mild solution.
After drying, apply Nikwax Nubuck and Suede Waterproofing Spray to revive water beading. Brush lightly with a nubuck eraser or suede brush to restore texture.
Reinforced Zones and Rubber Components
TPU toe caps, heel counters, and midsole guards are durable and can handle firm scrubbing. Use an old toothbrush and soapy water to remove scuffs and grime.
Discoloration is normal and doesn’t impact performance.
Gore-Tex and Waterproof Membranes
Never machine wash—this can delaminate the membrane. Instead, clean manually and reactivate waterproofing afterward.
Apply Salomon NST Proof or Nikwax Fabric & Leather Proof evenly to the upper. Some sprays require low heat (e.g., hair dryer on cool setting) to activate—follow label instructions.
✅ Test first: Spray a small hidden area to check for color changes.
How Often Should You Clean Your Salomon Boots?
Frequency depends on trail conditions and use.
After Every Hike
Remove insoles and let boots air out for at least an hour. Wipe down if visibly dirty.
Even short hikes generate sweat—letting boots stay damp leads to odor and liner breakdown.
After Muddy or Wet Hikes
Perform full cleaning. Mud dries hard and stresses seams. Saltwater exposure requires a vinegar rinse to prevent corrosion.
When You Notice These Signs
- Caked-on dirt or stains
- Foul smell
- Reduced traction (clogged lugs)
- Stiffness in flex zones
✅ Golden Rule: Clean boots sooner rather than later. The longer you wait, the more damage accumulates.
Store Your Boots to Prevent Damage
Proper storage keeps your boots in top condition.
Short-Term Storage (Between Hikes)
Keep boots in an open, dry space—never in a gym bag or sealed container. Loosen laces and leave the tongue open for airflow.
Avoid damp basements or humid garages.
Long-Term Storage (Off-Season)
Before storing for months:
– Clean and dry fully
– Remove insoles and store separately
– Apply waterproofing spray
– Loosen laces and stuff with paper
Store upright in a breathable dust bag or boot box. Use cedar shoe trees to absorb residual moisture and deter pests.
❌ Never store in plastic bags—they trap humidity and encourage mildew.
Maintain Every Part of Your Boots

Keep all components working at their best.
Replace Worn Laces
Inspect laces regularly. Frayed or stretched laces reduce fit security. Salomon offers replacement laces, including Quick Lace kits.
Clean and Repair Soles
Pick stones from lug patterns after each hike. Clean midsoles with a brush to prevent bacterial buildup.
For cracked outsoles or peeling rubber, use Gear Aid Aquaseal SR to patch minor damage. For severe wear, consider professional resoling.
Refresh Sock Liners
Salomon insoles are designed for comfort and moisture management. Machine wash monthly in warm water, air dry, and replace every 6–12 months or when flattened.
Avoid These Common Cleaning Mistakes
| Mistake | Consequence |
|---|---|
| Machine washing | Ruins waterproof membranes and stitching |
| Drying near heat | Warps soles and weakens glue bonds |
| Using bleach or strong detergents | Degrades fabric and promotes bacterial growth |
| Freezing boots | Ice crystals damage internal layers and adhesives |
| Skipping insole removal | Traps sweat and causes mold |
| Storing in plastic | Creates musty, anaerobic conditions |
✅ Fix it now: If you’ve made any of these errors, stop immediately. Switch to gentle hand cleaning and air drying.
Final Tips for Long-Lasting Salomon Boots
Extend the life of your boots with smart habits:
- Reapply waterproofing every 3–6 months or after deep cleaning.
- Wear moisture-wicking socks—never cotton.
- Carry spare socks on long hikes to keep feet dry.
- Limit saltwater exposure—rinse with fresh water and vinegar if you do hike on beaches.
Final Note: Cleaning Salomon hiking boots doesn’t require special gear—just warm water, a soft brush, and consistency. Whether you own the X Ultra 4, Quest 4, or XT-6, following this guide ensures your boots stay supportive, dry, and odor-free for hundreds of miles. Remember: a few minutes of care after every hike saves hours of repair later. Clean boots aren’t just fresh—they’re ready for your next adventure.


