How to Clean Vasque Hiking Boots
There’s nothing quite like slipping on your trusted Vasque hiking boots for a rugged trail adventure—unless it’s realizing they’re caked in dried mud, reeking of last week’s swamp crossing, or starting to show signs of wear. Over time, dirt, sweat, and moisture break down materials, compromise waterproofing, and create a breeding ground for odor-causing bacteria. But the fix is simpler than you think: knowing how to clean Vasque hiking boots properly can restore performance, prevent premature damage, and extend their life for hundreds of trail miles.
Whether your boots just returned from a muddy backcountry trek or have been sitting in the garage too long, regular cleaning is essential. Vasque boots often combine full-grain leather, synthetic mesh, and GORE-TEX liners—each requiring specific care. A rushed wipe-down or tossing them in the washing machine can lead to delamination, cracked leather, or ruined membranes. This comprehensive guide walks you through every step: from removing laces and prepping for cleaning, to deep scrubbing, conditioning leather, re-waterproofing, and storing correctly. You’ll learn how to clean without damaging delicate materials, dry safely without heat, and keep your boots fresh and trail-ready for years.
Prep Your Vasque Boots for Cleaning
Before any scrubbing begins, proper preparation ensures a thorough clean and prevents hidden damage.
Remove Laces and Insoles
Start by pulling out the insoles and unlacing the boots completely. This exposes trapped dirt inside the collar and under the tongue, areas often missed during surface cleaning. Most Vasque insoles are removable and designed to be washed separately. Set both laces and insoles aside—they’ll be cleaned next to avoid recontamination.
Knock Off Loose Debris
Take your boots outside and tap the soles together to dislodge pebbles, dried mud, or plant matter stuck in the tread. Use a soft-bristle brush or dry microfiber cloth to wipe away surface grime from the upper and midsole. If mud is caked on, let the boots air-dry slightly first—never apply heat. Once dry, gently scrape off thick clumps with a dull tool like a spoon edge. Avoid aggressive brushing on wet leather, as it forces moisture into the fibers and weakens the material.
Spot Clean Vasque Boots Quickly
When boots aren’t heavily soiled, a fast spot clean maintains hygiene between deep cleanings.
Wipe Down Exterior Surfaces
Mix a solution of 5 parts water to 1 part mild soap (like dish soap or Nikwax Footwear Cleaning Gel). Dip a clean cloth into the mix and wring it out thoroughly—only damp, not wet. Gently wipe the boot’s exterior, focusing on high-dirt zones: toe caps, heel counters, and lace guides. For tight spots around stitching or eyelets, use an old toothbrush with light pressure. Avoid soaking synthetic panels or leather; excess water compromises adhesives and padding.
Air Dry and Deodorize
After wiping, loosen laces and prop boots upright in a dry, ventilated area. Stuff loosely with paper towels to draw out internal moisture. To combat odors, lightly mist the interior with a 1:1 water-vinegar spray. Let boots dry completely—12 to 24 hours—before wearing or storing. Never stash damp boots; trapped moisture leads to mold, glue breakdown, and lingering smells.
Deep Clean Vasque Boots Step by Step
For post-trip recovery or heavy soiling, a full deep clean restores breathability, grip, and protection.
Wash Laces and Insoles Separately
Rinse laces and insoles under lukewarm water to remove surface grit. Soak them in warm, soapy water for 5–10 minutes. Gently scrub laces with your fingers and wipe insoles with a soft cloth. For odor control, spritz insoles with a 4:1 water-to-vinegar mix. Lay flat on a towel to air-dry—never use a dryer, heater, or direct sun. Both should be fully dry before reinserting.
Clean the Boot Exterior
Wet the entire boot using a sponge or faucet spray. For leather models, avoid full submersion—use a damp cloth instead. Apply a 5:1 water-soap solution or footwear-specific cleaner (e.g., Nikwax Gel) to a soft brush. Scrub in small circles from sole to collar, focusing on seams, tongue, and high-wear zones. Use a toothbrush for crevices. Rinse thoroughly under running water—especially around drainage ports and stitching—to remove all soap residue. Synthetic models can be submerged briefly, but limit soak time to 10–15 minutes for leather hybrids.
Clean the Interior Without Damage
Never use soap inside Vasque boots—it’s hard to rinse out and can degrade GORE-TEX or moisture-wicking liners. Instead, use only water or a 4:1 water-vinegar solution on a soft cloth. Wipe the interior in circular motions from toe to heel, targeting sweat-prone areas like the heel and tongue. Avoid scrubbing to protect delicate membranes. Let air dry fully before reassembly.
Treat Stains and Mold
If mold appears from improper storage, act quickly. Mix 4 parts water to 1 part vinegar and apply with a soft cloth to affected areas. Let sit 5 minutes, then wipe and rinse. Repeat if needed. For grass stains or oil marks, pre-treat with the same solution before regular cleaning. Always dry completely afterward to prevent regrowth.
Condition Leather Vasque Boots
Only required for leather or hybrid models, conditioning prevents cracking and maintains flexibility.
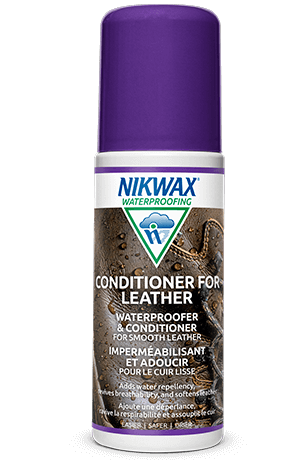
Apply Leather Conditioner
After cleaning, while the boot is still slightly damp (not wet), apply a premium leather conditioner like Nikwax Liquid Conditioner for Leather. Use an applicator pad or fingers to spread evenly over all leather surfaces—especially high-flex zones like the ankle and toe box. Avoid synthetic panels and soles. Let absorb for 2–3 hours. Do not speed-dry. Once dry, buff lightly with a clean cloth. Repeat every 3–5 cleanings to preserve waterproofing and extend life.
Re-Waterproof Your Vasque Boots

Cleaning strips away the factory DWR (durable water repellent) coating. Reapplying a waterproofer is critical for long-term performance.
Choose the Right Waterproofing Product
Match the product to your boot’s material:
- Synthetic or hybrid uppers: Use Nikwax Fabric & Leather Waterproofing Spray.
- Full-grain leather: Apply Nikwax Waterproofing Wax for Leather.
- Nubuck/suede accents: Use Nikwax Nubuck & Suede Spray.
Always check Vasque’s official care guidelines to confirm compatibility.
Apply Evenly and Let Cure
Shake the spray well and apply from 6 inches away in a ventilated area. Coat the entire upper, including seams, eyelets, and toe cap. For wax-based products, massage in with fingers or cloth. Let boots dry for at least 4–6 hours before wearing. Avoid heat sources—air drying protects adhesives and membranes.
Dry Vasque Boots Safely and Completely

Improper drying is the leading cause of boot failure. Heat warps soles, cracks leather, and breaks down glue.
Air Dry Indoors Only
Place boots in a warm, dry room—never near radiators, fireplaces, or in direct sunlight. Remove insoles and loosen laces to maximize airflow. Stuff loosely with crumpled newspaper for the first 30–60 minutes to absorb moisture, then remove. Insert shoe trees or rolled towels to maintain shape.
Speed Up Drying Without Heat
Use a box fan 1–2 feet away to circulate air. For frequent hikers, a low-heat boot dryer (like DryGuy) safely cuts drying time in half. Most Vasque boots take 12 to 72 hours to dry fully, depending on material and saturation.
Eliminate Odors During Drying
When boots are halfway dry, lightly mist the interior with a 1:1 water-vinegar spray. Or, place a few tablespoons of baking soda in a breathable pouch (sock or coffee filter) and leave inside overnight. Both neutralize bacteria and leave a fresher scent.
Store Vasque Boots Properly
How you store boots between hikes impacts their lifespan more than you might think.
Keep in a Cool, Dry Place
Store upright in a closet or on a shoe rack—away from damp basements, hot garages, or sunlit windows. Ideal storage is between 50°F and 75°F (10°C–24°C). Avoid vacuum-sealed bags—they compress the midsole and ruin cushioning.
Prevent Pests and Compression
Use breathable boot bags or ventilated plastic bins if rodents are a concern. Never stack heavy items on top—this distorts the heel counter and upper. Store with laces undone and tongue propped open.
Maintain Airflow
Leave laces loose and remove insoles for long-term storage. This prevents musty odors and helps materials retain shape and breathability.
Inspect for Damage Monthly
Routine checks catch small issues before they become boot-killing problems.
Check Uppers for Tears
Look for punctures, seam splits, or worn fabric—especially on high-rub zones. Minor rips can be patched temporarily with Tenacious Tape, but major damage usually means replacement. Leather tears are rarely repairable.
Examine Sole Integrity
Inspect the outsole for deep cuts, peeling midsole, or separation at the upper-to-sole bond. If the midsole is lifting, use a strong adhesive like Gear Aid Aquaseal SR to reattach. Worn treads may still be resolable—if the upper is intact, many cobblers offer affordable resoling for Vasque models.
Monitor Tread Wear
Flattened lugs reduce traction on wet or rocky terrain. If tread is worn smooth, consider resoling or retiring the boots. Rotating between two pairs on long hikes extends overall lifespan.
Final Note: Cleaning Vasque hiking boots isn’t just about looks—it’s about performance, comfort, and value. A 30-minute cleaning session after every few hikes prevents irreversible damage and keeps your boots ready for the next trail. Follow these steps: remove insoles and laces, deep clean with mild soap, dry safely without heat, condition leather, re-waterproof, and store properly. With consistent care, your Vasque boots can deliver reliable support and protection for hundreds of miles. Treat them right, and they’ll carry you farther.