
How to Clean Leather Hiking Boots Safely
You’ve just finished a long trek through mud, rain, and rocky terrain. Your leather hiking boots are caked with dirt, soaked in sweat, and begging for attention. If you toss them in the corner without cleaning, you’re not just ignoring a mess—you’re inviting cracks, stiffness, and irreversible damage. Washing leather hiking boots the right way is essential for preserving their structure, waterproofing, and comfort. Done properly, a thorough clean can extend your boots’ life by years, keeping them flexible, odor-free, and trail-ready. In this guide, you’ll learn a complete, step-by-step process to safely wash, condition, and protect your boots—without risking damage to the leather or seams.
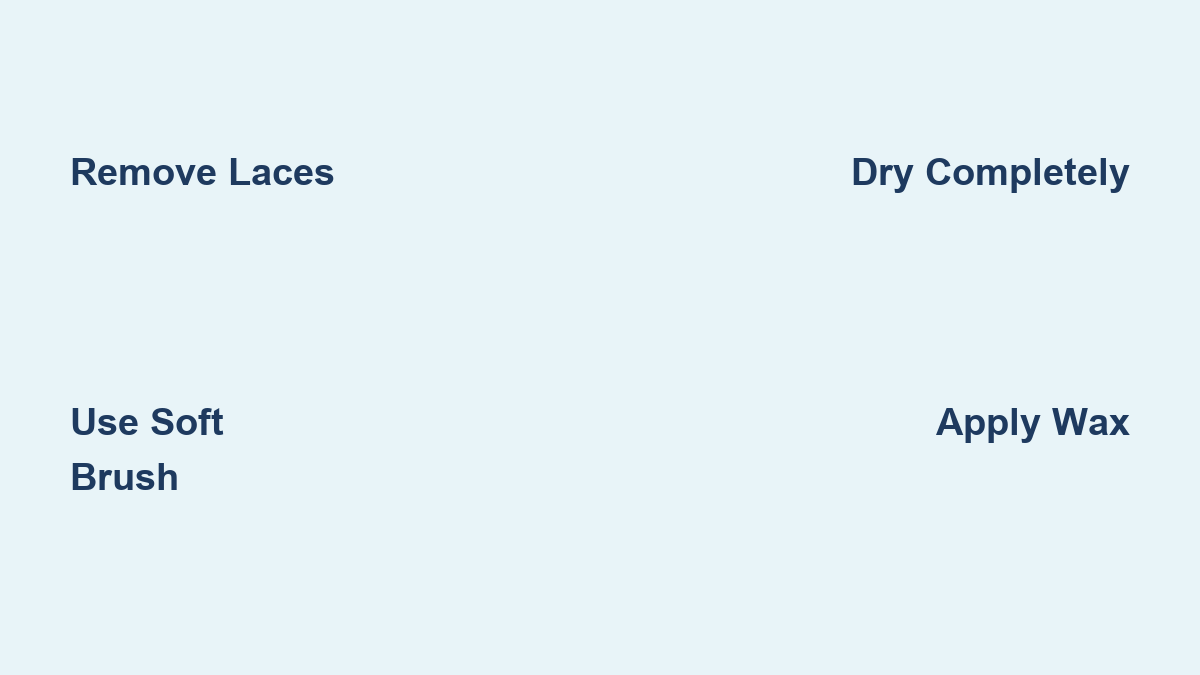
Remove Laces and Loosen Surface Debris
Before any cleaning begins, prepare your boots to ensure no dirt is left behind in hidden spots.
Unlace for Full Access
Start by removing the laces entirely. This gives you full access to the tongue, eyelets, and inner lining—areas where moisture and grit accumulate. Use a toothbrush or small cleaning tool to dislodge dirt stuck under metal eyelets and along stitching lines. Leaving these zones uncleaned can lead to premature wear and odor buildup.
Brush Off Dry Mud and Grime
Tap the boots together outside to knock loose large chunks of dried mud. Then, use a soft-bristled brush (like a horsehair or nylon brush) to gently sweep away surface dirt. Never scrub aggressively on dry, caked-on mud—this can scratch the leather surface. If your boots are heavily soiled, let the mud dry completely first, then brush it off in layers.
Pro Tip: Clean your boots within 24 hours of use. The longer dirt and salt from sweat sit on the leather, the more they degrade the fibers over time.
Choose the Right Cleaning Method for Your Boot Type

Not all leather hiking boots require the same treatment. Match your cleaning approach to the material, construction, and level of soiling.
Hose Rinse for Extremely Dirty Boots (e.g., Scarpa Rebel)
For boots that have been through deep mud or wet trails:
– Use a garden hose with moderate pressure to rinse off surface grime.
– Let water sit on the leather for 5–10 minutes to soften embedded dirt.
– Scrub with a soft brush, focusing on seams, toe caps, and heel counters.
– Repeat the rinse-and-scrub cycle 2–3 times, waiting an hour between rounds for deeper penetration.
Avoid pressure washers. They force water into stitching and can compromise glue bonds, leading to delamination over time.
Warm Soapy Water for Moderate Cleaning (e.g., Scarpa Rush TRK)
For boots with moderate dirt but no thick mud:
– Mix a few drops of mild soap (like saddle soap or fragrance-free dish detergent) with warm water.
– Dip a soft cloth or brush into the solution and clean all surfaces using circular motions.
– Pay extra attention to zippers, synthetic overlays, and stitching.
– Wipe down with a clean, damp cloth to remove soap residue—leftover soap can attract more dirt.
Damp Cloth for Light Maintenance (e.g., Schnee Pack)
For boots used infrequently or lightly worn:
– Wipe down with a slightly damp microfiber cloth.
– Use a toothbrush for hard-to-reach areas like tongue folds and lacing channels.
– This method is ideal for routine upkeep between deep cleans.
Never soak leather boots. Submerging them in water weakens leather fibers, causes warping, and risks damaging internal liners and adhesives.
Dry Boots Completely—No Exceptions
Moisture trapped inside leather leads to stiffness, mold, and unpleasant odors. Proper drying is non-negotiable.
Air Dry at Room Temperature
- Stuff boots with crumpled newspaper or paper towels to draw out moisture.
- Place them in a well-ventilated area away from direct sunlight and heat sources.
- Replace the paper every 3–4 hours as it becomes damp.
- Full drying typically takes 12–24 hours, depending on humidity.
Use a Boot Dryer for Faster Results
- Insert a low-heat boot dryer (such as DryGuy or PEET) to speed up evaporation.
- These devices gently warm the interior without overheating the leather.
- Avoid radiators, fireplaces, or hair dryers on high heat—these can dry out and crack the leather.
Warning: Never apply conditioner or wax to damp boots. Wait until they feel completely dry to the touch—inside and out.
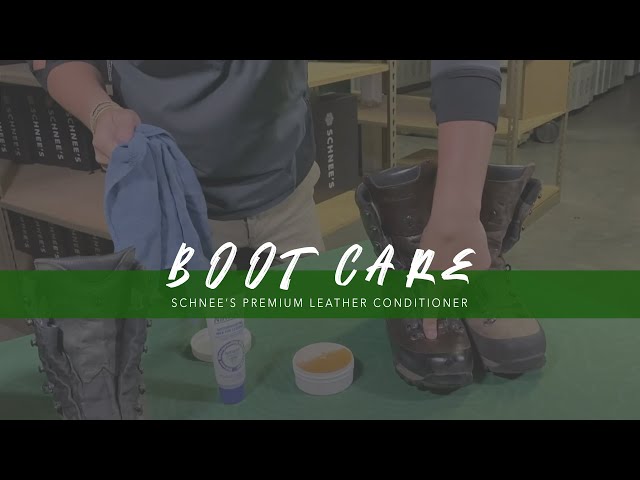
Condition Leather to Restore Natural Oils
Leather naturally loses oils through exposure and use. Conditioning replenishes moisture and prevents cracking.
Apply Balm to Full-Grain Leather Boots (e.g., Schnee Pack)
For pure leather models:
– Use a high-quality leather conditioner like Schnee Leather Conditioner.
– Apply a thick, even layer with your fingers or a clean cloth.
– Focus on high-flex zones: ankle folds, toe boxes, and heel counters.
– Let it soak in overnight—do not wipe off excess. The leather will absorb what it needs.
How often? Condition 2–4 times per year, or after every 3–4 deep cleans.
Use Liquid Conditioner for Hybrid Boots (e.g., Scarpa Rush TRK)
For boots with synthetic panels or treated leather:
– Choose a liquid proofing and conditioning agent like Mendal’s MLE Proofer.
– Apply after drying and allow 24 hours for full absorption.
– This product both conditions and begins the waterproofing process.
Avoid over-conditioning. If old wax remains, new conditioner won’t penetrate. Always clean thoroughly before conditioning.
Waterproof with Wax-Based Treatment
Cleaning and conditioning mean little without a protective seal. Wax-based waterproofers penetrate deeply and last longer than sprays.
Warm Boots for Better Wax Absorption
Cold leather pores are closed and won’t absorb wax well. Use a hair dryer on low heat or a boot dryer for 5–10 minutes to gently warm the surface and open the pores.
Apply Wax in Thin, Even Layers
For full-grain leather boots:
– Use a firm wax like Oben House LP or Mendal Sport Wax.
– Dab a small amount onto a soft cloth and rub in circular motions.
– Cover all leather surfaces—including the welt, heel, and around eyelets.
– Let cure overnight. If the surface feels sticky, apply a second thin coat.
For hybrid or treated leather:
– Use Grangers Wax or Snow Seal.
– Apply thinly and evenly.
– Allow 24 hours between coats. Two coats are usually sufficient.
Never use liquid waterproofers over wax. They won’t bond and can peel, flake, or create a greasy surface.
Test first: Try wax on a small, inconspicuous area to check for color darkening, especially on lighter leathers.
Avoid These Common Cleaning Mistakes
Even experienced hikers damage boots with preventable errors.
Don’t Use Stiff or Wire Brushes
Hard bristles scratch the leather surface and fray stitching. Stick to soft brushes or microfiber cloths.
Never Skip the Drying Step
Applying conditioner or wax to damp boots traps moisture inside, promoting mold and weakening adhesives.
Don’t Store in Plastic Bags
Plastic cuts off airflow and encourages mildew. Store boots in a breathable cotton bag or open shelf.
Avoid Harsh Household Cleaners
Never use bleach, ammonia, or degreasers. Even strong dish soaps used excessively can strip natural oils and degrade glue.
Store Boots Properly After Washing
Longevity starts with smart storage.
Maintain Shape with Stuffing
Fill boots with newspaper, cedar inserts, or boot shapers to prevent creasing and keep the shaft upright.
Keep in a Cool, Dry Place
Avoid attics, garages, or damp basements. Ideal storage is indoors, away from direct sunlight and extreme temperatures.
Re-Wax Before Next Use
Even stored boots lose wax protection over time. Before your next hike:
– Wipe down with a damp cloth.
– Reapply a light coat of wax.
– Let cure for 12–24 hours.
When to Skip Conditioning
Not every wash cycle requires conditioning.
Boots in Good Condition? Just Re-Wax
If the leather is still soft, supple, and lightly coated with wax:
– Clean with soapy water.
– Dry thoroughly.
– Reapply a fresh coat of wax.
Rule of thumb: Condition only when leather feels dry, looks dull, or shows fine surface cracks. Over-conditioning softens fibers and reduces structural support.
Final Wash Checklist
Use this checklist to ensure no step is missed:
- [ ] Laces removed for full access
- [ ] Loose dirt and debris brushed off
- [ ] Cleaned with appropriate method (hose, soap, or cloth)
- [ ] Dried completely—no dampness inside
- [ ] Conditioned (if leather feels dry)
- [ ] Waterproofed with wax-based treatment
- [ ] Stored in a cool, dry place with proper stuffing
Summary: Wash, Condition, Protect
Washing leather hiking boots isn’t just about appearance—it’s about performance and longevity. Follow this three-phase routine to keep your boots in top condition:
- Clean – Remove laces, loosen debris, and wash using the right method for your boot type.
- Condition – Restore lost oils with balm or liquid, depending on leather type.
- Treat – Seal with warming and wax-based waterproofing for long-lasting protection.
This entire process takes 2–4 days, but it pays off in extended boot life, better comfort, and reliable performance on every trail. Whether you’re recovering from a muddy hunt or prepping for winter hikes, proper care ensures your leather boots stay supple, waterproof, and ready to carry you forward—step after step, season after season. Stick to the routine, avoid shortcuts, and your boots will reward you with miles of support.


