How to Dry Hiking Boots Safely and Quickly
Wet hiking boots are more than just a nuisance—they’re a threat to both your feet and your gear. Moisture trapped inside can lead to blisters, fungal infections, and lingering odors, while improper drying can permanently damage your boots. Whether you’ve splashed through a stream, trudged in the rain, or endured a sweaty uphill climb, knowing how to dry hiking boots properly is essential. The wrong method—like tossing them on a radiator or leaving them in a hot car—can melt adhesives, crack leather, or destroy waterproof linings. This guide delivers proven, safe techniques to dry hiking boots at home or in the wild, based on expert recommendations and real-world field practices. You’ll learn how to use airflow, absorbent materials, and smart gear to preserve your investment and keep your feet healthy.
Remove Debris and Clean First
Before drying begins, cleaning your boots ensures faster, more effective results and prevents long-term damage.
Brush Off Mud and Rinse Gently
Start by knocking off dried mud with a stiff brush—this removes abrasives that can wear down fabric and linings. If the boots are caked with dirt or salt, rinse them with lukewarm water, avoiding full submersion. Never use hot water, as it can weaken the glues bonding the sole or warp synthetic materials. For stubborn grime, use a soft brush and mild soap, but avoid harsh detergents that strip waterproof coatings.
Why Cleaning Matters
Trapped debris holds moisture and slows drying. It also increases the risk of odor, mold, and staining. Regular cleaning keeps the boot’s breathability intact and maintains the performance of waterproof membranes like Gore-Tex, which rely on clean pores to function.
Remove Insoles and Laces
One of the most effective yet overlooked steps is removing components that trap hidden moisture.
Pull Out Insoles and Untie Laces
Take out the insoles—they absorb sweat and water and dry slower than the boot itself. Remove laces to open the collar fully, allowing air to circulate deep into the toe box and heel. Lay insoles flat on a towel and hang laces over a clothesline or doorknob.
Dry Components Separately
Insoles can take 24–48 hours to dry completely. Stuffing them with crumpled newspaper speeds the process. Damp laces promote mildew in eyelets, so never re-lace damp boots. Dry them fully to maintain hygiene and prevent material degradation.
Shake Out Excess Water
Eliminating free water before drying cuts total drying time significantly.
Knock and Shake Boots Vigorously
Turn boots upside down and tap the heels together to dislodge water pooled in the toe. Shake them side-to-side and upside-down to expel moisture from seams and the tongue. This step is especially helpful after river crossings.
Towel-Dry Interior and Exterior
Use a clean, absorbent towel to blot:
– Inside the shaft and toe box
– Around the tongue and collar
– Outer surfaces, especially suede or nubuck
This reduces moisture content by up to 30%, making the next steps far more effective.
Stuff with Absorbent Materials
Proper stuffing pulls moisture from the interior while maintaining the boot’s shape.
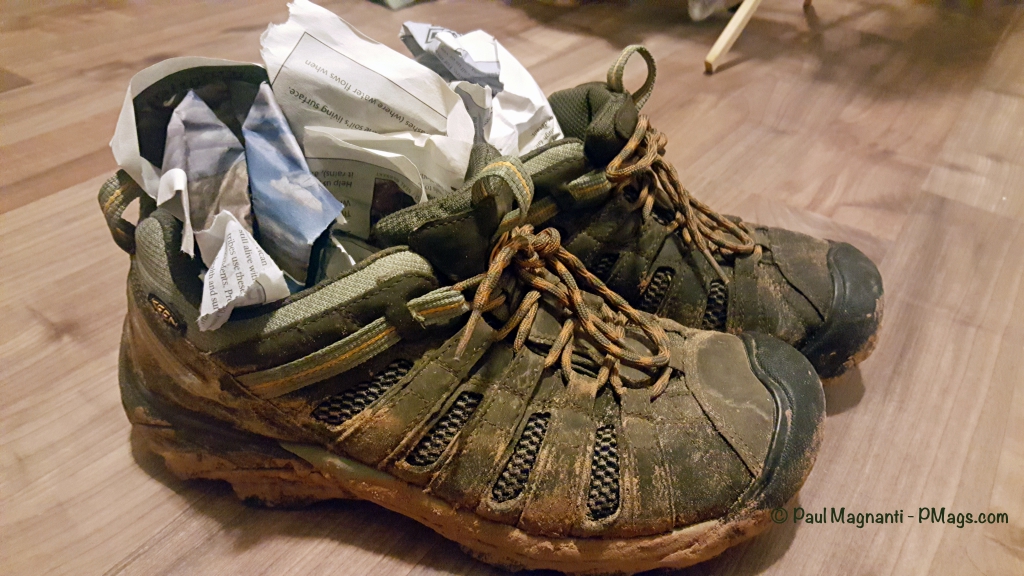
Use Newspaper or Paper Towels
Crumple newspaper loosely and fill each boot to the top. Replace every 2–4 hours as it absorbs moisture and darkens. Tear small holes in the paper to increase surface area and absorption. Paper towels work even better—they’re more absorbent and can be wrung out and reused.
Try Microfiber or Cotton Rags
Microfiber towels are highly absorbent, quick-drying, and reusable—ideal for base camp or home use. Cotton rags work too, but avoid colored fabrics that might bleed dye onto light-colored linings.
DIY Rice or Silica Socks (Backcountry Option)
Fill clean socks with rice or silica gel beads and insert them into boots overnight. Rice absorbs moisture slowly but is accessible. Silica is more efficient and can be reactivated by baking at 200°F for 2 hours. These “dry socks” are also great for electronics and gear.
Position for Maximum Airflow
How and where you place your boots determines drying speed and evenness.
Store Boots Upside Down
Hang boots from hooks, wader hangers, or fan grills with the toe pointing down. This uses gravity to help water escape and prevents pooling in the heel.
Use a Fan for Faster Drying
Place a non-heated fan near the boots, aiming airflow at the toe box. For better results, insert a USB-powered mini fan into the boot. Run it overnight—gentle airflow dries boots without risking heat damage.
Rotate Boots Periodically
Turn them every few hours to expose all sides to air. This prevents one area from staying damp due to contact with a surface, ensuring even drying.
Allow 24–72 Hours for Full Drying
Patience is key—rushing leads to mold, odor, and structural damage.
Drying Time Depends on Conditions
- Lightly damp: 12–24 hours
- Soaked: 48–72 hours
- Thick leather or winter boots: Up to 5 days
Check with your hand—feel deep into the toe box and heel collar. If it feels cool or damp, it’s not dry.
Never Wear Partially Dry Boots
Residual moisture inside the lining causes blisters and degrades adhesives over time. Always wait until boots are completely dry before wearing.
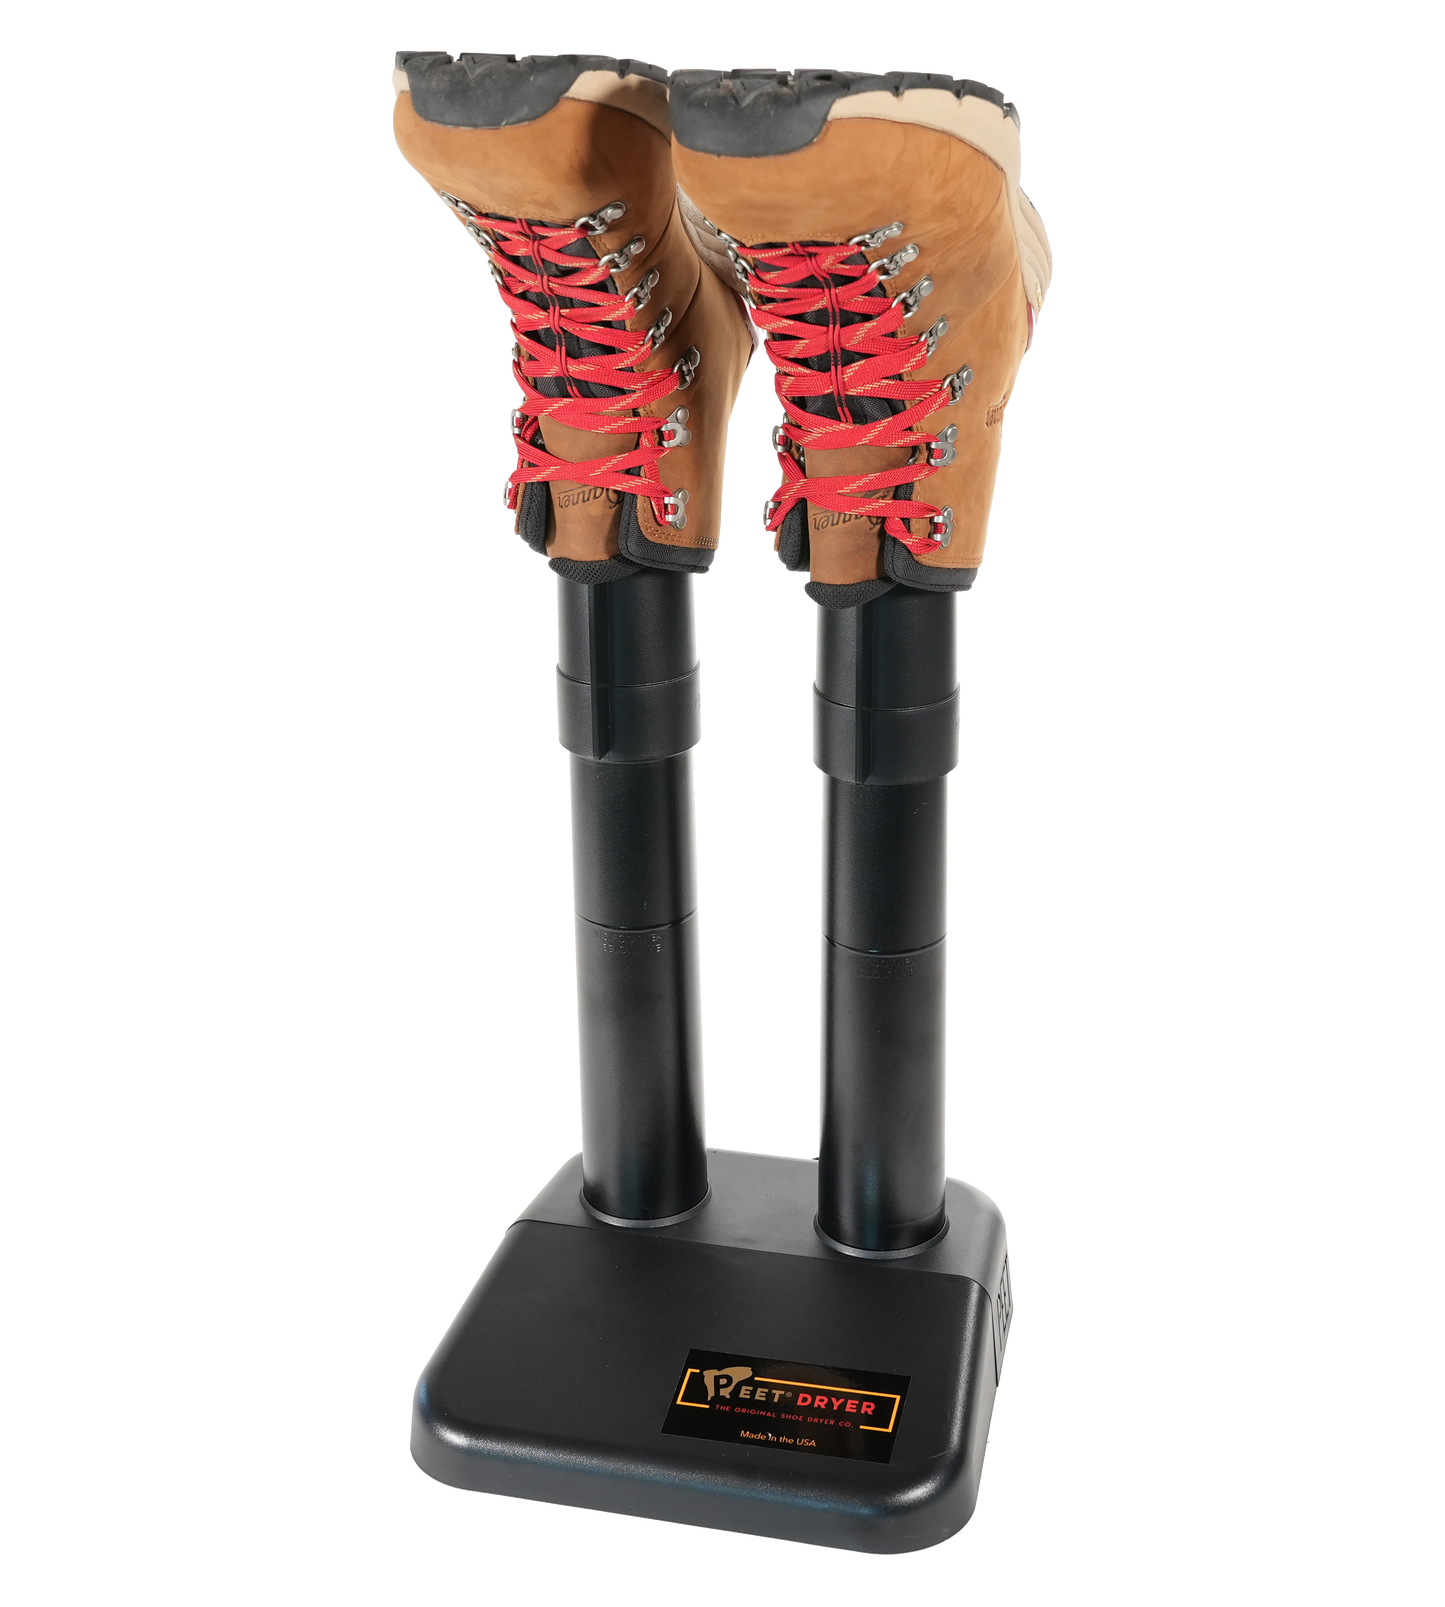
Use Electric Boot Dryers (Safely)
For frequent hikers, dedicated dryers offer safe, controlled drying.
Choose Low-Heat Models
- DryGuy Force: Gentle warm air with a 1–2 HP motor
- Peet Dryer: Convection-only, no forced heat
- Grakksaw Backcountry: Portable, battery-powered option
Avoid high-heat models—anything that feels hot to the touch can damage glue and membranes.
How to Use Boot Dryers
Insert the drying tubes into boots with insoles removed. Run for:
– 2–4 hours for damp boots
– 6–8 hours for soaked ones
Pair with silica gel packs for added moisture removal.
Prevent Frozen Boots in Winter
In sub-zero conditions, drying isn’t always possible—focus shifts to thawing and moisture control.
Sleep with Boots in Your Sleeping Bag
Place boots in a dry sack and store them at the foot of your sleeping bag. Body heat prevents freezing, ensuring they’re wearable in the morning.
Use Hot Water Bottles
Fill a Nalgene with hot (not boiling) water, seal it, and place it inside each boot before bed. Reheat as needed. This gently thaws ice without overheating.
Insert Hand Warmers
Activate chemical hand warmers and place them inside damp boots. Works best for slightly wet boots—never for soaked ones. If it’s too hot to touch, it’s too hot for your boots.
Avoid Direct Heat Sources
Heat is the #1 enemy of hiking boot longevity.
Never Use These Heat Methods
- Radiators or space heaters
- Hairdryers on high
- Campfires or tent stoves
- Sunlight on car dashboards
Why Heat Damages Boots
- Melts adhesives, causing sole separation
- Causes leather to shrink and crack
- Ruins waterproof membranes
- Makes polyurethane midsoles brittle
Rule of thumb: If it’s too hot for your hand, it’s too hot for your boots.
Try Backcountry Drying Hacks
When gear is limited, hikers use clever field methods.
Midday Sun Drying
On sunny breaks, remove boots and expose them to sunlight. Take out insoles and lay them on a warm rock. Works best in dry climates.
Pack Towels and Extra Socks
Stuff boots with quick-dry towels from your pack. Wear dry synthetic socks inside wet boots to absorb moisture—change them as needed. Never use cotton—it holds water.
Cat Litter or Rice in a Bucket
Fill a bucket with non-clumping cat litter, place boots upright, and cover with a lid. Creates a dry, sealed environment—ideal for car camping or base camp.
Prevent Wet Boots with Smart Gear

The best drying strategy is preventing saturation.
Wear Gaiters
Cover the boot opening and lower calf to block water from rain, snow, and mud. Essential for wet terrain.
Use Vapor Barrier Liner (VBL) Socks
Neoprene or polypropylene liners stop moisture from entering the boot. Wear them next to skin, then add hiking socks. Remove and dry at night.
Choose Waterproof Boots Wisely
Gore-Tex-lined boots offer breathable waterproofing. Higher-cut models reduce water ingress. Trail runners dry faster but offer less protection.
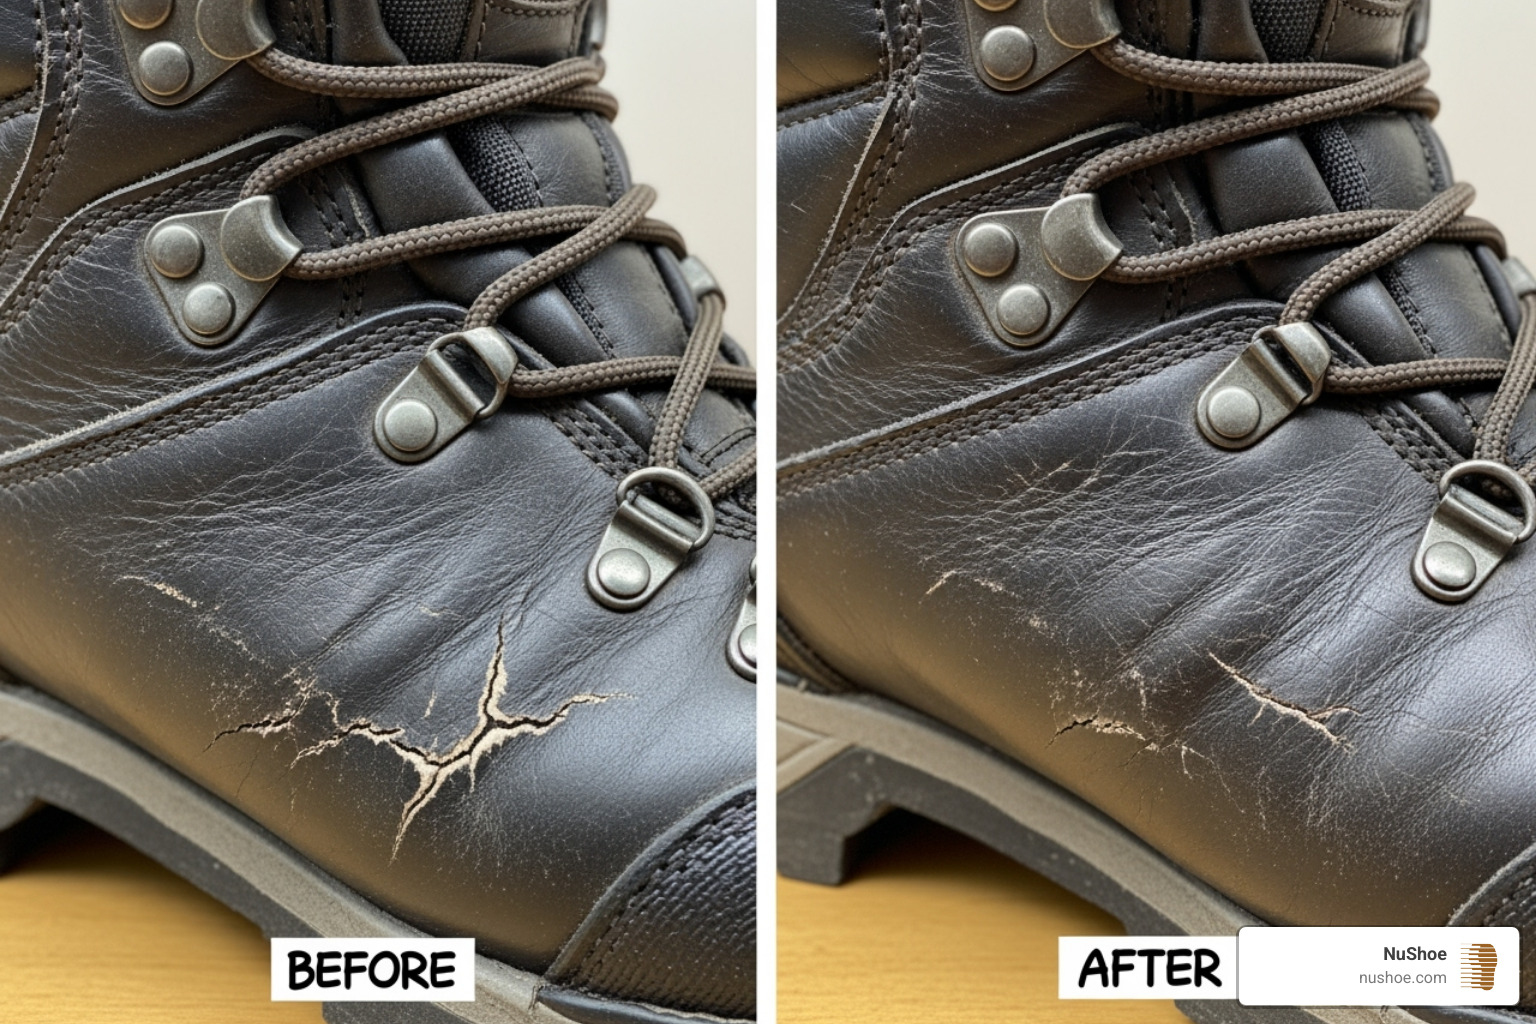
Maintain Boots After Drying
Proper care after drying extends boot life.
Condition Leather Boots
Apply beeswax or leather conditioner to restore oils and prevent cracking. Do this every few months or after heavy wet exposure.
Reapply Waterproofing
Use Nikwax, Grangers, or similar products on clean, dry boots to revive the DWR (durable water repellent) finish.
Inspect for Mold and Mildew
Smell for mustiness or look for discoloration. Clean with a 1:1 vinegar-water solution, then rinse and dry thoroughly.
Rotate Between Two Pairs
Frequent hikers benefit from owning two pairs.
Alternate Usage
Wear one pair while the other dries completely. Ideal for weekend trips or multi-day treks.
Store Properly
Keep boots in a cool, dry place away from sunlight. Use boot trees or stuff with paper to maintain shape. Avoid plastic bags—they trap humidity.
Final Note: Drying hiking boots isn’t just about comfort—it’s about gear care and foot health. By avoiding heat, maximizing airflow, and using absorbent materials like newspaper or silica, you can safely dry boots at home or in the wild. Prevent wetting with gaiters and VBL socks, and always remove insoles and laces to speed up the process. Whether you’re base camping or trekking through winter storms, these proven techniques ensure your boots stay functional, odor-free, and ready for miles ahead.