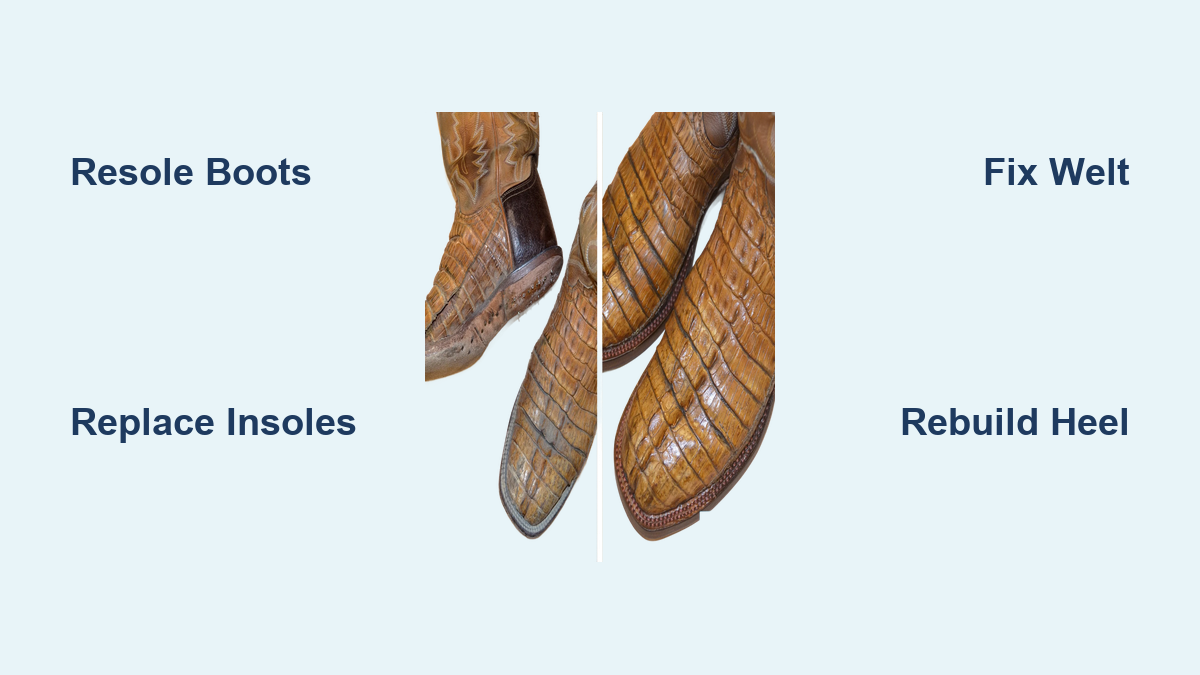
Cowboy Boot Repair: Quick Steps
Worn soles, cracked leather, and wobbly heels don’t mean your boots are done. Cowboy boot repair is a precision craft that brings boots back stronger, longer-lasting, and truer to fit than ever. Whether you ride in handmade Luccheses, work in Ariats, or treasure vintage Justins, broken-in boots can almost always be rebuilt.
Professional cobblers treat boots like heirlooms, not disposable gear. With expert recrafting, your boots can outlive decades of trail dust and two-step floors. This guide walks you through every phase of cowboy boot repair, from diagnosing structural damage to restoring exotic skins, so you keep riding in comfort, style, and confidence.
Discover What’s Fixable in Cowboy Boot Repair
All Brands, All Damage Types
No matter the brand, Lucchese, Ariat, Tony Lama, Justin, Red Wing, or White’s, professional repair services handle them all. The rule of thumb is simple: if it walks, it can be rebuilt. That includes ranch boots, dress boots, firefighting gear, and even chewed-up pairs from curious dogs, with a 90% repair success rate.
Exotic skins like alligator, ostrich, snake, and stingray get specialized care too. UGGs, suede chaps, and nubuck styles aren’t left out either. From zipper replacements to spur shelf installations, nearly every component is replaceable or restorable.
Custom Repairs Beyond Resoling
Top-tier repair goes far deeper than swapping out soles:
– Replace chewed toe boxes
– Install rawhide counters for extra heel stability
– Add saddle vamps or pull straps
– Modify heel height or install rocker soles
– Correct gait issues with offset heels
If it affects fit, function, or form, it can be fixed.
Diagnose the 5 Critical Zones of Your Boots

The Upper: Guard Against Tears
The upper covers your foot and ankle. Damage here, including rips, burns, and pet chewing, requires patching or refinishing. Suede and exotic skins need special dyes and topcoats to match texture and color. Always avoid DIY glues, as they stiffen leather and ruin breathability.
The Insole: The Hidden Decay Killer
This is where boots silently die. Over time, sweat and moisture make insoles crack, crystallize, or rot. Once compromised, simple resoling won’t cut it. A full factory rebuild is needed, including new insole, midsole, and shank. Ignoring this leads to collapsed arches and irreversible fit loss.
🔍 Pro Tip: If your foot feels unstable or you hear creaking when walking, check the insole.
The Welt: The Structural Anchor Point
The welt connects the upper to the sole. It’s either stitched (Goodyear) or glued. When worn, it exposes the upper to water and stress. During repair, old stitching is picked out, and a new welt is trimmed to match the original bootmaker’s edge profile. Precision here ensures the boot keeps its shape.
The Heel Base: Preserve the Feel
This layer sits between the sole and heel cap. Keeping the original heel base maintains your boot’s custom fit and break-in memory. Replacing it alters how the boot flexes and feels. Hand-nailed washer heels attach directly to this base for superior cohesion.
The Sole and Heel Cap: Ground Zero for Wear
These take the most abuse. Leather soles wear smooth while composition soles crack. Replace them before they expose the welt. Delaying risks water intrusion and internal decay. Oil-tan soles add durability and moisture resistance, ideal for ranch work.
Recraft, Don’t Replace: The Boot Rebuild Process
Step-by-Step Restoration
-
Remove Old Soles and Heels
Carefully cut away worn layers without damaging the welt or upper. -
Inspect and Replace the Welt
If torn or loose, new welt leather is stitched in, then hand-trimmed to match factory specs. -
Rebuild the Footbed
Rotted insoles get replaced. The new one is wet-formed and lined with U.S.A. Super Prime leather for comfort and longevity. -
Re-Peg and Re-Shank
Worn pegs and shanks are replaced. Clinching nails lock everything in place, restoring arch support and sole attachment strength. -
Install Heel and Sole
Washer heels are hand-nailed to the preserved heel base. Soles are glued and pegged for maximum durability. -
Finish Like Factory
Edges are beveled and polished to match the original bootmaker’s design. Final buffing brings out a deep luster.
⏱️ Timeline: 2–3 weeks for full recrafting. Rush services may be available.
Overhaul vs. Rebuild: Know the Difference

Boot Overhaul for Minor to Moderate Damage
Best for boots with intact insoles and structure but worn exteriors.
Includes:
– New leather or composition soles and heels
– Seam re-stitching
– False tongue and lace replacement
– Edge dyeing and polish
This option is cost-effective and fast, keeping the broken-in feel you love.
Factory Rebuild for Severe Internal Damage
Required when the insole is cracked or rotted. This is common in high-end handmade boots like White’s, Drew’s, or Nicks.
Includes:
– Complete insole replacement
– New midsole and shank
– Full recorking of footbed
– Optional welt replacement
A rebuild returns the boot to like-new structural condition, often exceeding original durability.
💡 Expert Note: A rebuild costs more upfront but saves money long-term by extending boot life indefinitely.
Fix the Fit: Stretching and Modifications
Stretch Up to Half a Size
Leather boots can be professionally stretched up to half a size wider to relieve pressure on toes and instep. The process targets width, which indirectly reduces tightness in length by allowing your toes to spread.
Process:
– Identify leather type (smooth, suede, exotic)
– Use steam and shoe stretchers with targeted pressure
– Condition thoroughly post-stretch
For ladies’ boots, shafts can be cut down and stretched across the calf for a snug fit.
Orthopedic Adjustments
Custom modifications correct biomechanical imbalances:
– Offset heels for supination or pronation
– Lifts for leg-length discrepancies
– Rocker soles for easier walking
– Steel toe repairs and protective caps
These adjustments prevent long-term joint strain while improving comfort.
Clean and Refinish Like New

Standard Shine for a Quick Refresh
Every repair order should include a complimentary boot shine. Here’s what it covers:
– Dirt and old polish removal
– Deep leather conditioning until buttery soft
– Hand-rubbed wax or cream polish
– High-friction buffing for a mirror-like shine
This treatment lasts 3–6 months with regular wear.
Deep Clean and Refinish for Full Restoration
For stained, faded, or neglected boots, especially suede, nubuck, or exotics, a deep restoration is necessary.
Steps:
1. Dry clean or sand suede with specialized stones or micro-sandblasting booths
2. Apply pure lanolin to restore moisture
3. Color-match and re-dye worn areas
4. Seal with custom topcoat for UV and water resistance
5. Waterproof with a light spray for suede
✅ Result: Up to 10 times longer-lasting finish than a standard shine.
Exotic Skin Care
Alligator, ostrich, snake, and stingray need tailored handling:
– Gentle cleaning to preserve scale patterns
– pH-balanced conditioners to prevent cracking
– Non-gloss topcoats that protect without dulling texture
Avoid alcohol-based cleaners, as they strip natural oils.
Materials That Matter in Cowboy Boot Repair

Premium Leather Soles
Repair shops often use higher-grade soles than factory originals:
– Oil-tan leather: Naturally water-resistant, ideal for wet conditions
– Dry-tan leather: Firmer, longer-lasting, preferred for dress boots
Both options outperform standard factory cuts in durability and comfort.
Heel and Peg Quality
- Washer heels: Provide even wear distribution
- Clinch nails and pegs: Lock sole to shank, prevent loosening
- Preserved heel bases: Maintain original flex and fit
Using OEM-quality materials ensures authenticity and performance.
Shipping, Pricing, and Guarantees
Mail-In Repair Logistics
Most top cobblers offer nationwide mail-in service:
1. Snap photos and email for a free estimate
2. Ship via insured carrier (often with prepaid labels)
3. Get updates during the repair process
4. Receive boots back in 2–3 weeks
Free Zoom consultations are available for complex damage.
Pricing Guide (2024)
| Service | Starting Price |
|---|---|
| Sole and Heel Replacement | €95–€150 |
| Welt Repair | +€40–€80 |
| Insole Replacement | +€60 |
| Factory Rebuild | €248.95+ |
| Deep Clean and Refinish | €75–€120 |
| Exotic Skin Refinish | +€30–€60 |
| Stretching | €45 |
| Zipper Replacement | €55 |
💳 Note: Most shops require a deposit. Unclean boots may incur extra cleaning fees.
Warranty and Liability
- Work is guaranteed: full satisfaction or rework at no cost
- No liability for lost, fire-damaged, or unclaimed boots after 30 days
- Always insure high-value shipments
Maximize Boot Longevity: Pro Tips
Prevent Damage Before It Starts
- Condition monthly with lanolin-based cream
- Rotate boots to allow drying between wears
- Replace soles early, don’t wait for holes
- Use boot trees to maintain shape
- Store in breathable bags, away from direct heat
Recognize Warning Signs
| Symptom | Likely Issue | Action |
|---|---|---|
| Squeaking | Moisture in insole | Dry immediately, consider rebuild |
| Loose sole | Failed pegs or glue | Recraft before further damage |
| Heel wobble | Worn heel base | Replace heel cap and inspect base |
| Cracked leather | Dryness | Condition, then refinish if needed |
When to Rebuild vs. Retire
✅ Rebuild if:
– Boot is high-quality (handmade, pegged sole)
– Upper is intact
– You love the fit
❌ Retire if:
– Upper is split beyond repair
– Exotic skin is peeling or delaminating
– Cost exceeds 70% of new boot price
Frequently Asked Questions About Cowboy Boot Repair
Can all cowboy boot brands be repaired?
Yes. Professional cobblers repair all major western brands including Lucchese, Ariat, Tony Lama, Justin, Red Wing, White’s, Tecovas, and many more. If the boot can be worn, it can typically be rebuilt.
How long does cowboy boot repair take?
Full recrafting typically takes 2–3 weeks. Rush services may be available depending on the shop. Mail-in repairs include shipping time on both ends.
When should I choose a rebuild instead of an overhaul?
Choose a factory rebuild when the insole is cracked, crystallized, or rotted. An overhaul works for boots with intact internal structure but worn exteriors. Rebuilds are common for high-end handmade boots.
Can cowboy boots be stretched for a better fit?
Yes. Leather boots can be professionally stretched up to half a size wider. The process uses steam and targeted pressure, and works on smooth leather, suede, and exotic skins.
Is cowboy boot repair worth the cost?
For high-quality boots, repair is almost always worth it. A factory rebuild extends boot life indefinitely and preserves the broken-in fit. When repair costs exceed 70% of a new boot’s price, replacement may be the better option.
Key Takeaways for Cowboy Boot Repair Success
Cowboy boot repair is resurrection, not just maintenance. The five critical zones (upper, insole, welt, heel base, and sole) determine whether your boots need a simple overhaul or a full factory rebuild. Catching damage early, especially in the insole, saves money and preserves the fit you worked hard to break in.
Your next step is simple: photograph your boots and email them to a professional cobbler for a free estimate. Whether you’re fixing a dog-chewed toe or rebuilding a family heirloom, expert recrafting keeps tradition alive, one peg at a time. Keep riding, keep stepping, and never let worn soles slow you down.