How to Clean Suede Hiking Boots: Easy Steps
You’ve just stepped off a rain-soaked trail, your trusted suede hiking boots coated in mud, splattered with dirt, and streaked with water marks. That soft, napped surface—once rich with texture and depth—now looks dull, matted, and lifeless. If you’re asking how to clean suede hiking boots without damaging them, you’re not alone. Suede is delicate by nature, and a single misstep—like tossing them in the washing machine or blasting them with a hairdryer—can leave them stiff, cracked, or permanently stained. But with the right tools, techniques, and timing, you can safely restore your boots to peak condition, preserving both their performance and appearance. This guide delivers a complete, step-by-step method backed by experts and real-world hikers to clean, protect, and maintain suede hiking boots—so they stay trail-ready for years to come.
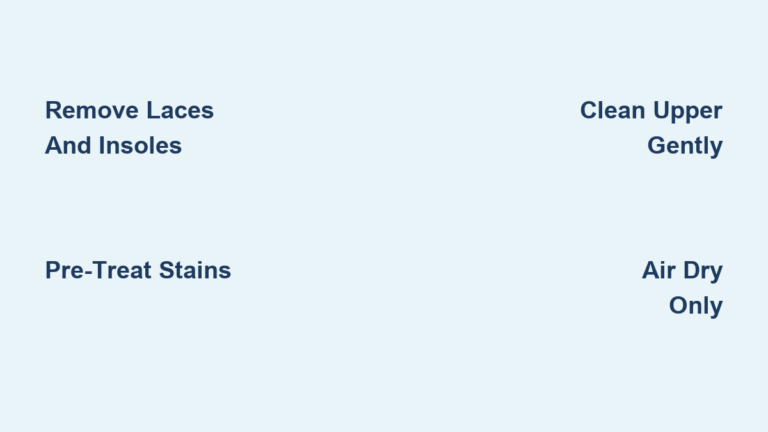
Remove Laces and Prep Boots
Before any cleaning begins, proper preparation prevents damage and ensures a thorough treatment.
Pull Out Insoles and Laces
Start by removing the laces and insoles. Soak the laces in warm water with a drop of mild dish soap, then gently scrub them with a soft toothbrush. Rinse and lay flat to air-dry—never wring or twist. For insoles, wipe down with a damp cloth and sprinkle a light layer of baking soda inside the boot to absorb odors and moisture. Let everything dry completely before reassembly.
Knock Off Loose Dirt
Tap the boots together outside to dislodge dried mud and debris. Use a stiff-bristled brush or the edge of a dull knife to scrape off caked-on dirt, especially around the toe box and sole. This prevents dirt from turning into mud during spot cleaning and reduces the risk of spreading grime deeper into the fibers.
Stuff for Shape and Absorption
Crumple newspaper or paper towels and tightly pack the interior. This helps maintain the boot’s shape and pulls moisture out from the inside during drying. Replace the stuffing every few hours with dry paper to maximize absorption.
Brush Away Surface Grime
Dry brushing is the safest and most effective first step in routine care.
Use a Suede-Specific Brush
Choose a horsehair or nylon-bristled suede brush. Begin at the toe and brush in one direction—this lifts the nap and removes dust without damaging the delicate fibers. For textured seams or creases, use a multi-brush with both stiff and soft zones to reach tight spots.
Brush After Every Few Wears
Even if your boots don’t look dirty, brush them every 2–3 uses. Regular brushing prevents dirt from embedding into the nap and keeps the texture fluffy and uniform. Think of it like grooming a carpet—consistent maintenance keeps it looking fresh and extends the time between deep cleans.
Pro Tip: Always brush before applying protector spray. A lifted nap absorbs treatment more evenly, boosting water and stain resistance.
Treat Common Stains Immediately

Address stains quickly to prevent permanent damage. Different stains require different approaches.
Remove Water Rings
White, cloudy patches appear when suede dries too quickly. To fix:
– Dampen a microfiber cloth with clean water.
– Lightly mist the entire affected area—don’t just wet the stain.
– Let dry naturally, then brush.
Why? Uneven drying causes rings. Moistening the whole zone ensures consistent evaporation.
Erase Scuff Marks
For heel rubs or sidewalk scuffs:
– Use a pencil eraser or suede eraser block.
– Rub firmly in short strokes.
– Brush afterward to lift the nap.
For deeper scuffs, lightly dab the area with a 2:1 vinegar-water mix first.
Kill Salt Stains
Winter hikes leave behind white crusts from trail salt. To remove:
– Mix 2 parts water + 1 part white vinegar.
– Dip a cloth in the solution and blot the stain.
– Wipe with a clean, water-dampened cloth.
– Air-dry, then brush.
Ideal for: Snowy trails, icy paths, or coastal hikes.
Pull Out Oil and Grease
Act fast—oil penetrates deeply.
– Blot excess with a dry paper towel.
– Cover the spot with cornstarch or talcum powder.
– Let sit 6–8 hours or overnight.
– Brush off. Repeat if needed.
For stubborn stains, use a suede-specific oil remover—never dish soap.
Fight Mildew
Damp storage leads to black or green specks.
– Mix 80% water + 20% white vinegar.
– Dab (don’t soak) the affected area.
– Wipe with a damp cloth.
– Dry completely in a ventilated space.
Warning: Mildew spores can trigger allergies—never wear infected boots.
Deep Clean for Heavy Soiling
When brushing and spot cleaning aren’t enough, a deep clean restores your boots.
Use Suede Shampoo (Best for Stains)
For boots with mud, grime, or discoloration:
– Shake Saphir Universal Shampoo well.
– Spray foam onto stained areas.
– Work it in with a soft cloth or brush.
– Wait 3–5 minutes.
– Wipe off residue with a damp cloth.
– Air-dry at least 6 hours.
Visual cue: Foam turns gray as it lifts dirt—this means it’s working.
Try Suede Multi-Cleaner (For Full-Boot Cleaning)
For overall dullness:
– Mix equal parts Saphir Omnidane and water.
– Apply in circular motions with the included brush.
– Rinse brush and repeat until clean.
– Dry 6+ hours in a ventilated room—no heat, no sun.
Exception: If boots are extremely dirty, rinse the interior with water, then dry thoroughly.
Dry Boots the Right Way

Improper drying is the #1 cause of suede damage.
Air-Dry at Room Temperature
Place boots in a well-ventilated area, away from radiators, heaters, or direct sunlight. Heat cracks leather and melts adhesives.
Replace Stuffing Regularly
Swap out damp newspaper every 2–3 hours. Fresh paper absorbs more moisture and speeds drying.
Never Wear Until Fully Dry
Wearing damp boots leads to odor, mould, and blisters. Drying takes 12–24 hours, depending on humidity.
Pro Tip: If suede feels stiff, hold boots 6 inches above a boiling kettle’s steam. Brush immediately to lift the nap. Don’t touch the steam—just let it hover.
Restore the Nap and Texture
After drying, the nap may lie flat. Revive it with brushing and steam.
Brush in One Direction
Use a crepe or horsehair brush. Stroke from toe to heel to realign fibers. This restores softness and depth.
Steam for Stubborn Flattening
For matted areas:
– Hold boots over steam for 2–3 seconds.
– Brush right away while fibers are warm and pliable.
– Avoid prolonged exposure—this can weaken glue.
Why it works: Steam rehydrates leather fibers, making them easier to lift.
Condition Only When Necessary
Suede doesn’t need frequent conditioning. Overuse softens the material and reduces support.
Apply Suede-Specific Conditioner
Only if boots feel dry or cracked:
– Use a suede-safe conditioner (not mink oil or wax).
– Apply sparingly with a cloth.
– Test on an inconspicuous spot first.
– Let absorb 10–15 minutes, then brush.
Warning: Heavy oils darken suede and clog pores—avoid on hiking boots.
Protect Against Future Damage
Cleaning is pointless without protection. Reapply after every deep clean.
Spray with Suede Protector
Use a nanotech spray like Saphir Nano or Vulner:
– Shake well.
– Hold 8–10 inches from the boot.
– Spray in sweeping motions—cover seams, toe, and heel.
– Let dry 24 hours before wearing.
Pro Tip: Spray while boots are slightly damp (after cleaning) for deeper penetration—but check manufacturer label first.
Reapply Every 3–4 Hikes
Rain, mud, and snow wear down protection. Refresh the spray monthly or after wet conditions.
Use Waterproofer for Extra Defense
If boots aren’t factory-treated:
– Choose a suede-safe waterproofing spray.
– May darken suede slightly—color evens out after drying.
– Reapply every few months.
Restore Faded Color
Sun and trail wear fade suede over time.
Spray with Suede Renovator
To revive color:
– Shake Saphir Suede Renovator well.
– Spray evenly from 8–10 inches away.
– Wait 10 minutes; repeat for deeper tone.
– Lightly brush after drying.
Test first: Spray inside the shaft to check color match.
Frequency: Every 1–3 Months
High-use boots may need touch-ups every 4 weeks. Focus on high-wear zones like the toe and sides.
Follow a Care Schedule
Consistent maintenance beats deep cleaning.
| Task | Frequency | Purpose |
|---|---|---|
| Dry brush | Every 2–3 wears | Prevent dirt buildup |
| Spot clean | As needed | Stop stains from setting |
| Deep clean | Every 3–6 months | Remove embedded grime |
| Apply protector | Every 3–4 hikes | Maintain water resistance |
| Condition | Only if dry | Prevent cracking |
| Color restore | As needed | Even out faded areas |
| Full inspection | Seasonally | Check for wear, glue, sole |
Ariat Pro Tip: Rotate boots. Alternating pairs reduces wear and extends lifespan.
Store Boots Properly
Off-season storage makes or breaks longevity.
Clean Before Storing
Never store dirty or damp boots. Clean, dry, and re-protect them first.
Stuff and Cover
Use boot trees or paper to maintain shape. Store in breathable cotton bags—never plastic, which traps moisture.
Keep in a Cool, Dark Place
Avoid attics, basements, or garages with humidity swings. Choose a closet away from sunlight.
Don’t Stack or Crush
Compressed suede develops permanent creases. Store upright with space between pairs.
Avoid These Common Mistakes
Even experienced hikers make these errors:
- Using a washing machine: Destroys nap and glue.
- Drying near a heater: Causes cracking and shrinkage.
- Applying mink oil: Darkens suede and reduces breathability.
- Ignoring wet boots: Leads to mould and odors.
- Skipping protector: Increases cleaning frequency.
When to see a pro: For oil-soaked boots or structural damage, professional cleaning is safer.
Final Tips from Real Users
- Baking soda overnight = odor control and moisture absorption.
- Vinegar-water mix = safe, eco-friendly stain remover.
- Brush before spraying = better protector penetration.
- Never ignore wet boots—stuff with paper immediately.
- Test all products on hidden areas first.
Summary: How to Clean Suede Hiking Boots
1. Prep: Remove laces, insoles, and debris.
2. Brush: Use a suede brush for surface dirt.
3. Spot clean: Treat stains with vinegar, eraser, or cornstarch.
4. Deep clean: Use suede shampoo or multi-cleaner.
5. Dry: Air-dry slowly with paper stuffing.
6. Restore: Brush and steam to revive the nap.
7. Protect: Reapply spray after every clean.
8. Store: In a cool, dry, breathable space.
With this routine, your suede hiking boots won’t just look great—they’ll perform reliably for years. The goal isn’t spotless perfection, but durable, trail-ready footwear that ages with character. Clean smart, protect consistently, and your boots will carry you farther.