How to Lace a Boot: Quick Steps
If your boots keep slipping, pinch your instep, or loosen mid-march, the problem is not always the fit. It is likely how you are lacing them. Knowing how to lace a boot properly can prevent blisters, relieve pressure, and even save your ankle on a steep trail or in high-stakes environments. From military precision to hiking comfort, the right lacing technique transforms your footwear from a liability into an asset.
This guide breaks down proven boot lacing methods used by soldiers, hikers, and outdoor professionals. You will learn how to choose the best pattern for your foot type, fix common pain points, and apply tactical-grade techniques that stay secure under pressure. All of this is backed by functional design, not guesswork.
Choose the Right Laces First
Before tying a knot, ensure your laces support your mission. Standard cotton shoelaces fray, stretch, and snap under load. In tactical and outdoor use, that is a real hazard.
Paracord vs. Cotton: What Works
Paracord (550 cord) is the gold standard for durability. It resists water, mud, and abrasion, making it ideal for combat boots and hiking. Its tensile strength (550 lbs) means it will not break during intense activity.
- Match the shape: Use flat laces for flat eyelets, round for D-rings or hooks.
- Get the length right: Add 9 inches per extra eyelet pair. Complex patterns like Ladder or Supernova need full-length laces.
Prep Boots the Tactical Way
Always lace while kneeling. This forces your heel back into the heel cup and positions your shin correctly, which is critical for preventing shin splints. Lacing while sitting lets your foot float forward, creating pressure on the toe box and top of the foot.
Wear wool or synthetic socks, never cotton. Moisture-wicking material reduces friction and blister risk.
Criss-Cross Lacing: Fast & Functional
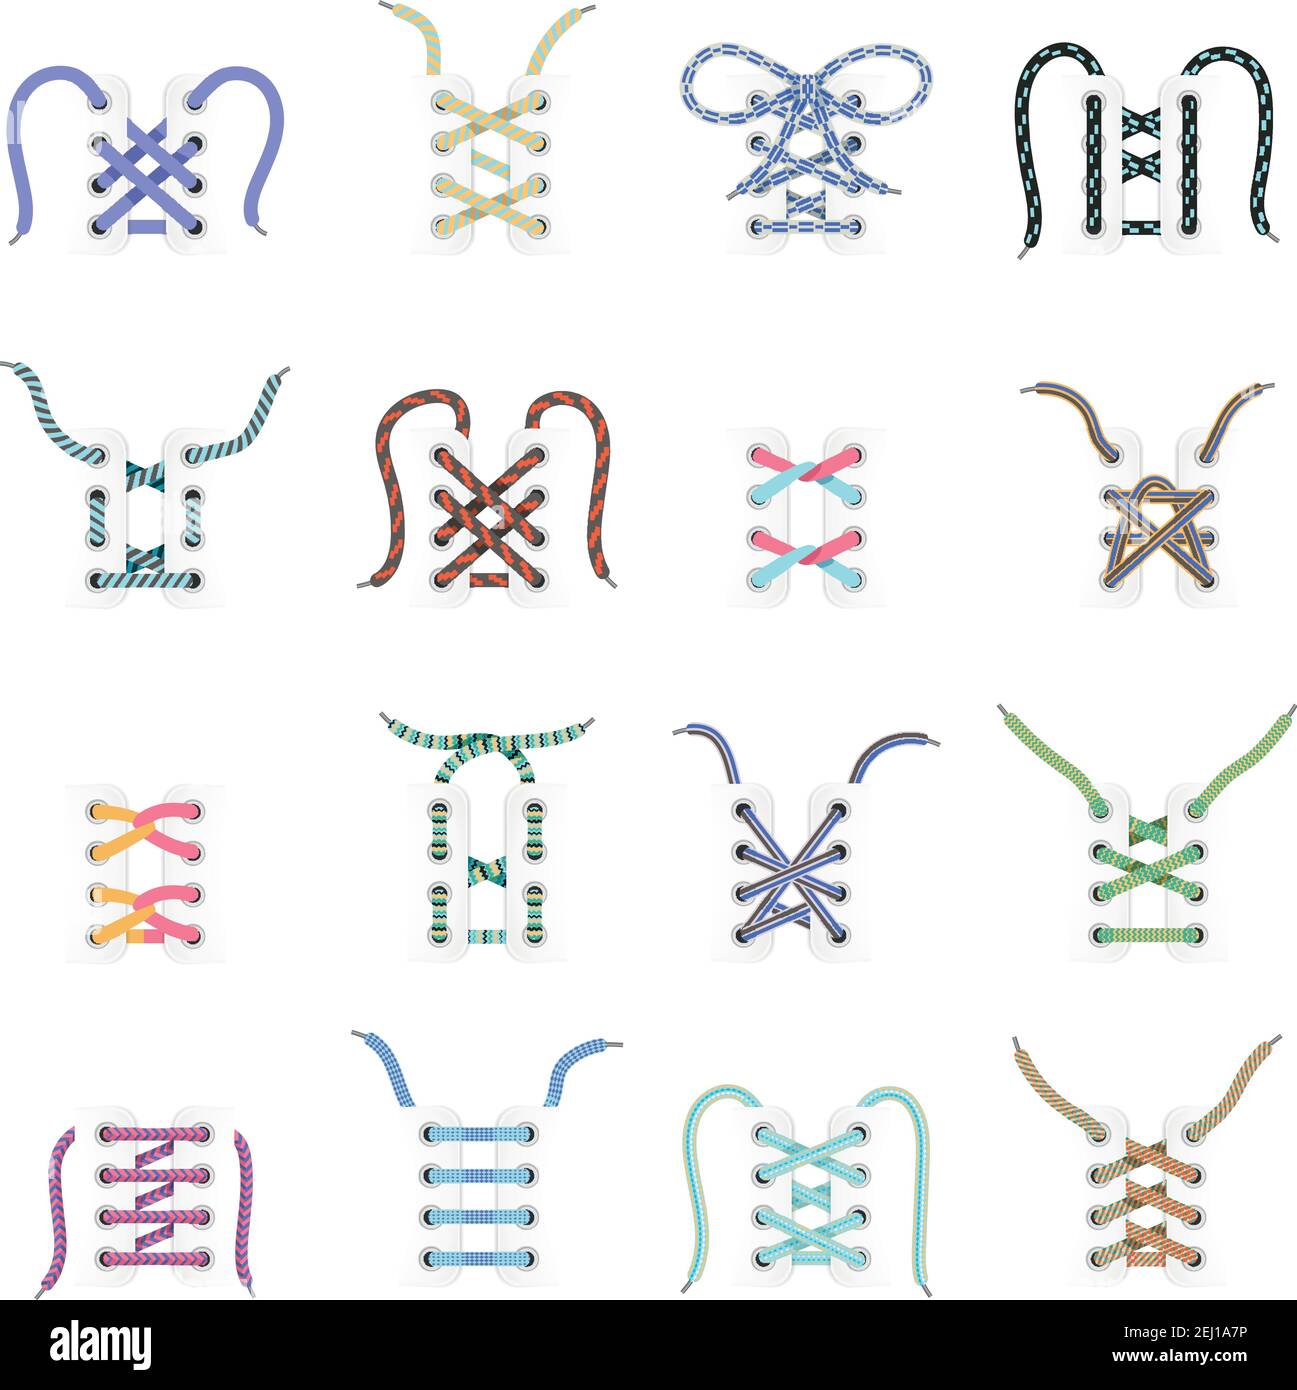
The most common method, but with a tactical twist.
Standard vs. Tactical Criss-Cross
Standard: Laces cross over the eyelets. Easy, but prone to snagging.
Tactical Criss-Cross: Thread laces from inside out at each step. This keeps the crossover flatter, reduces debris entry, and cuts snag risks in tight spaces.
Best for: Everyday wear, quick hikes, or when speed matters.
How to Do It
- Insert both ends through the bottom eyelets from inside out.
- Cross diagonally and feed each end into the next higher eyelet on the opposite side (inside out).
- Repeat to the top.
- Tie with a double knot or surgeon’s finish.
Pro Tip: Use a surgeon’s knot (double wrap before tightening) at the ankle eyelets to lock tension and prevent loosening.
Army Lacing: Stiff Boots, Full Flex
Used by military units worldwide to balance rigidity and comfort.
Why It Works
Stiff leather boots resist flexing. Army lacing lets the upper move with your foot while keeping the heel locked. The outside shows straight vertical lines; crossovers stay hidden inside.
Best for: Combat boots, long marches, parades.
Step-by-Step
- Start at the bottom: run one lace straight across inside out.
- Take that end, go straight up into the eyelet directly above (outside in).
- Cross diagonally inside the boot, exit next eyelet on the opposite side (inside out).
- Repeat: straight up outside, cross inside.
- Finish with a heel lock if needed.
Visual Cue: The outside should look like vertical bars with no diagonal lines.
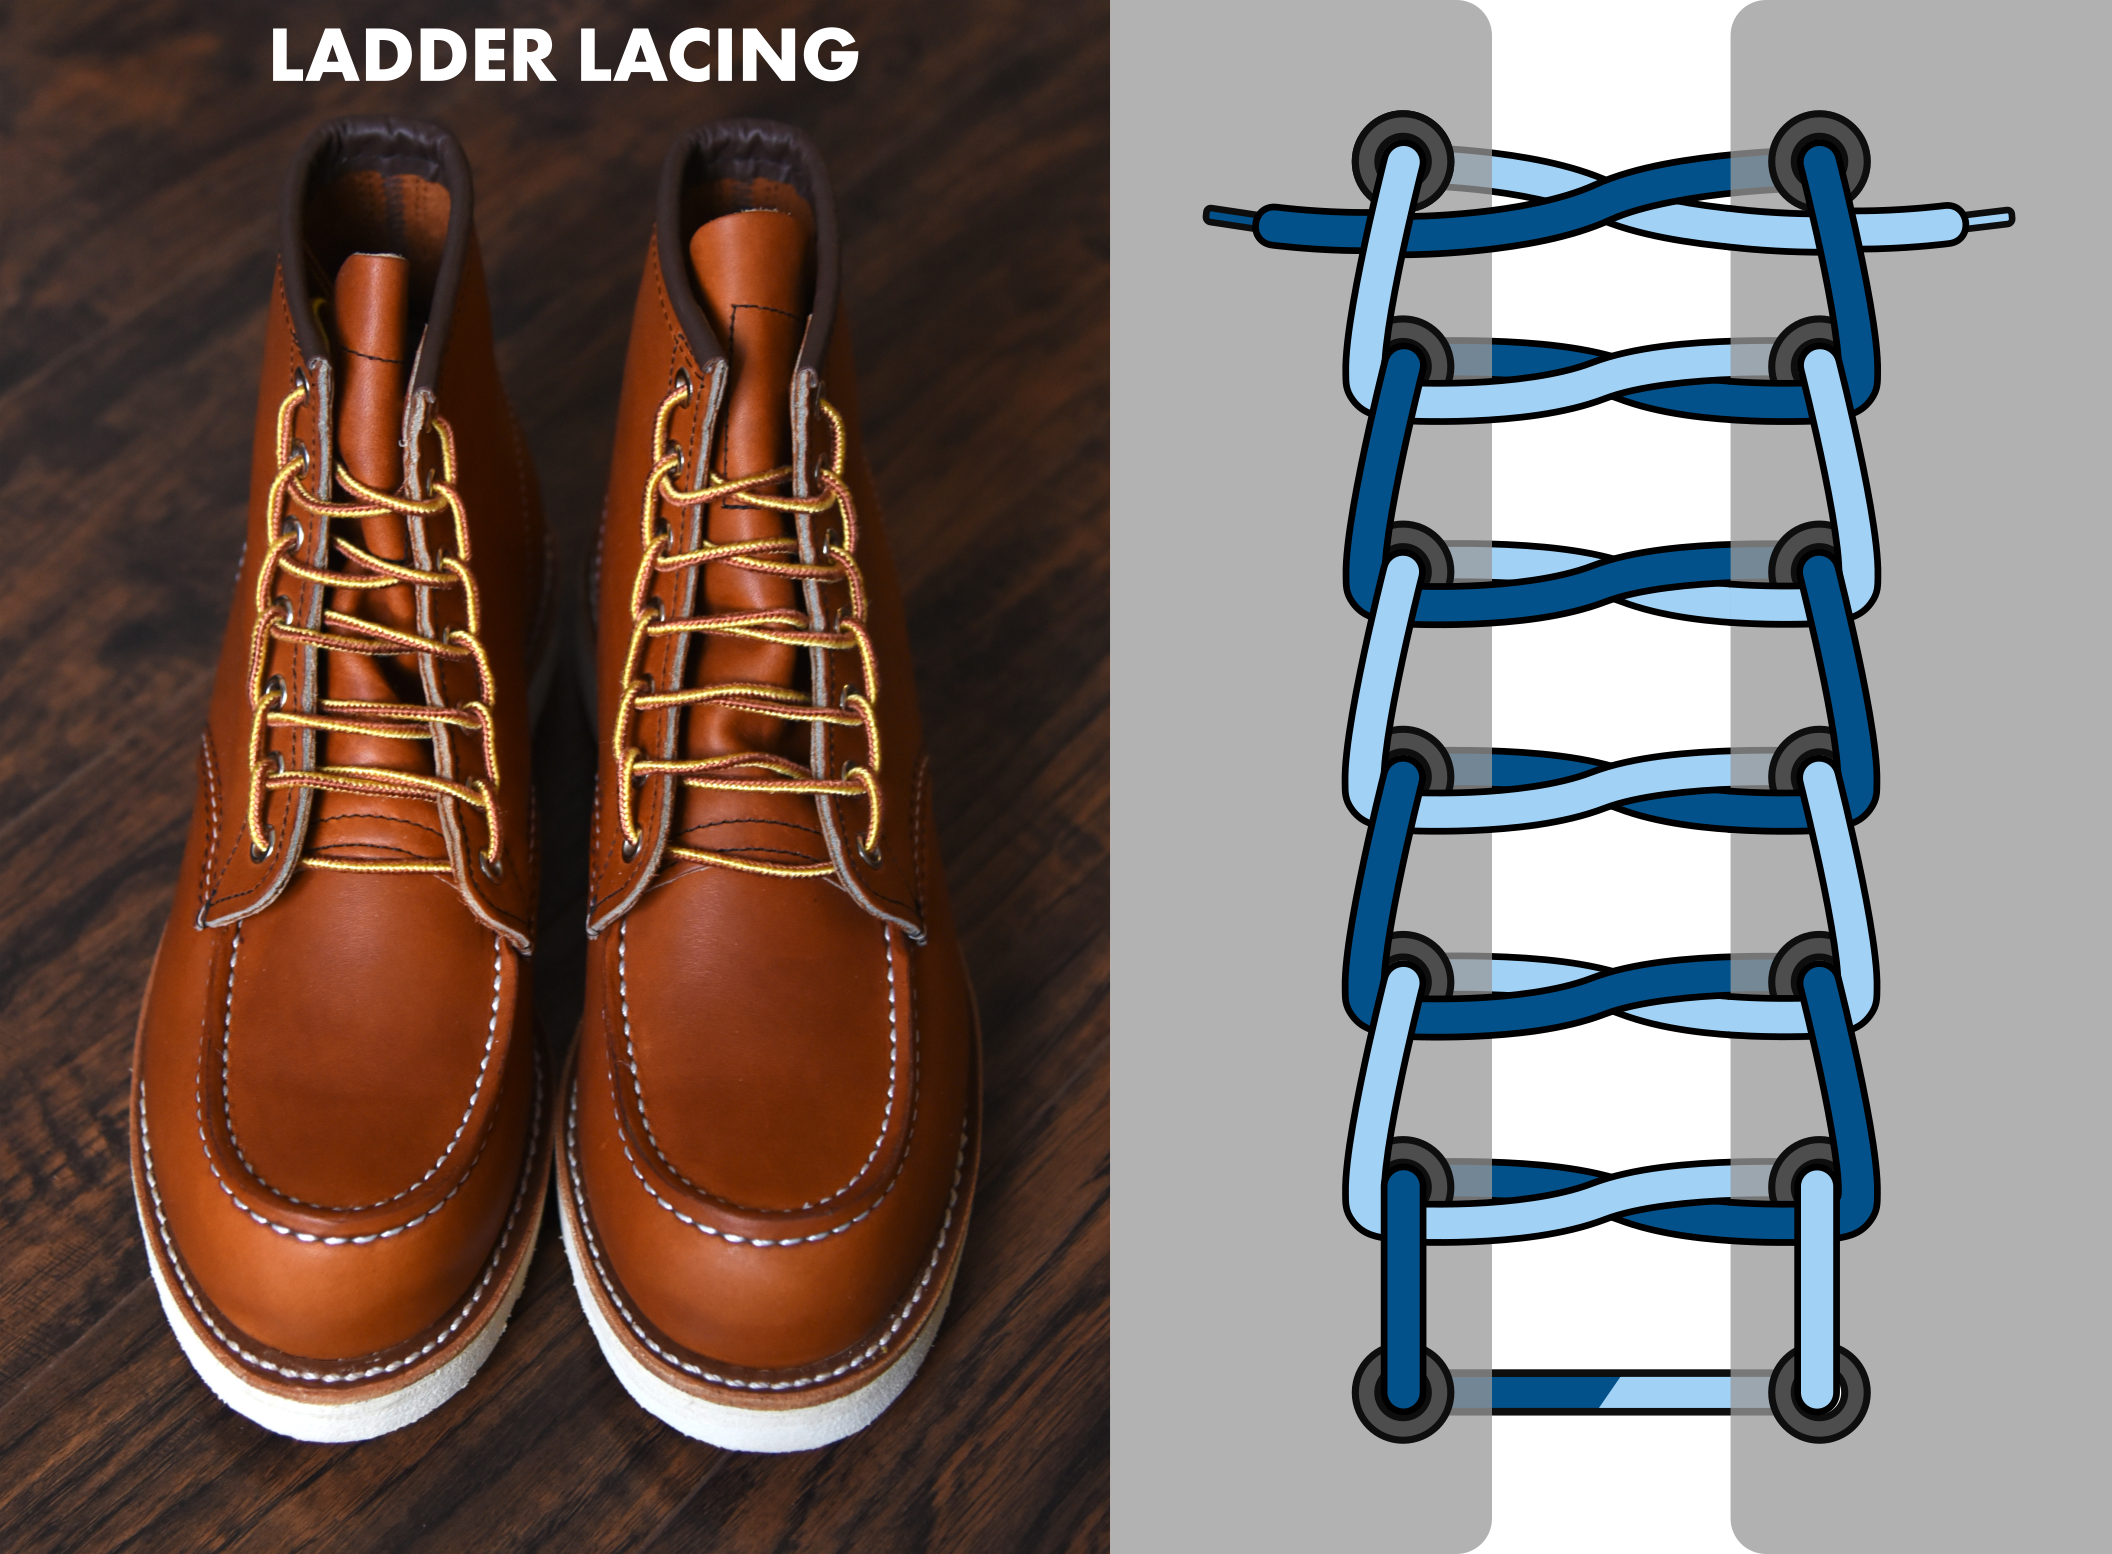
Ladder Lacing: Maximum Ankle Lock
The go-to for paratroopers and ceremonial guards.
Built for Stability
Each crossover is locked under a vertical segment, creating a ratchet-like hold. Once tightened, laces will not slip, making this ideal for high-impact jumps or standing for hours.
Best for: Tall boots, ankle support, zero-tolerance environments.
How to Lace It
- Run laces straight across bottom eyelets inside out.
- Both ends go straight up to the next eyelets (outside in).
- Cross over the tongue.
- Thread each lace under the vertical segment on the opposite side, like weaving.
- Pull up to the next eyelet (outside in), repeat.
Warning: Hard to adjust once set. Practice before field use.
Straight-Bar Lacing: Pressure Relief & Quick Release

Also known as Lydiard lacing, this method is clean, functional, and life-saving.
Ideal for High Arches
Eliminates diagonal pressure on the top of the foot. Horizontal bars on the outside mean no lace bite, while vertical runs inside skip sensitive zones.
Best for: High arches, dress boots, medical emergencies.
How to Do It (Even Number of Eyelets Required)
- Start outside in at the bottom eyelets.
- Right lace: go straight up inside, then out at the next eyelet.
- Left lace: skip one eyelet, go up to the third, then out.
- Alternate sides, always running straight across outside, straight up inside.
- Tie at the top.
Emergency Use: Medics can cut all horizontal bars with one swipe for instant boot removal.
Heel Lock Lacing: Stop Slippage Fast
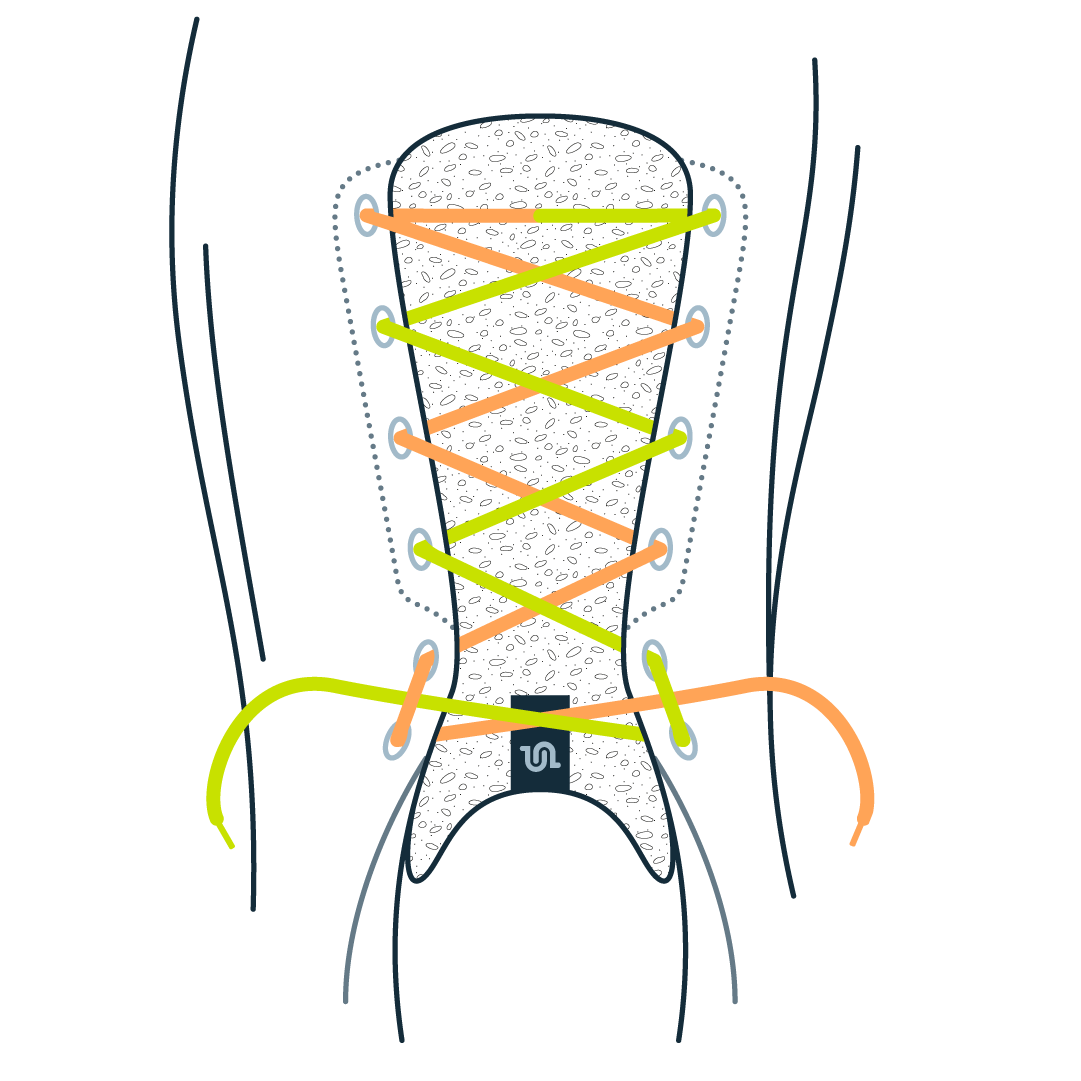
Also called the Runner’s Loop, this is not a full method but a finishing move.
Fix Heel Slip in Seconds
Creates a cinch around the ankle collar, locking the heel in place. Works with any lacing style.
Best for: Narrow heels, long hikes, preventing blisters.
How to Apply
- Lace normally to the second-to-last eyelets.
- Instead of crossing, feed each end straight up into the top eyelet on the same side, forming a loop.
- Cross the laces and thread each through the opposite loop.
- Pull tight. It feels like a seatbelt click.
- Tie normally.
Time Saver: Takes 10 seconds and eliminates heel rub on descents.
Solve Pain Points with Smart Lacing

Generic patterns do not fit all feet. Use these targeted fixes.
Window Lacing: Bypass Pressure Zones
For pain across the instep or metatarsals.
How to Create a Window
- Unlace to the eyelets below the pain zone.
- Run each lace straight up its side (no crossover).
- Resume criss-cross above the gap.
- Tie off. The “window” floats over the sore spot.
Optional: Add surgeon’s knots at the top and bottom of the window to lock tension.
Toe-Relief Lacing: Free Up the Front
When toes feel crushed, skip the bottom eyelets.
How to Do It
- Start lacing at the second set of eyelets.
- Leave the bottom pair unlaced.
- Continue normally up.
Note: If this helps, your boot may be too narrow or short.
Surgeon’s Knot: Lock Tension Where Needed
A double-wrap knot that holds firm.
Where to Use It
At the ankle or mid-foot where slippage occurs.
- At the target eyelets, wrap the laces twice before pulling tight.
- Feed directly to the next eyelet to lock the tension.
- Resume lacing.
Use Case: Prevents loosening during long rucks or in wet conditions.
Two-One-Three Lacing: Beat Lace Bite
Alleviates pinching in the ankle area.
The Pattern
Instead of even criss-crossing, follow a 2-1-3 sequence:
- After the first crossover, go two eyelets up on one side.
- Then one on the opposite.
- Then three on the first.
This shifts pressure points and reduces direct lace pressure on sensitive areas.
Best for: Skaters, tight-fitting boots, or those with bony ankles.
Advanced & Tactical Variants
For specialized missions or extreme conditions.
Lock Lacing: Heel Security for Climbers
Uses vertical segments as pulleys. Each crossover is threaded under the vertical to create a self-locking system.
Best for: Running, mountaineering, tactical ops.
Gippo Lacing: Quick Tight for Tall Boots
Combines Quick Tight and Corset styles. Split sections allow rapid tightening of upper and lower zones independently.
Best for: Motorcyclists, riders, fast-response roles.
One-Handed Lacing: No Knots, No Problem
Anchored at the top, laced down with friction holds. Useful for amputees or gear-limited scenarios.
How: Start at the top, lace down in criss-cross, finish with a tuck or clip.
Segmented Lacing: Dual-Zone Control
Use two separate laces, one for the forefoot and one for the ankle. Adjust tension independently.
Best for: Hikers with varying foot swelling or custom orthotics.
Fix Common Lacing Problems
Use this quick-reference guide to troubleshoot.
| Problem | Solution |
|---|---|
| Heel Slipping | Apply Heel Lock or Surgeon’s Knot at top eyelets |
| Top of Foot Hurts | Switch to Straight-Bar or Window Lacing |
| Toes Cramping | Try Toe-Relief Lacing or check boot size |
| Laces Keep Loosening | Use Surgeon’s Knot or Lock Lacing |
| Shin Splints | Lace while kneeling; ensure heel is seated |
| Blisters on Heel | Eliminate slippage with Heel Lock plus wool socks |
Maintenance & Field Readiness
Even the best lacing fails with worn gear.
Inspect Regularly
Check laces for fraying, especially near eyelets and knots. Replace at the first sign of wear.
Clean Like a Pro
Remove laces before cleaning boots. This ensures the tongue and eyelet channels are free of dirt, which can cause abrasion and pressure points.
Know Your Unit’s Rules
Military units often require Straight-Bar or Army Lacing for inspections. Field use may allow functional variations. Always confirm SOPs.
Choose the Right Method: Quick Decision Guide
- Need speed? → Criss-Cross or Lightning Lacing
- Need ankle stability? → Ladder or Lock Lacing
- High arches or lace bite? → Straight-Bar or Window Lacing
- Heel slipping? → Heel Lock or Surgeon’s Knot
- Dress uniform? → Straight-Bar or Hidden Knot
- Emergency access? → Straight-Bar (single-cut removal)
- Breaking in stiff boots? → Army Lacing for flexibility
Frequently Asked Questions About Boot Lacing
What is the best way to lace boots for hiking?
The best way to lace boots for hiking depends on your foot type and terrain. For most hikers, a standard criss-cross with a heel lock at the top prevents slippage on descents. If you have high arches, switch to straight-bar lacing to relieve pressure on the top of your foot.
How do I stop my boot laces from coming undone?
To stop boot laces from loosening, use a surgeon’s knot (a double wrap before tightening) at the ankle eyelets where slippage typically starts. You can also try lock lacing, which threads each crossover under the vertical segment to create a self-locking pulley system.
How tight should I lace my boots?
Lace your boots snugly but not painfully tight. The lower eyelets should hold your foot in place without crushing your toes, while the ankle area needs firm support. Always lace while kneeling so your heel sits properly in the heel cup before you tighten.
Can lacing techniques help with heel slippage?
Yes, lacing techniques can eliminate heel slippage. The heel lock (or runner’s loop) is the most effective fix. It creates a cinch around the ankle collar that locks your heel in place, preventing the friction that causes blisters on long hikes.
What is ladder lacing used for?
Ladder lacing is used for maximum ankle stability and is the standard for paratroopers and ceremonial guards. Each crossover locks under a vertical segment, creating a ratchet-like hold that will not loosen during intense activity or prolonged standing.
Should I use paracord instead of regular laces?
You should use paracord instead of regular cotton laces for tactical, military, or rugged outdoor use. Paracord (550 cord) resists water, mud, rot, and abrasion, and it has a tensile strength of 550 lbs. Standard cotton laces fray and snap under load, which is a safety hazard.
Final Thoughts on Mastering Boot Lacing
Knowing how to lace a boot is not just about tying shoes. It is about optimizing performance, preventing injury, and staying mission-ready. Whether you are hiking a mountain, patrolling a base, or just walking to work, the right lacing technique makes all the difference.
Start with Tactical Criss-Cross for simplicity, then master Heel Lock and Straight-Bar for problem-solving. With practice, you will adapt your lacing to your foot, terrain, and task, turning a simple knot into a tool of precision.
Your next step: Pick one method from this guide and practice it on your current boots before your next hike, shift, or mission.