How to Make Boots Fit Tighter
If your boots slip at the heel, let your foot slide forward, or feel loose around the instep, you’re dealing with more than just discomfort. Poorly fitting boots cause blisters, reduce stability, and can even lead to long-term foot problems. The good news is you don’t need to replace them. Learning how to make a boot fit tighter opens the door to proven fixes that take up excess space and lock your foot in place.
This guide walks you through diagnostic steps, internal padding solutions, sock strategies, lacing tricks, and professional modifications. Whether you wear work boots, hiking gear, or sleek Chelseas, you’ll find targeted methods to eliminate slippage and secure your foot from heel to toe.
Diagnose the Fit Issue First
Before adding inserts or swapping socks, pinpoint exactly where your boot feels loose. A mismatched fix wastes time and money, so accurate diagnosis matters.
Check for Heel Slippage
A slight lift of about ⅛” to ¼” is normal in new leather boots and usually disappears after break-in. If your heel rises more than that, especially on stairs or slopes, the boot is either too large or lacks proper instep contact. In laceless boots like Chelseas, heel slip is almost always a symptom of low instep volume rather than a heel problem.
Test for Forward Sliding
Walk downhill or jog lightly in place. If your toes hit the front or you feel cramping, your foot is sliding forward. Common causes include:
– Loose instep
– Unsupported arch
– Boot that’s too long or voluminous
Inspect the Flex Point
Have someone watch your boot as you walk. The crease should form at the ball of your foot, not in the middle of the sole. A midfoot break signals sliding, which leads to instability and blisters.
Measure with a Brannock Device
Sneaker size is unreliable for boots. Most people wear boots a half-size smaller than their athletic shoes. Visit a shoe store and use a Brannock device to measure:
– Foot length
– Width
– Arch length
If your Brannock size is 11.5, try a size 11 in boots. Many manufacturers design boots to accommodate thicker socks.
Add Full-Length Insoles for Better Support

One of the fastest ways to make a boot fit tighter is to reduce internal volume with a quality insole. This lifts your foot closer to the upper, improving contact and control.
Use Leather Insoles for Precision Fit
Vegetable-tanned leather insoles from Dale’s Leatherworks are excellent for dress and work boots. They’re firm, breathable, and compress slightly over time for a custom feel.
- Thin (3mm): Reduces fit by roughly 0.5 size
- Medium (5mm): Reduces fit by roughly 1.0 size
- Thick (7mm): Reserved only for massively oversized boots
Pro Tip: Avoid thick insoles unless absolutely necessary. They can distort the boot’s internal geometry and pinch the ball of your foot.
Choose Ergonomic Insoles for Comfort
For hiking or all-day wear, try Superfeet Hike Cushion or Copper Memory Foam insoles. These offer:
– Arch support to prevent rolling
– Heel cradling to reduce slip
– Cushioning that adapts to your stride
They’re ideal if you deal with fatigue or plantar fasciitis.
Cut Padded Insoles to Shape
Generic insoles from Dr. Scholl’s or similar brands can be trimmed to fit. Use them as a budget-friendly base layer, especially in athletic or casual boots.
Warning: Don’t stack multiple soft insoles. They compress unevenly and reduce stability.
Target the Instep to Stop Heel Slip
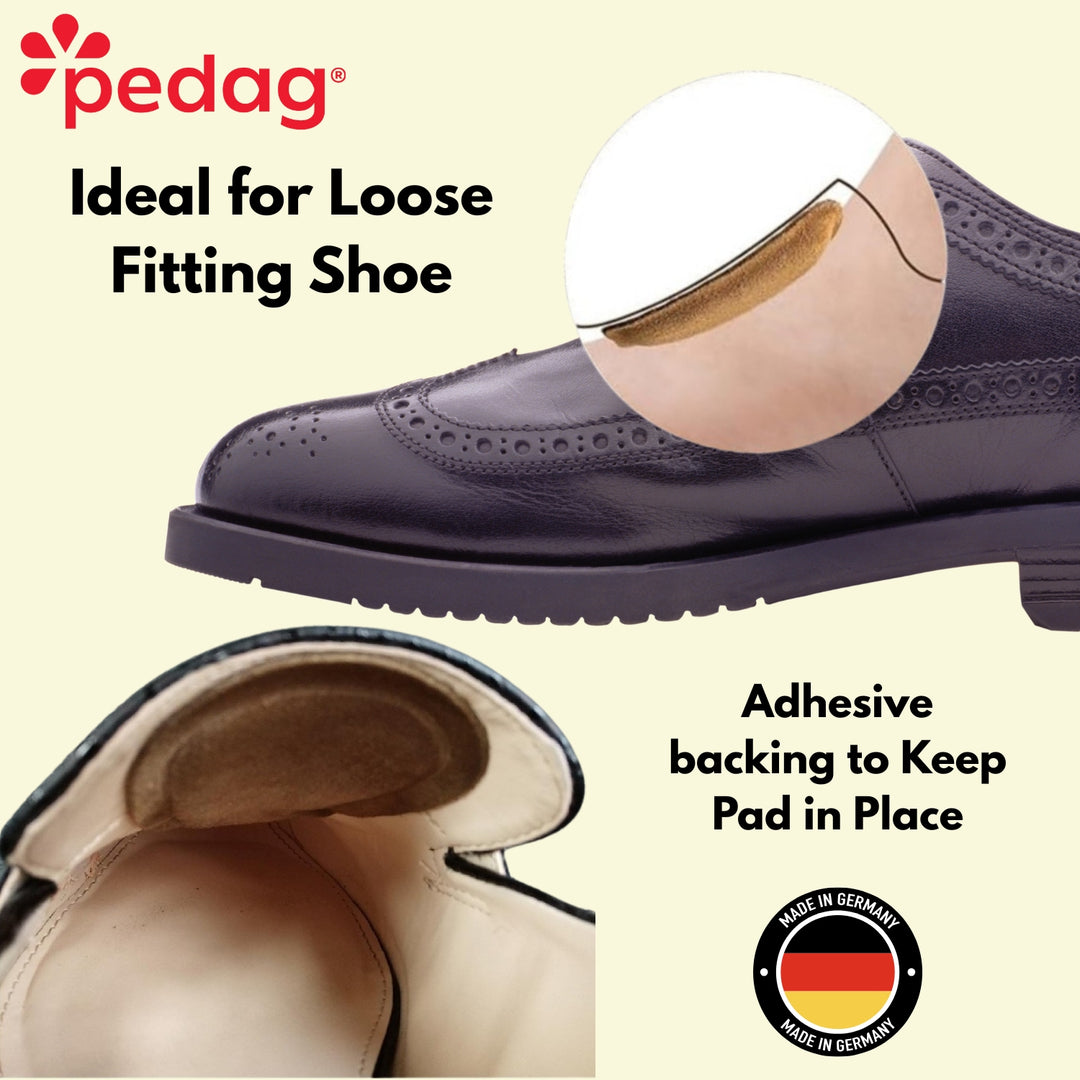
In laceless boots like Chelseas or loafers, heel slip usually stems from low instep contact. Fix the instep, and the heel locks in naturally.
Apply Tongue Pads for Instant Grip
Pedag Supra Tongue Pads are a game-changer. These suede pads stick to the inside of the tongue and press your foot down and back.
- Best for: Low insteps, narrow feet, Chelsea boots
- Effect: Eliminates heel lift without altering the boot’s look
- Cost: Under $15 for a pair
How to Install:
1. Clean the tongue with alcohol
2. Peel and stick the pad where the instep contacts the boot
3. Let it set for 24 hours before heavy use
Glue in Arch Cookies for Front-to-Back Stability
Arch cookies are D-shaped leather or EVA pads glued into the arch area. They prevent forward sliding and tighten the midfoot.
- Material: Leather for breathability, EVA for cushion
- Placement: Center under the arch, not the ball of the foot
- Fix: Use shoe glue for permanence
Pro Tip: Combine an arch cookie with a tongue pad for full-foot lockdown. This two-point system works wonders in Alden or Allen Edmonds boots.
Fix Heel Slippage with Inserts
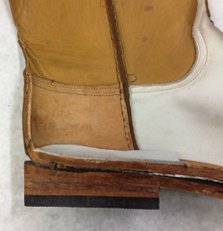
If your heel lifts but the instep feels fine, targeted heel solutions can close the gap without compromising comfort.
Use Heel Grips or Lifts
Self-adhesive pads made from leather, gel, or moleskin stick to the back lining and reduce vertical space.
- Leather: Durable and molds to your foot
- Gel: Cushioned, great for sensitive heels
- Moleskin: Soft, ideal for blister prevention
Start thin and add layers if needed. Place pads on the interior heel counter, not the insole.
Install a Leather Heel Counter (Cobbler Fix)
For chronic heel slip, a cobbler can install a leather heel back. This rigid insert reinforces the heel cup and stops the shearing motion that causes blisters.
- Best for: Expensive boots worth repairing
- Cost: $30 to $60
- Durability: Permanent
This is especially useful in boots with soft or stretched heel counters.
Fill the Toe Box Without Crushing Toes
Excess space in the toe box causes forward sliding, but never jam rigid foam into the front. It displaces your arch and leads to toe pain.
Use Soft Foam or Layered Fillers
- EVA foam pads: Cut to fit, soft and compressible
- Layered cloth: Fold a thin wool cloth for the base, top with soft fleece
- Moisture-wicking fabric: Prevents odor during long wear
Place fillers only in the very front, under the insole if possible.
Avoid Temporary Fixes
- Tissue paper or newspaper: Falls apart and offers no support
- Rigid inserts: Push toes up and cause corns or pressure points
If your toes feel compressed when standing, the filler is too thick.
Upgrade Your Socks for a Tighter Fit
Socks are one of the easiest and most effective ways to take up space, especially in boots designed for thick layers.
Wear Thick Wool or Synthetic Socks
Cotton absorbs moisture and compresses. Wool or synthetic blends maintain volume and wick sweat.
- Best pick: Rocky Premium Boot Socks
- Thickened heel and toe
- Can fill up to a full size in length or two widths
- Ideal for work and hiking boots
Try the Double-Sock Method
Wear a thin liner sock made from polypropylene under a thicker outer sock.
- Reduces friction and prevents blisters
- Adds volume without bulk
- Regulates temperature
Snowboarding Tip: Use thin, moisture-wicking performance socks. Bulky socks compress unevenly and reduce board control.
Use Smart Lacing Techniques
Even loose boots can be locked down with the right lacing. It’s a mechanical fix that costs nothing but takes seconds.
Apply Heel Lock Lacing
Also known as the runner’s loop, this technique secures the ankle and prevents lift.
Steps:
1. Lace normally up to the second-to-last eyelet
2. Create a loop with each lace
3. Pass the final lace through both loops from underneath
4. Pull tight and tie
The ankle is pulled down into the heel cup for a secure fit.
Try Ladder Lacing for Maximum Stability
Used by the military, this method distributes tension evenly and prevents lateral movement.
- Requires longer laces (2 to 4 inches longer than stock)
- Best for work, hiking, and tactical boots
- Delivers full-foot lockdown on uneven terrain
Pro Tip: Always tighten laces from toe to ankle. Never just at the top.
Heat Mold Specialized Boots
For snowboard or high-end hiking boots with heat-moldable liners, heat shaping is the gold standard for a custom fit.
Follow Manufacturer Instructions
- Remove the liner if possible
- Heat in an oven (typically 180 to 200°F for 5 to 10 minutes)
- Reinsert and lace tightly
- Sit for 10 to 15 minutes to cool
Warning: Never use a heat gun on non-moldable boots. This can warp or shrink them permanently.
Get Professional Heat Molding
Snowboard shops offer heat-molding services, often with gait analysis. They can also fit custom orthotics for precision support.
Know Your Boot Type: Apply the Right Fix

Different boots have different fit rules. What works for a Chelsea won’t work for a hiking boot.
Fix Snowboarding Boots
- Priority: Control and response
- Best Fixes:
- EVA foam insoles
- Heat-moldable liners
- Heel lifts for loose heel pockets
- Avoid: Thick socks that compress and deaden feel
Optimize Work Boots
- Priority: All-day comfort and safety
- Best Fixes:
- Thick cushioned socks like Rocky brand
- Arch-supporting insoles
- Heel grips and ladder lacing
- Pro Tip: Use tongue pads in laceless work boots with low insteps
Adjust Hiking Boots
- Philosophy: Allow toe wiggle on descents
- Best Approach:
- Size up 0.5 to 1.0 for swelling
- Use double socks and insoles to fine-tune
- Focus on breathability and moisture control
Tighten Fashion Leather Boots
- Challenge: No laces make adjustment harder
- Solution:
- Tongue pads are essential for Chelseas
- Leather insoles maintain look and breathability
- Avoid thick socks that ruin the silhouette
Compare Solutions at a Glance
| Fix | Best For | Cost | Durability | Ease |
|---|---|---|---|---|
| Thick Socks | 0.5 to 1 size too big | $ | High | Easy |
| Tongue Pads | Chelseas, low instep | $ | Medium | Easy |
| Full Insoles | General volume, arch support | $$ | High | Easy |
| Heel Grips | Isolated heel slip | $ | Medium | Easy |
| Arch Cookies | Forward sliding | $$ | High (glued) | Medium |
| Ladder Lacing | Stability, work boots | $ (laces) | Permanent | Easy |
| Heat Molding | Snowboard boots | $$$ | Permanent | Hard |
| Heel Counter | Severe slip, pro fix | $$$ | Permanent | Hard |
Final Tips to Maintain the Fit
- Break-in Matters: Leather molds over time. Don’t expect perfection on day one.
- Monitor Compression: Insoles and liners wear down. Replace every 6 to 12 months.
- Keep It Dry: Use moisture-wicking materials to prevent odor and bacterial growth.
- Never Shrink Leather Boots: Water or heat can ruin the structure. Only heat-mold if designed for it.
When to Walk Away
If a boot is more than one full size too big, fixes may not be enough. In that case, consider resoling, stretching, or selling and buying the correct size.
Frequently Asked Questions About Making Boots Fit Tighter
What is the cheapest way to make boots fit tighter?
Thick wool socks are the most affordable starting point. For boots off by 0.5 to 1 full size, a quality pair of wool or synthetic boot socks can fill significant space. Double-sock layering with a thin liner and a thicker outer sock also adds volume at minimal cost.
Do heel grips really work for boot slippage?
Yes, when the slip is isolated to the heel pocket. Self-adhesive leather, gel, or moleskin pads attach to the interior heel counter and reduce vertical space. For severe or structural heel slip, a cobbler-installed leather heel counter offers a permanent solution.
Can I shrink boots to make them tighter?
Generally, no. Applying water or heat to standard leather boots can warp, crack, or ruin the structure. The only safe exception is boots with heat-moldable liners, such as modern snowboard boots, which are specifically designed for this process.
Are tongue pads better than insoles for loose boots?
They serve different purposes. Insoles reduce overall internal volume and add arch support, making them ideal for general looseness. Tongue pads target the instep specifically and are the best fix for laceless boots like Chelseas where heel slip stems from low instep contact. Many users combine both for maximum security.
How tight should a boot fit around the instep?
The instep should feel snug with no gap between the top of your foot and the tongue. A secure instep locks the heel in place and prevents forward sliding. If you can slide a finger easily between your instep and the tongue, the boot is too loose in that area.
When should I see a cobbler instead of using DIY fixes?
Visit a cobbler when DIY methods fall short, especially for expensive boots worth preserving. Professional services include installing leather heel counters, gluing arch cookies permanently, and assessing whether a boot can be narrowed. For snowboard boots, professional heat molding delivers a precision fit that DIY methods can’t match.
Key Takeaways for Making Your Boot Fit Tighter
You can absolutely make a boot fit tighter without buying new footwear. Start by diagnosing where the looseness lives: heel, instep, toe box, or overall volume. Add a quality insole to reduce internal space and improve arch contact. Target problem areas with tongue pads for instep gaps or heel grips for isolated heel slip. Upgrade to thick wool socks or try double-sock layering to fill remaining space. Lock everything in with heel lock or ladder lacing techniques. For specialty boots like snowboard gear, professional heat molding delivers a custom fit that lasts.
If your boots are more than one full size too large, these fixes may not be enough. In that case, consult a cobbler or consider replacing the boots entirely.