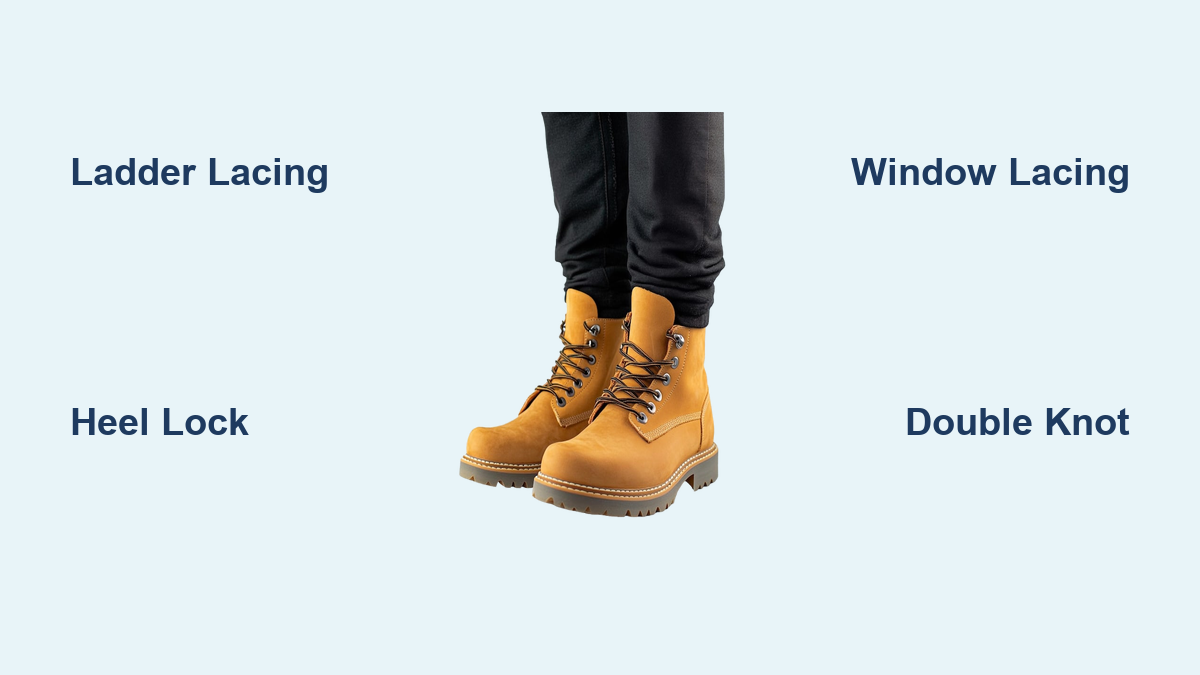
How to Tie Timberland Boots
If your Timberlands feel loose, cause heel lift, or just don’t look quite right, the fix often comes down to knowing how to tie a Timberland boot properly. The lacing method you choose affects everything from ankle support to overall appearance. Whether you wear your boots for construction work, weekend hikes, or casual outings, the right technique makes a real difference. This guide covers multiple lacing styles, troubleshooting tips, and best practices to help you get the perfect fit every time.
Choose the Right Lace Length
Matching your laces to your boot’s eyelet count is the first step toward a clean, secure tie. Wrong-length laces lead to loose knots or incomplete patterns.
Match Laces to Eyelets
- 4 pairs (8 holes): 36-inch laces
- 6 pairs: 45-inch laces
- 7 pairs: 54-inch laces (or 47-inch for hiking models)
- 8 or more pairs: 63-inch laces
Pro Tip: If your replacement laces run short, skip the top eyelets and tie just below them. Pulling tight at every stage also preserves lace length.
Standard Criss-Cross Lacing

This everyday method is simple, balanced, and works for most foot shapes. It’s the foundation for understanding boot lacing.
How to Criss-Cross Laces
- Thread from the bottom: Insert laces into the lowest eyelets from outside to inside.
- Cross diagonally: Pull each lace to the opposite side, threading inside to outside through the next eyelet up.
- Repeat upward: Continue crossing until you reach the top.
- Secure with a double knot: Tie firmly to prevent loosening.
Why It Works
- Even pressure across the foot
- Quick to do and easy to adjust
- Ideal for casual and light work use
Avoid This Mistake: Not pulling tight at each level wastes lace and weakens support.
Ladder Lacing (Military Style)
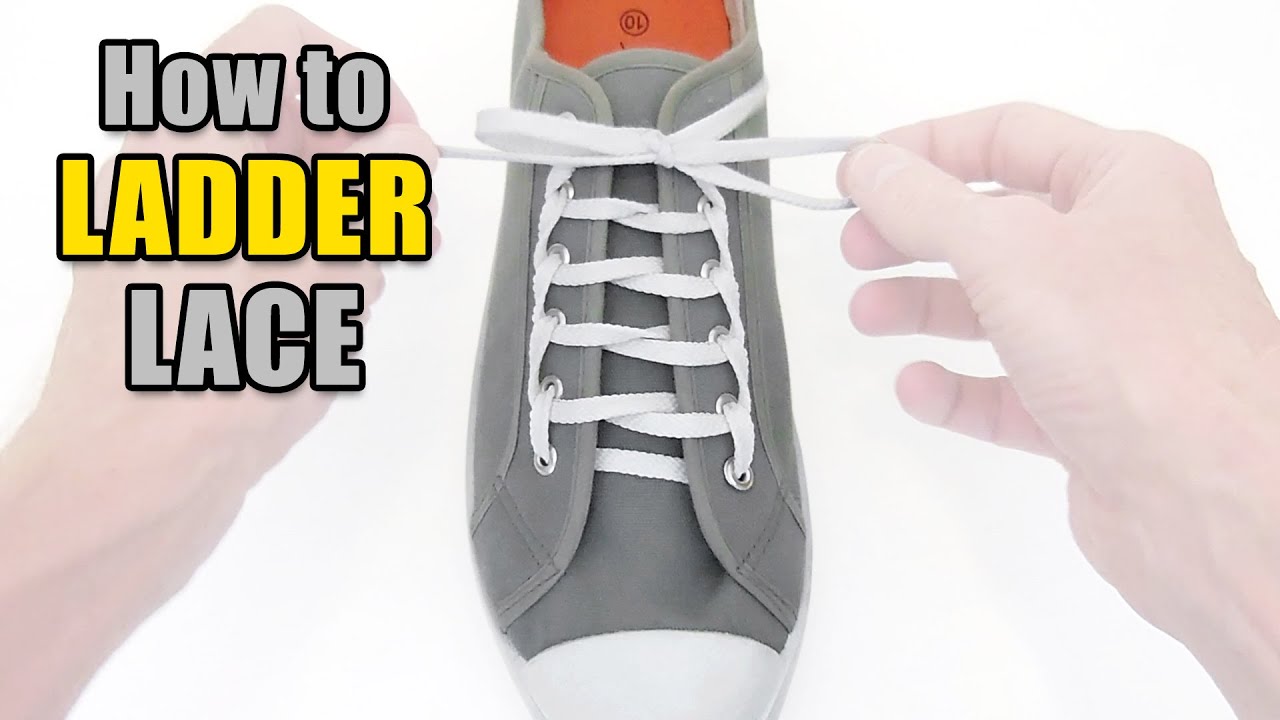
Also called army or paratrooper lacing, this method locks laces in place and gives a rugged, clean look that matches Timberland’s iconic yellow boots.
Step-by-Step Ladder Lacing
- Start horizontally: Run both ends straight across the bottom eyelets from inside to outside.
- Right side up: Take the right lace, go straight up the same side, and pull through outward.
- Cross to left: Bring it across to the left eyelet, threading outside to inside.
- Left side up: Take the left lace, run it straight up, thread under the horizontal bar, and pull through.
- Repeat: Alternate sides, creating horizontal rungs until you reach the top.
Benefits of Ladder Lacing
- Prevents laces from coming undone
- Distributes pressure evenly
- Offers superior ankle support
- Matches the classic Timberland aesthetic
Best For: Construction, hiking, or anyone needing durable, no-fail lacing.
Fix Heel Slippage With Heel Lock Lacing

If your heel lifts when walking, especially on slopes or stairs, heel lock lacing keeps your foot locked in place.
How to Apply Heel Lock
- Lace normally using criss-cross up to the second-to-last eyelet.
- Before the final pair, create a loop with each lace end, like starting a bow.
- Pull each lace through the opposite loop, forming a locking mechanism.
- Tighten and finish with a standard bow.
What It Solves
- Stops heel lift and blisters
- Increases ankle stability
- Ideal for hiking or long walks
Expert Note: Use this whenever you feel your foot sliding forward during descents.
Relieve Top-of-Foot Pressure With Window Lacing

Got a high arch or sore spot on the instep? Window lacing creates a gap over the pressure point so the lace doesn’t press down.
How to Do Window Lacing
- Start criss-crossing from the bottom.
- When you reach the painful area, skip the cross and run both laces straight up the same side.
- Resume criss-crossing above the gap.
- Tie as usual.
Who Needs This?
- High arches
- Swollen feet
- Foot injuries or sensitive spots
Visual Cue: You’ll see a window where the laces don’t cross. This is the relief zone.
Prevent Toe Pain With Toe-Relief Lacing

Long hikes or downhill walking can slam your toes into the front of the boot. Toe-relief lacing reduces pressure at the front while keeping the midfoot secure.
How to Apply
- Begin lacing from the top down or use a modified criss-cross.
- Keep the bottom 1 to 2 eyelets loose or skip crossing near the toes.
- Increase tension as you move up the boot.
- Tie securely at the top.
Why It Matters
- Prevents black toenails
- Reduces bruising on descents
- Allows room for foot swelling
Time-Saving Shortcut: Use this if you regularly experience numbness or pain in the toes after walking.
Secure Laces With a Double Overhand Knot
Even the best lacing fails if the knot comes undone. The double overhand knot is more secure than a standard bow.
How to Tie It
- After crossing the laces, make a single overhand knot (simple loop and pull through).
- Repeat the same knot over the first.
- Pull tight to create a jam-resistant finish.
When to Use It
- Hiking trails
- Heavy work shifts
- Any activity involving constant movement
Pro Tip: Tie this knot before hitting the trailhead. The extra few seconds are worth it.
Best Lacing by Use Case

For Work and Construction
- Recommended: Ladder lacing
- Why: Durable, stays tight, easy to adjust with gloves
- Alternative: Criss-cross with double overhand knot
For Hiking and Outdoor Use
- Recommended: Criss-cross with heel lock or window lacing
- Why: Customizable support, prevents blisters, handles terrain changes
- Tip: Combine techniques. Use window lacing for pressure and heel lock for stability.
For Casual and Style Wear
- Chukka Boots: Use straight bar lacing for a sleek, minimalist look
- Classic Yellow Boots: Ladder or criss-cross for rugged authenticity
- Style Hack: Loosen slightly for a relaxed vibe, but never so much that the heel slips
Customization Rule: Make it your own and balance looks with comfort.
Fix Common Lacing Problems
| Problem | Solution | Technique |
|---|---|---|
| Laces keep coming undone | Use a double overhand knot | Secure Finishing Knot |
| Heel slips inside boot | Lock the ankle | Heel Lock Lacing |
| Pain on top of foot | Skip pressure zone | Window Lacing |
| Toes hurt when walking | Loosen front, tighten midfoot | Toe-Relief Lacing |
| Not enough lace to tie | Pull tight at each step or skip top eyelets | Tension Control |
Warning: Ignoring heel slippage can lead to blisters and long-term foot fatigue.
Frequently Asked Questions About Tying Timberland Boots
What lace length do I need for 6-inch Timberlands?
Six-inch Timberlands typically have 6 eyelet pairs and require 45-inch laces. Always measure your boot’s eyelet count before buying replacements to avoid running short or dealing with excess lace.
How do I stop my Timberland laces from coming undone?
Finish your lacing with a double overhand knot instead of a standard bow. This creates a jam-resistant finish that holds up during hiking, work shifts, and long walks.
Can I use ladder lacing on any Timberland boot?
Yes, ladder lacing works on most Timberland models with standard eyelets. It is especially popular on the classic yellow boots for its rugged, military-inspired look and secure fit.
What’s the best lacing method to prevent heel slippage?
Heel lock lacing, also called the surgeon’s knot method, is the most effective. It creates loops at the top eyelets that lock your heel in place and prevent lifting on slopes or stairs.
How do I relieve pressure on the top of my foot?
Use window lacing by skipping the criss-cross at the pressure point and running both laces straight up. This creates a gap that removes pressure from the arch or instep area.
Should I loosen my Timberlands when storing them?
Yes, loosening your laces during storage helps maintain the boot’s structure and prevents unnecessary stress on the eyelets and leather. It also makes them easier to slip into next time.
Final Tips for Long-Lasting Timberland Boot Performance
- Inspect laces regularly: Frayed or worn laces break under pressure. Replace them before they fail.
- Clean eyelets: Dirt buildup makes lacing difficult. Wipe with a cloth or small brush.
- Rotate lacing methods: Use different styles based on the day’s activity.
- Break in boots properly: New Timberlands need time to mold. Wear them with correct lacing to shape them to your foot.
- Store untied: Loosen laces when not in use to maintain boot structure.
Knowing how to tie a Timberland boot goes beyond looks. It affects function, safety, and comfort every time you wear them. Start with the standard criss-cross, experiment with ladder or heel lock techniques, and customize based on your foot’s needs. With the right knot and lacing style, your Timberlands will perform better and last longer, whether you’re on a job site, a mountain trail, or a city street.