Fix a Boot Issue: Quick Steps
If your favorite hiking or work boot is falling apart, with a peeling sole, worn-down heel, or a tear in the upper, you are not out of luck. Knowing how to fix a boot can save you money, extend the life of your footwear, and keep you off the trail or job site for less time. Whether the damage shows up as delamination, cracks, or torn leather, most common boot failures are repairable at home with the right tools and techniques.
This guide walks you through diagnosing damage, choosing the best adhesives, and executing durable fixes that stand up to real-world stress. You will learn how to patch a problem and restore both strength and waterproofing for long-term performance.
Assess the Damage Type
Identifying exactly what is wrong is the first step in any successful boot repair. Different issues require different approaches, materials, and levels of intervention.
Spot Sole Delamination
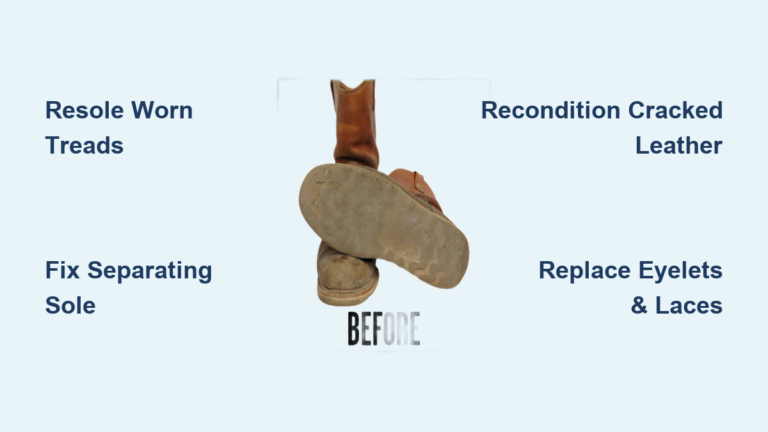
Look for visible gaps between the sole and the upper material. If you can slide a piece of paper into the seam, the bond has failed. This is common in boots exposed to heat or heavy flexing. Delamination often starts at the toe or heel and worsens with each step, letting in water and debris.
Find Cracks and Peeling Rands
Cracks appear as splits in the rubber sole or midsole. Press on the area. If the crack widens, it needs immediate attention. Peeling rands expose stitching and upper material to impact and moisture. Both compromise structural integrity and weather resistance.
Check for Tears and Worn Heels
Tears in leather or canvas upper material usually happen from abrasion or over-flexing. Inspect high-stress zones like the ankle and toe box. Worn heels create imbalance and reduce traction. If the heel is uneven or collapsed, it affects posture and increases injury risk during lifting or hiking.
Gather the Right Repair Supplies
Using household glue will not cut it. Boots endure constant flex, moisture, and pressure, so your repair materials must match that demand.
Clean and Prep Like a Pro
- Stiff brush: Remove caked dirt from treads and separation lines.
- 70% isopropyl alcohol: Wipe all surfaces to eliminate oils and residues.
- 120–150 grit sandpaper: Roughen smooth rubber or leather for better grip.
- Paper towels or cloth: Dry surfaces thoroughly after cleaning.
Skip this prep, and even the best glue will fail. Surfaces must be squeaky clean for a lasting bond.
Choose the Best Adhesive for the Job
| Repair Type | Recommended Glue | Why It Works |
|---|---|---|
| Sole reattachment | Aquaseal SR, Barge Cement | Flexible, waterproof, resists shear forces |
| Filling cracks and tears | Shoe Goo, Aquaseal SR | Builds durable, flexible layers |
| Quick fixes | Loctite Shoe Glue | Fast-drying, strong for small repairs |
| Heavy-duty rebuilds | E6000, Tuff Toe | Industrial strength, structural reinforcement |
Aquaseal SR is the top pick for most repairs because it stays flexible, will not peel, and seals against water.
Use Tools That Ensure Pressure and Precision
- Clamps or rubber bands: Hold soles firmly during cure.
- Duct tape: Acts as a clamp or mold for rebuilding heels.
- Putty knife or toothpick: Spread or inject glue into tight gaps.
- Weights (e.g., soup cans): Press soles flat when clamps are not available.
- Sharp blade: Trim excess cured adhesive.
Repair a Delaminating Sole

When the sole starts to lift, re-bonding it properly restores stability and waterproofing.
Clean Both Surfaces Thoroughly
Scrub the exposed sole and boot upper with a stiff brush. Wipe both areas with an alcohol-dampened cloth. Let dry completely. Sand any glossy surfaces lightly to improve adhesion.
Apply the Right Glue Correctly
Use Aquaseal SR or Bostik Fix and Glue for heavy-duty results. Apply a thin, even layer to both the sole and upper. For contact cements like Barge, let the glue become tacky for 2 to 3 minutes before joining. Flexible glues like Aquaseal can be pressed together immediately.
Clamp and Cure Without Disturbance
Align the sole precisely and press it down. Secure with clamps, rubber bands, or wrap tightly with duct tape. Place the boot on a flat surface, or fill it with heavy cans to apply downward pressure. Let cure for 8 to 12 hours minimum. For maximum strength, wait 24 hours before wearing.
Fix Tears and Cracks in Material

Whether it is a gash in leather or a split in rubber, sealing the gap prevents further tearing.
Back Large Tears Before Gluing
For holes or through-and-through tears, apply duct tape to the inside of the boot. This creates a base for the adhesive and keeps the edges aligned. Press the tear closed and secure with tape on the outside.
Fill Deep Cracks Completely
Use Shoe Goo or Aquaseal SR. Squeeze or brush the glue deep into the crack. Work it into every crevice with a toothpick. Overfill slightly because shrinkage may occur as it dries.
Seal and Reinforce the Surface
After the initial layer cures for 8 to 12 hours, apply a second coat over the top. This creates a waterproof, abrasion-resistant cap. For leather, follow with a conditioner to blend the repair and maintain flexibility.
Rebuild a Worn or Missing Heel
A collapsed heel throws off your balance and strains your back. Rebuilding it restores function and comfort.
Create a Mold with Duct Tape
Wrap tape around the edge of the heel to form a wall. This dam contains the liquid adhesive and shapes the new heel. Make sure the tape adheres well to clean, dry surfaces.
Pour in Flexible Rubber Adhesive
Use Aquaseal SR for best results. Pour or spread it into the taped area until it matches the height of the original heel. Place the boot upside down on a level surface so the adhesive spreads evenly.
Let It Cure Fully Before Use
Wait at least 12 hours before removing the tape. Sand the surface lightly to smooth edges and restore tread pattern if needed. Test walk on carpet first to ensure stability.
Repair Peeling Rands and Seals

Peeling rands leave the toe vulnerable. Reattaching them protects against future damage.
Clean Under the Peeling Edge
Lift the rand gently and brush out dirt. Wipe both the rand and boot upper with alcohol. Let dry completely.
Inject Adhesive into the Gap
Use a toothpick or small brush to apply Aquaseal SR under the rand. Ensure full coverage along the entire separation line. Press the rand down firmly.
Tape and Hold for 12 Hours
Wrap duct tape tightly around the toe section to maintain pressure. Let cure undisturbed. For large areas, repeat with a topcoat after the first layer sets.
Seal Leaks and Prevent Water Ingress

Even small cracks can let in water. A proper seal keeps your feet dry.
Target Seams and Stitch Holes
Clean the area with alcohol. Apply Aquaseal SR along stitched seams and any pinholes. Use a brush to work the glue into the thread.
Cure on a Flat Surface
Place the boot sole-side up on a level surface. Let cure for 8 to 12 hours. The result is a flexible, waterproof barrier that moves with the boot.
Extend Boot Life After Repair
A successful fix is not the end. It is the start of smarter maintenance.
Trim and Smooth Excess Glue
Once cured, use a sharp blade to slice off any overhang. Lightly sand rough spots for comfort and appearance. This prevents snagging and improves wear.
Condition Leather Regularly
Leather dries out without natural oils, making it prone to cracking. Apply mink oil or leather conditioner every 2 to 3 months. This keeps fibers supple and prevents new tears.
Apply Weatherproofing After Each Fix
Spray or rub on a waterproofing agent after repairs. Wax-based products add durability. Sprays are quicker for canvas. Reapply every few outings in wet conditions.
Avoid Heat and Stress Zones
Never dry boots near a heater or campfire. Heat breaks down adhesives and causes delamination. Also, use skip lacing to reduce pressure on repaired areas.
Frequently Asked Questions About Boot Repair
What is the best glue to fix a boot sole?
Aquaseal SR is the top recommendation for sole reattachment. It stays flexible under stress, resists peeling, and creates a waterproof seal. Barge Cement is another strong option for heavy-duty sole work, though it requires a 2 to 3 minute tack time before joining.
Can I use super glue to repair a boot?
Super glue is not ideal for boot repair because it becomes rigid and cracks under the constant flexing of footwear. Flexible adhesives like Shoe Goo, Aquaseal SR, or Loctite Shoe Glue perform far better over time.
How long does it take for boot glue to dry?
Most flexible rubber adhesives require 8 to 12 hours to cure fully. For maximum bond strength, especially in cold environments or for heavy rips, wait 24 to 72 hours before wearing the boots.
How do I stop my boots from leaking at the seams?
Clean the seam area with 70% isopropyl alcohol, then apply Aquaseal SR directly over the stitching. Work the adhesive into the thread with a small brush and let it cure sole-side up on a flat surface for 8 to 12 hours.
When should I replace boots instead of repairing them?
If the sole is severely structurally compromised, the upper is rotted through, or the boot has extensive damage beyond a single failure point, replacement may be the better option. DIY repair works best for minor to moderate issues like delamination, cracks, and worn heels.
How do I prevent my boots from delaminating again?
Avoid exposing boots to direct heat sources like campfires or heaters, since heat melts adhesive bonds. Clean and condition leather regularly, and apply weatherproofing treatments every few months to maintain material integrity.
Key Takeaways for Fixing Your Boots

Fixing a boot comes down to three essentials: clean surfaces, flexible adhesive, and proper curing time. Aquaseal SR stands out as the most versatile repair compound because it handles delamination, tears, heel rebuilds, and leak sealing in one product. Always prep with a stiff brush, 70% isopropyl alcohol, and light sanding to ensure the glue bonds permanently.
Your next step is to inspect your boots today. Identify the failure point, gather the right supplies, and set aside a full evening for the repair. Most fixes cure overnight, so you can have functional, waterproof boots ready to wear by morning.