How to Prevent Heel Slippage in Hiking Boots
If your heel lifts with every step on the trail, you’re not just uncomfortable—you’re setting yourself up for blisters, bruised toes, and even joint strain. Heel slippage in hiking boots is one of the most common complaints among hikers, but it’s rarely unavoidable. Whether you’re breaking in new boots or struggling with a favorite pair that’s lost its grip, the solution lies in a mix of proper fit, smart lacing, and strategic gear choices. Ignoring heel movement isn’t just painful—it can derail entire trips. The good news? With the right techniques, you can eliminate heel lift for good. This guide delivers proven, step-by-step fixes—from lacing tricks to sock science and boot modifications—so you can hike farther, safer, and blister-free.
Check Your Boot Fit: The Root Cause of Heel Slippage

Test Heel Cup Snugness Before You Hike
A secure heel starts with a properly fitted boot. The heel cup—the rigid back portion of the boot—should lock your heel in place with zero vertical movement. To test it:
– Fully undo the laces and slide your foot forward until your toes touch the front.
– Keep your leg straight (don’t bend at the knee) and try to fit one finger behind your heel.
– If your finger moves easily, the boot is too long.
– If it won’t fit at all, the boot is too short.
– Walk on a decline or ramp to simulate downhill hiking—this is when heel lift becomes most obvious.
Even a few millimeters of movement can cause blisters over time. If your heel slips during this test, don’t expect it to magically stabilize on the trail. “Your heel shouldn’t be slipping,” says a veteran boot fitter with over 15 years of experience. “You need to take up the slack and force your heel down into the heel pocket.”
Match the Boot Last to Your Foot Shape
Not all boots fit the same—even in the same size. The shoe last (the mold used to shape the boot) varies by brand and model. A mismatch here is a leading cause of heel slippage, even if the boot seems “right” in size.
– Narrow heels? Try Salomon or La Sportiva—they often run narrower in the heel.
– Wide or high-volume feet? New Balance offers D, 2E, and 4E widths, increasing your odds of a snug fit.
– High instep? Look for boots with stretchable uppers or adjustable lacing zones.
“There’s a reason big shoe companies offer many different lasts,” one expert notes. “It sounds like you have shoes that don’t match your feet.” Don’t assume your usual size will work—try multiple brands and walk in them before buying.
Fit to Your Larger Foot
Most people have one foot bigger than the other. Always size your boots to the larger foot, then adjust the fit on the smaller side using:
– Heel grips
– Custom insoles
– Double-layer socks (on one foot only)
If the imbalance is significant, consider custom orthotics to balance support and prevent slippage.
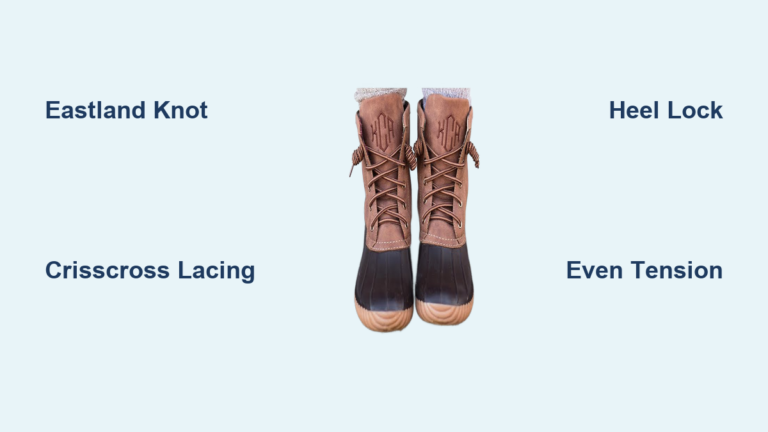
Lock Your Heel with the Runner’s Loop Lacing Technique
Apply the Heel Lock Lacing Method
The runner’s loop (also called heel lock lacing) is a game-changer for eliminating heel lift. It uses mechanical leverage to pull your heel back into the boot. Here’s how:
1. Lace normally up to the top eyelets or hooks.
2. Instead of crossing, bring each lace straight up to form a loop on each side.
3. Pass each lace through the opposite loop, creating an “X.”
4. Pull down firmly—the loops act as pulleys, cinching the ankle collar and locking the heel in place.
5. Tie a double knot to maintain tension.
This method is especially effective on boots with speed hooks or lace-lock systems. For best results, use waxed nylon or paracord laces, which resist stretching and hold tension better than flat cotton laces.
Retighten Laces Mid-Hike
Boots loosen as materials stretch and feet swell. Stop every 30–60 minutes during the first few miles to:
– Re-tighten the heel lock
– Adjust midfoot tension
– Prevent slack buildup
Avoid over-tightening above the ankle—this can cut off circulation and cause numbness. Instead, focus tension on the ankle collar where it matters most.
Choose Socks That Reduce Slippage
Wear Darn Tough or Merino Wool Socks
The right socks can make or break your fit. Darn Tough socks are a top choice for hikers because they offer a snug, compressive fit that minimizes internal foot movement. Merino wool is another excellent option—moisture-wicking, temperature-regulating, and resistant to odor.
Key features to look for:
– Seamless toes to prevent hot spots
– Targeted cushioning in high-friction zones
– Durable construction that maintains shape over long hikes
“When I switched to Darn Toughs only, I slipped less.”
Use a Liner + Outer Sock Combo
For boots with a little extra space, a liner sock and outer sock combination can:
– Fill volume without compressing toes
– Reduce friction between skin and boot
– Wicks moisture away from the foot
Do not wear three socks—extra layers increase shear and blister risk. And beware: too-thick socks can lift your heel out of the heel cup. Always test sock combinations before hitting the trail.
Upgrade to Supportive Insoles

Install Deep-Heel-Cup Footbeds
Aftermarket insoles can transform a loose boot into a secure one. Look for models with a deep heel cup and firm arch support:
– Superfeet Green or Hike: Known for stabilizing the foot and eliminating heel rub.
– Powerstep or FootActive: Great for mild overpronation and moderate cushioning.
– Oboz insoles: Designed specifically for hiking, with excellent contouring.
“I switched to Superfeet Trailblazer insert and instantly felt better—zero rubbing.”
Avoid Insoles That Lift Your Heel
Some rigid orthotics, especially blue Superfeet, can raise your heel instead of securing it. The stiff rear portion may “rock” over contoured midsoles, causing instability and paradoxical slippage.
“The blue Superfeet insoles are likely part of the problem. I question whether you even need them.”
If you notice increased lift after adding insoles, try flat or neutral footbeds like the New Balance MO889, which allow natural foot movement without artificial elevation.
Add Heel Grips and Foam Liners
Use Silicone or Gel Heel Grips
Stick-on gel or silicone heel grips increase friction between your foot and the boot lining.
– Place them directly in the heel cup.
– They grip both sock and boot, reducing lift.
– Replace when adhesive weakens.
“Insert silicone or gel heel grips inside the boot. They increase friction and reduce heel slippage.”
Install Foam Heel Liners
For boots with excess vertical space, foam heel liners are a low-cost fix. Cut to size and place just above the heel inside the boot.
– Prevents upward movement
– Ideal for older or slightly stretched boots
– Easy to swap or remove as needed
“Has anyone tried ‘heel liners’? They’re foam strips a few inches long, placed above the heel.”
Tape Your Heel for Maximum Protection
Apply Leukotape P Before Every Hike
Leukotape P is a medical-grade tape that creates a durable, non-slip barrier on your heel.
– Apply it directly to the back of your heel before putting on socks.
– Smooth it down firmly to prevent wrinkles.
– Works all day, even in wet or sweaty conditions.
“Leukotape – socks – boots. I’ve got bony heels and this was the lasting answer for me.”
Use it proactively, not after blisters form. It’s especially useful on long descents or multi-day treks.
Use Moleskin for Extra Cushioning
Moleskin adds padding and reduces shear.
– Cut a piece and apply to your heel or inside your sock.
– Back it with duct tape for durability.
– Ideal for known pressure points or long hikes.
“A little proactive Leukotape goes a long way. Even with perfect boots, I tape my feet.”
Modify Boots for Better Heel Control

Attach a Heel Lock Strap
For older or stretched boots, a heel lift strap can restore stability.
– Clips or loops onto the boot’s heel tab.
– Pulls the heel down and back with adjustable tension.
– Great for boots that are still structurally sound but have lost their snugness.
Soften Stiff Heel Counters
Some boots, like Inov-8, have rigid heel cups that resist foot shape.
– Use a garment steamer or kettle to apply steam for 30 seconds.
– Immediately wear the boot with thick socks for 1–2 hours to mold the heel.
– Repeat if needed.
“You can soften the heel cup in Inov-8s using steam and then mold it to fit—works in theory.”
Replace Boots When Necessary
Know When to Retire Old Footwear
Even with fixes, boots wear out. Replace them if:
– They’re older than 2–3 years
– They’ve seen over 500 miles of use
– The sole is separating or midsole is compressed
– Heel slippage persists despite all adjustments
“If your boots are more than 2–3 years old or have significant wear, consider replacing them.”
Choose Boots Designed for Heel Stability
Some models are engineered to prevent slippage:
– Danner Trail 2650: 8mm heel-to-toe offset + external heel counter
– Lowa Renegade: Flexible yet secure heel cup
– Salomon Quest 4: SensiFit technology wraps the foot snugly
“I’ve found other boots that eliminate [heel lift] completely.”
Break In Boots the Right Way
Wear Them Indoors First
Never start a long hike in stiff, unbroken boots.
– Wear them 1–2 hours daily indoors.
– Walk on hard floors and stairs.
– Focus on downhill motion to test heel stability.
Test on Inclines Early
Visit a store with a ramp or simulate descent hiking:
– Wear full hiking gear.
– Walk slowly downhill.
– Feel for heel lift or toe jamming.
“Please don’t dismiss podiatry entirely… I vowed never to start a long trek with new footwear—or even new insoles.”
Shop Later in the Day
Feet swell with activity. Always try on boots:
– In the afternoon or evening
– With your hiking socks
– After walking around for 10+ minutes
This mimics real trail conditions and ensures a true fit.
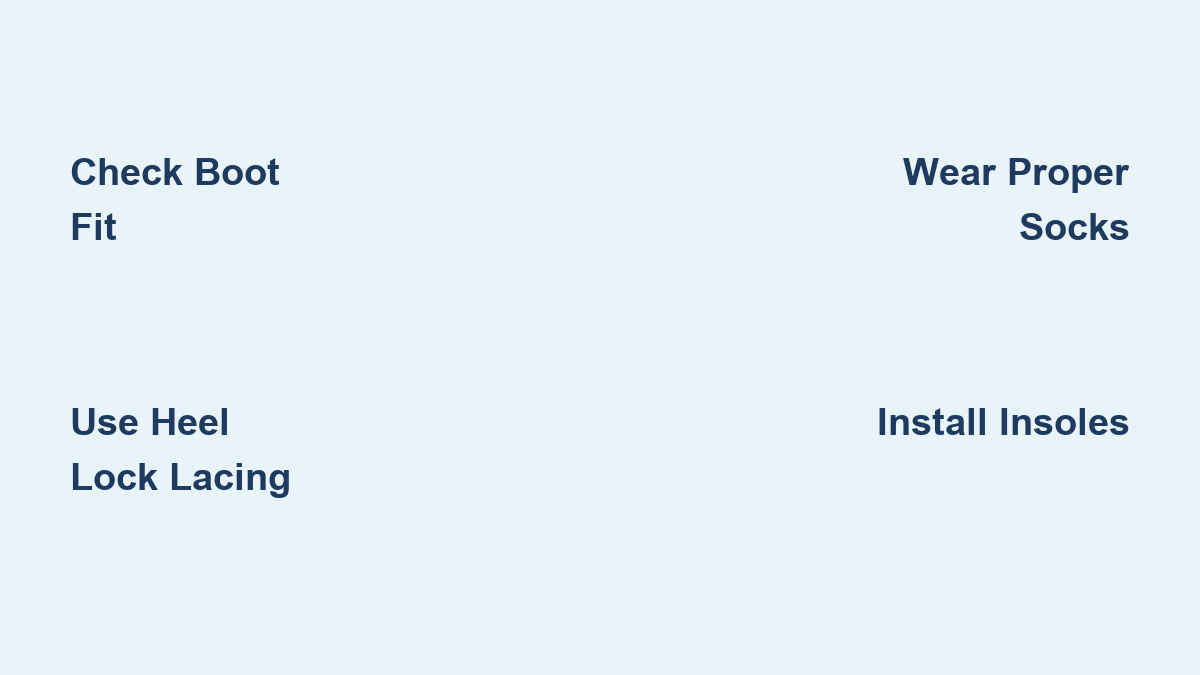
Final Step-by-Step Plan to Stop Heel Slippage
| Step | Action | Why It Works |
|---|---|---|
| 1 | Get feet professionally measured | Ensures correct length and arch match |
| 2 | Try multiple brands and lasts | Finds anatomical fit (e.g., New Balance, Salomon) |
| 3 | Use heel lock lacing | Locks heel with mechanical tension |
| 4 | Install supportive insoles | Stabilizes foot and deepens heel cup |
| 5 | Wear Darn Tough or double socks | Adds volume, reduces friction |
| 6 | Apply Leukotape or moleskin | Prevents blisters before they start |
| 7 | Insert gel heel grips | Increases internal friction |
| 8 | Retighten laces mid-hike | Compensates for loosening materials |
| 9 | Replace boots every 2–3 years | Avoids wear-related instability |
| 10 | Never hike far in untested boots | Prevents avoidable injury |
Heel slippage isn’t normal—it’s a warning sign. By combining proper fit, smart lacing, and preventive protection, you can hike with confidence, comfort, and zero blisters. Start with fit, reinforce with technique, and protect with prevention. Your feet—and your next adventure—depend on it.