Best Lacing Techniques for Hiking Boots (2026 Guide)
If your hiking boots are pinching, slipping, or bruising your toes, the problem might not be your boots—it’s likely your lacing. Most hikers rely on the basic criss-cross method, but that one-size-fits-all approach often fails on rugged trails, long descents, or with unique foot shapes. The solution? Strategic lacing techniques that transform how your boots fit—without buying new gear.
Proper lacing gives you control over pressure, stability, and comfort. It can eliminate heel slip, relieve high instep pain, prevent black toenails, and stop blisters before they start. Whether you’re tackling steep switchbacks or enduring a 20-mile trek, adjusting your laces takes seconds and pays off in miles. This guide delivers field-tested, expert-approved lacing methods—no special tools, just smarter use of the laces you already have.
Heel Lock Lacing for Downhill Stability
Stop heel lift and protect your toes on steep descents.
Standard Heel Lock (Lace Lock)
When hiking downhill, your foot slides forward, jamming your toes into the boot’s front and causing bruising or black toenails. The heel lock solves this by cinching your heel firmly in place without increasing pressure on the top of your foot.
Steps:
1. Lace normally up to the second-to-last eyelet.
2. Instead of crossing, feed each lace up through the top eyelet on the same side.
3. Cross the laces and thread each end through the loop on the opposite side.
4. Pull tight to lock the heel, then tie a secure double knot.
Pro Tip: This creates a mechanical “cinch” that stabilizes your heel independently of instep tension—ideal for long descents.
Mid-Foot Heel Lock (AMC Method)
Designed for boots with speed-lacing hooks, this technique locks tension at the midfoot, preventing heel lift while maintaining ankle flexibility.
Steps:
1. Lace snugly to the eyelet just before the ankle curve.
2. Run each lace straight up to the next hook, skipping a criss-cross.
3. Tie a surgeon’s knot below this point to secure the tension.
4. Thread each lace under the opposite lace between the hooks.
5. Pull upward to tighten and finish with a knot.
Warning: Apply the lock at the foot’s upward curve, not the calf. Too high can restrict blood flow.
Loop-and-Pull (Oboz Style)
A fast, reliable method that uses loops for leverage—perfect for quick trail adjustments.
Steps:
1. Create a loop with each lace at the top eyelets.
2. Cross the laces and feed each through the opposite loop.
3. Pull down to tighten the midfoot.
4. Tie a standard knot.
Visual Guide: See Oboz’s YouTube demo at 2:14 for real-time application.
Window Lacing for High Instep Pressure Relief
Eliminate discomfort across the top of your foot.
Standard Window Lacing (Box Lacing)
If your boot presses on the top of your foot, especially with high arches or bunions, window lacing creates a “floating” section that bypasses the painful zone.
Steps:
1. Identify the pressure point (usually midfoot).
2. Unlace just below this area.
3. Run both laces vertically up each side, skipping the eyelets directly over the sensitive spot.
4. Resume criss-cross lacing above.
5. Tie securely.
Best For: Narrow boots with high insteps, swelling, or post-injury sensitivity.
Surgeon’s Knot Window Lacing
Adds a tension lock below the window to prevent upward pull that defeats the relief.
Steps:
1. Lace normally until just before the pressure zone.
2. Tie a surgeon’s knot (double wrap before tightening).
3. Run laces vertically up the sides, skipping the tight section.
4. Resume criss-cross above.
5. Finish with a double knot.
Why It Works: The knot acts as a barrier—tightening above doesn’t compress the instep.
Skip Lacing for Ball-of-Foot Comfort
Relieve pressure on the metatarsals and wide forefeet.
How to Apply Skip Lacing
Ideal if your boots squeeze the ball of your foot, causing metatarsalgia or numbness.
Steps:
1. Locate the eyelets over the painful area (often near the ball of the foot).
2. Skip threading through these eyelets.
3. Continue criss-cross lacing above and below the gap.
4. Pull evenly and tie.
User Benefit: Skipping just one pair of eyelets can instantly reduce forefoot pressure.
Pro Tip: Combine with a heel lock for downhill hikes—loose forefoot, locked heel.
Toe-Relief Lacing for Downhill Comfort
Give toes room to swell without losing support.
How to Apply
Prevents toenail trauma during long descents when feet naturally slide forward.
Steps:
1. Start lacing from the second set of eyelets, skipping the bottom pair.
2. Proceed with normal criss-cross lacing up the boot.
3. Keep the forefoot looser while securing the heel and midfoot.
Best For: Long descents, wide forefeet, or feet that swell on the trail.
Expert Move: Pair with a heel lock for full downhill protection.
Surgeon’s Knot for Tension Control
Lock in fit at specific zones.
How to Tie a Surgeon’s Knot
This knot prevents loosening and allows segmented tension control.
Steps:
1. Cross laces as in a standard knot.
2. Wrap the laces around each other twice before pulling tight.
3. Finish with a regular bow.
Uses:
– Lock tension below a pressure zone
– Secure midfoot before applying heel lock
– Prevent slippage during long hikesKey Benefit: Resists loosening better than a standard bow—critical for glove-friendly adjustments.
Straight-Bar Lacing for Narrow Feet
Snug fit with even pressure.
How to Apply
Perfect for narrow or low-volume feet that shift inside boots.
Steps:
1. Lace straight across the bottom eyelets.
2. Run each lace vertically up to the next eyelet on the same side.
3. Cross over and pull tight at each level.
4. Repeat up the boot.
Advantage: Eliminates diagonal pull, reduces friction, and fills excess volume.
Bonus: Great for military or tactical boots.
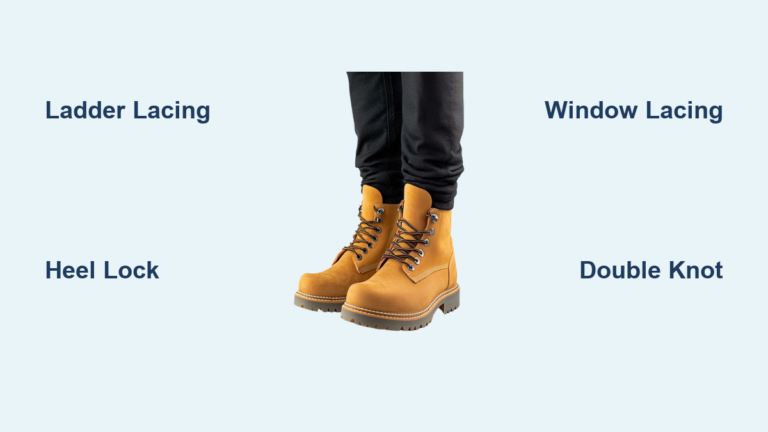
Ladder Lacing for Extra Stability
Maximize support in flexible boots.
How to Apply
Ideal for worn or low-support boots that need extra lockdown.
Steps:
1. Lace straight across the bottom eyelets.
2. Run laces vertically up to the second eyelet pair.
3. Cross laces and wrap each under the vertical segment from below.
4. Feed down through the next eyelet pair.
5. Repeat up the boot.
Result: A grid-like pattern that locks the foot in place.
Best For: Rugged terrain or soft uppers.
Friction-Free Lacing for Durability
Extend lace life and reduce wear.
How to Apply
Minimizes lace-on-lace abrasion in high-use boots.
Steps:
1. For even-numbered eyelets: thread the bottom lace downward.
2. For odd-numbered eyelets: thread outward.
3. Alternate entry (over-under) at each pair.
4. Eliminates direct rubbing points.
Outcome: Laces last longer and slide smoother during adjustments.
Diagonal Lacing for Bunion Relief
Shift pressure from the big toe joint.
How to Apply
Ideal for hallux valgus, bunions, or medial foot pain.
Steps:
1. Start from the lowest eyelet on the outer side.
2. Bring the lace diagonally up and out through the top eyelet on the inside.
3. With the other lace, criss-cross normally to the top.
4. Tie securely.
Effect: Reduces pressure on the inner forefoot and prevents toe impact.
Prevents: Subungual hematoma (black toenails).
Classic Criss-Cross: When to Use It
The default method—for when no issues exist.
Standard Criss-Cross Lacing
Best for well-fitting boots and neutral foot types.
Steps:
1. Thread diagonally from bottom eyelets, crossing to opposite side.
2. Repeat up the boot.
3. Tie with a double knot.
Limitation: Doesn’t address pressure points—use only if no discomfort.
Upgrade Tip: Add a surgeon’s knot at midfoot for added security.
Match Lacing to Your Foot Type
Customize fit based on anatomy.
| Foot Type | Best Technique | Why |
|---|---|---|
| High Arches / High Instep | Window Lacing + Surgeon’s Knot | Prevents top-of-foot compression |
| Low Arches / Low Volume | Straight-Bar Lacing | Fills space, prevents slippage |
| Wide Feet | Skip Lacing + Straight-Bar | Reduces forefoot pressure |
| Narrow Feet | Skip Eyelets + Surgeon’s Knot | Eliminates excess volume |
| Swollen Feet | Mid-Hike Window Lacing | Accommodates swelling without re-lacing fully |
Adjust Lacing by Terrain
Change technique based on trail direction.
Uphill Hiking
Goal: Promote circulation and ankle mobility.
Method:
– Loosen laces around the ankle
– Keep instep snug
– Allows natural flexion, reduces fatigue
Avoid: Over-tightening the top—can restrict blood flow.
Downhill Hiking
Goal: Stop foot slide and protect toes.
Method:
– Tighten forefoot lacing
– Apply heel lock
– Consider toe-relief lacing (skip bottom eyelets)
Pro Combo: Heel lock + loose forefoot = zero toe jamming.
Advanced Tips from Boot Fitters
Expert-level hacks for long hikes.
- Segment Fit with Surgeon’s Knots: Divide the boot into zones—snug midfoot, loose instep, locked heel.
- Loop the Top Eyelet: After tying, loop each lace end through the top eyelet and tuck under to prevent loosening.
- Round Lace Security Hack: Wrap twice before tying for a double-loop bow that stays tight.
- Use Lace Anchors or Garages: Tuck excess lace to prevent snagging.
Avoid These Common Lacing Mistakes
| Mistake | Risk | Fix |
|---|---|---|
| Lacing too tight | Numbness, poor circulation | Use finger test—no space under laces |
| Uneven tension | Blisters, hot spots | Re-lace if one side feels tighter |
| Ignoring discomfort | Blisters, calluses | Adjust laces immediately |
| No heel lock on descents | Black toenails | Apply before downhill sections |
| Using frayed laces | Sudden failure | Replace every 6–12 months |
Maintain Laces and Boots
Extend gear life with simple habits.
- Replace laces when frayed or stretched.
- Unlace fully when removing boots—preserves heel counter.
- Clean laces monthly with mild soap and water.
- Store boots unlaced to maintain shape.
Bonus: Proper lacing reduces stress on eyelets and uppers—adds years to boot life.
Learn From Visual Guides
See techniques in action.
Recommended Resources:
-
Explorer Chick – Photo-based guide to skip, window, and heel lock lacing
explorerchick.com/journal/how-to-lace-boots-for-hiking -
Fieggen’s Shoelace Site – Full database with diagrams and animations
fieggen.com/shoelace -
Oboz YouTube Channel – Video demos of:
– Surgeon’s knot (start)
– Heel lock (2:14)
– Window lacing
– Round lace tying
Final Tips for Trail-Ready Lacing
- Test early: Try techniques on short hikes before long trips.
- Carry a cheat sheet: Print key methods and stash in your pack.
- Combine methods: Use surgeon’s knot + heel lock + window for full customization.
- Listen to your feet: Discomfort means adjust—don’t tough it out.
- Prioritize function: The best lacing is the one that keeps you moving pain-free.
Mastering lacing techniques turns your hiking boots into a dynamic support system. With these methods, you’re not just wearing boots—you’re engineering a custom fit for every trail, every foot, and every mile.