
How to Fix a Scuffed Leather Boot
A scuffed leather boot can ruin an otherwise sharp look. Whether it’s a light surface mark from daily wear or a deep gouge from a rough encounter, most scuffs are fixable with the right approach. The key is diagnosing the type of damage correctly, because not all scuffs are created equal. Some are just transferred material; others involve actual leather damage. Knowing the difference determines whether you need a simple wipe or a full restoration.
This guide walks you through every step, from identifying the scuff to applying the perfect finish, using only safe, proven methods. You’ll learn how to restore your boots like a pro, avoid common mistakes, and protect them for long-term wear, all without damaging the leather.
Identify the Type of Scuff on Your Leather Boot

Before touching your boot with any product, determine what kind of damage you’re dealing with. The repair method depends entirely on the scuff type.
Material Transfer vs. Leather Damage
A black mark on your boot isn’t always a scratch. Often, it’s material transfer, meaning rubber from a sole or pavement residue pressed onto the surface. This doesn’t harm the leather and wipes away easily. True abrasive scuffs remove finish or dye, leaving lighter patches. These require conditioning or polishing. Deeper scratches and gouges break the leather fibers and need filling and recoloring.
Spot Surface Scuffs and Deep Gouges
Surface scuffs appear as dull, faded streaks where friction has worn down the top layer. They’re common on toes and heels. Deep gouges feel indented and may show missing leather. Use your fingertip to test depth. If it catches, you’ll need filler. Cuts that go through the leather are structural and often beyond cosmetic repair.
Check Leather Color and Texture
Dark boots, especially black, hide repairs better than light tan or brown. Soft, full-grain leather absorbs conditioners well but may show texture differences after deep repairs. Firm leather holds polish and filler more reliably. Always assess under bright light to see the true extent of damage.
Gather the Right Repair Supplies
Using the correct tools makes the difference between a seamless fix and a messy mistake. Start with basics, then add specialized products based on scuff depth.
Essential Cleaning Tools
You’ll need:
– Soft microfiber cloths (lint-free)
– Damp cloth for wiping
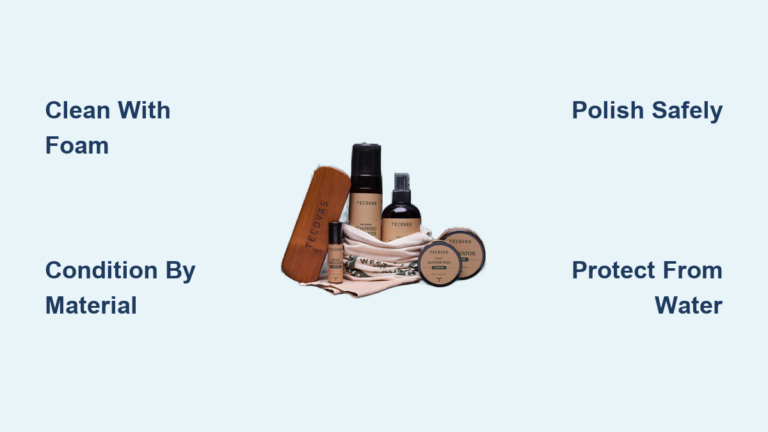
– Specialized leather cleaner (e.g., Tecovas, Fiebing’s)
– Pencil eraser (for rubber marks)
– Toothbrush or soft shoe brush
Avoid household chemicals like alcohol, nail polish remover, or dish soap. They strip natural oils and cause cracking.
Repair Products by Damage Level
For light scuffs:
– Leather conditioner (natural oils)
– Color-matched cream polish
For deep scratches and gouges:
– Resin-based repair cream (e.g., Saphir Renovating Repair Cream)
– Leather filler compound
– Matching leather dye
– Clear sealant
For loose flaps:
– Barge Cement or instant glue (use sparingly with a toothpick)
Finishing and Protection Kit
- Hard wax polish (carnauba-based for shine and fill)
- Water and stain protector spray
- Buffing brush or soft cloth
- Fine-grade sandpaper (400+ grit)
Keep everything organized before starting. Work in a well-lit, dust-free area.
Clean the Boot Surface First
Skipping cleaning leads to trapped dirt under polish or filler, worsening the appearance.
Remove Loose Dirt and Debris
Wipe the entire boot with a dry microfiber cloth. Pay attention to seams and crevices where dust accumulates. This prevents scratching during deeper cleaning.
Deep Clean with Leather-Safe Products
Apply a small amount of leather cleaner to a damp cloth, not directly on the boot. Work in gentle circles, focusing on scuffed zones. For stubborn grime, use a spot remover like Fiebing’s. Never soak the leather.
Dry Naturally Without Heat
Let boots air dry at room temperature for 10 to 30 minutes. Avoid radiators, hair dryers, or direct sunlight. Heat dries out leather, making it brittle and prone to cracking.
Trim and Smooth Damaged Edges
If a gouge has raised or frayed leather, gently trim with scissors or sand with fine paper. Create a smooth base so filler or polish adheres evenly. Wipe away dust afterward.
Remove Rubber and Transfer Scuffs
When the scuff isn’t a scratch, removing the foreign material restores the boot instantly.
Use a Pencil Eraser for Quick Fixes
Start with a standard pencil eraser. Rub firmly across the mark, in straight strokes rather than circles, to lift rubber residue. This works on most black or dark marks from shoes or floors.
Try a Magic Eraser With Caution
Dampen a melamine foam pad and wipe gently. It acts like fine sandpaper, so test first on an inconspicuous spot. Don’t use on suede or nubuck. Overuse can dull the finish.
Apply Mild Abrasive Paste for Stubborn Marks
Mix baking soda or non-gel toothpaste with water into a paste. Apply with a soft cloth using light pressure. Rinse with a damp cloth and dry. Only use this if eraser methods fail.
Final Wipe and Inspection
After cleaning, wipe the area with a dry cloth. Check if the mark is gone. If it remains, it’s likely a true scuff. Move to conditioning and polishing.
Repair Light Surface Scuffs and Faded Marks

Most everyday scuffs are superficial and respond well to conditioning and polishing.
Buff the Area with a Soft Cloth
Rub the scuffed zone in small circles. Buffing smooths disturbed fibers and can make minor marks disappear, especially on oiled leathers.
Condition to Hide Scuff Lines
Apply a natural leather conditioner (e.g., Tecovas Renovator) with your fingertips. Massage it into the scuff using circular motions. The oils swell the leather fibers, blending the damaged area with the surrounding surface.
Let it absorb for 15 to 30 minutes, then buff lightly. Repeat if needed. This step alone fixes many light scuffs.
Apply Color-Matched Cream Polish
If conditioning isn’t enough, use a cream polish in the exact shade of your boot. Kelly’s or Saphir Pommadier work well. Apply a small amount with a cloth, using tiny circles to work it into the leather.
Let it dry, then buff vigorously. The pigment fills micro-abrasions and restores even color.
Build Shine with Wax Polish
For a polished finish, apply a hard wax polish (e.g., Angelus or Tecovas Clear Wax). Use a separate cloth, apply in thin layers, and let each absorb before buffing.
Repeat 2 to 6 times for deep scuffs. The carnauba wax fills tiny imperfections and adds a protective shine.
Fix Deep Scratches and Gouges
When leather is visibly indented or missing, surface treatments won’t suffice. You need to rebuild the surface.
Choose the Right Filler Method
For small to medium gouges, resin-based repair cream (e.g., Saphir Renovating Repair Cream) is ideal. It bonds permanently, contains pigment, and won’t rub off.
For large depressions, use a leather filler kit with patching compound, then dye and seal.
Apply Resin Repair Cream
Clean and dry the area. For small scratches, apply the cream directly with your finger. For larger areas, mix with an equal part of cream polish for smoother spread.
Massage it into the gouge until level with the surface. Let it dry completely (30+ minutes). It will harden and become non-transferable.
Use Filler for Major Depressions
Apply liquid filler with a brush, building it up in thin layers. Let each layer dry (2 to 4 hours) before adding the next. Stop when the surface is flush.
Lightly sand if needed with 400+ grit paper. Wipe clean.
Recolor and Seal the Repaired Spot
Apply matching leather dye in thin coats. Let each dry before adding the next. This prevents streaking and allows better blending.
Once the color matches, seal with a clear leather sealant or wax to protect the repair from moisture and wear.
Handle Raised Leather Flaps

Sometimes a gouge lifts a flap of leather instead of tearing it off. Gluing it down preserves the original material.
Use Minimal Adhesive
Place a tiny dot of Barge Cement or instant glue on a piece of paper. Dip a toothpick into it and apply only to the underside of the flap. Avoid overflow.
Press and Hold Firmly
Lay the flap flat and press down for 30 seconds. Let it cure undisturbed for at least an hour.
Sand and Polish for Blend
If the glued area is uneven, lightly sand with fine paper. Then apply cream polish and buff to match the surrounding texture.
Avoid this method on flexible zones like the toe box crease. Glue will crack with movement.
Finish and Protect the Boot
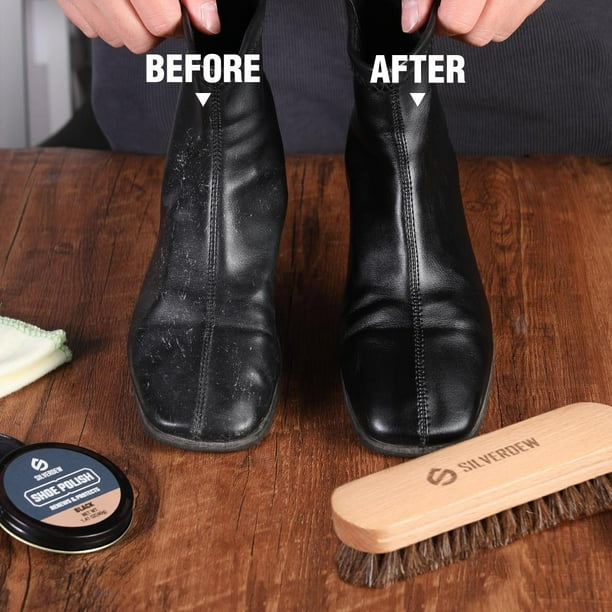
The final steps ensure durability and a professional look.
Polish the Entire Boot for Uniformity
Even if you repaired one spot, apply wax polish to the whole boot. This avoids a patchy appearance and creates an even shine.
Buff with a brush or cloth until glossy. This also helps hide minor wear across the surface.
Apply Water and Stain Protector
Spray a fluoropolymer-based protector (e.g., Tecovas Water and Stain Protector) from 6 inches away. Cover all surfaces, including seams.
Let dry 10 to 15 minutes. This adds a breathable barrier against future scuffs, water, and salt.
Maintain Shine with Regular Care
Buff lightly after each wear. Reapply protector every few months. Condition every 4 to 6 weeks to keep leather supple and scuff-resistant.
Prevent Future Scuffs and Damage
The best repair is one you never need.
Use Toe Guards for High-Wear Zones
Leather or rubber toe caps absorb impact and prevent scuffing. Ideal for work boots or frequent walkers. They’re discreet and replaceable.
Rotate Your Boots
Wearing the same pair daily accelerates wear. Rotate between 2 to 3 pairs to let leather rest, dry out, and recover shape.
Store Properly with Shoe Trees
Insert cedar shoe trees to maintain shape, absorb moisture, and reduce creasing. Store in a cool, dry place away from sunlight.
Avoid Common Mistakes
Don’t over-polish. Buildup cracks and looks unnatural. Never use heat to dry wet boots. Skip household cleaners. And don’t apply rigid fillers to flexible areas. They’ll crack.
When to See a Professional

Some damage is beyond DIY.
Deep Structural or Exotic Leather Damage
If the scratch goes through multiple leather layers, or if you own boots made from exotic skins (ostrich, alligator), seek a professional cobbler. These require specialized tools and dyes.
Failed Home Repairs
If conditioning, polishing, and filling haven’t helped, a pro can buff deeper, use custom color mixes, or perform partial resurfacing.
Cuts and Seam Damage
While cuts can be glued or sewn for function, they rarely look seamless. A cobbler may patch or replace sections, but aesthetic perfection isn’t guaranteed.
Frequently Asked Questions About Fixing Scuffed Leather Boots
Can I use household products to fix scuffed leather boots?
Yes, but with caution. A pencil eraser works well for rubber transfer marks. Baking soda or non-gel toothpaste can lift stubborn scuffs. However, avoid nail polish remover, alcohol, and dish soap. These strip natural oils and cause cracking.
How do I tell if a scuff is just surface dirt or actual damage?
Run your finger over the mark. If it feels smooth and sits on top of the leather, it’s likely material transfer. If the area feels lighter, rough, or indented, the leather itself is damaged and needs conditioning or filling.
Will fixing a deep gouge make my boot look new?
It depends on the leather color and depth. Black boots hide repairs very well and can often look nearly new. Light tan or soft leather may still show subtle texture differences even after professional repair. The goal is significant improvement, not always perfection.
How long does a leather repair last?
Resin-based fillers and proper dye work bond permanently and won’t rub off. Wax polishes may need reapplication every few months. With regular conditioning and protection, a solid repair can last for years.
What’s the best product for deep scratches?
Resin-based repair creams like Saphir Renovating Repair Cream are ideal. They contain pigment, bond permanently to the leather, and won’t transfer onto clothing once dry. For very large depressions, a leather filler kit with patching compound works better.
Can I fix scuffs on suede or nubuck boots the same way?
No. Suede and nubuck require different tools like suede brushes and specialized erasers. The methods in this guide apply to smooth, finished leather only. Using wax or cream polish on suede will ruin the texture.
Key Takeaways for Restoring Your Scuffed Leather Boots
Most scuffed leather boots can be restored at home with the right diagnosis and tools. Start simple: clean, condition, and polish. For deeper damage, use resin fillers and matching dye, then seal and protect the surface.
Regular maintenance is just as important as the repair itself. Condition every 4 to 6 weeks, rotate your boots, and store them with shoe trees. With consistent care, your boots can look sharp for years, not just seasons.