How to Fix Boot Heels: Quick Steps
A favorite pair of boots with a worn-down heel or a sole flapping open can feel like a death sentence for the shoes. Beyond looking rough, damaged heels throw off your posture, drain shock absorption, and turn every step into a slip hazard. The good news is that learning how to fix boot heels at home is easier than most people think. With the right adhesive, a few basic tools, and some patience during curing, you can restore work boots, hiking boots, and dress shoes to like-new condition for under twenty dollars. This guide covers diagnosis, repair methods, adhesive selection, and prevention so you can stop replacing boots and start repairing them.
Diagnose the Damage Before You Start
Jumping straight to glue wastes time and materials. A proper diagnosis ensures your repair actually holds.
Identify the Most Common Heel Problems
- Worn rubber heel caps: The bottom contact surface is thin, flat, or uneven, reducing traction and comfort.
- Sole or heel separation: A visible gap appears where the upper meets the sole, often starting at the toe or heel edge.
- Cracks or tears in the upper: Splits in leather or fabric, especially near the heel collar or flex points.
- Interior heel lining holes: Worn spots inside the heel cup that cause blisters and rubbing.
Match the Problem to the Right Fix
| Problem Type | Recommended Fix |
|---|---|
| Worn rubber heel caps | Replace with 3.5–4mm rubber pads |
| Separated sole or heel | Re-bond with Shoe Goo or epoxy |
| Leather or fabric tears | Patch with adhesive and reinforcement |
| Interior lining holes | Apply self-adhesive interior patch |
Using fabric glue on rubber or skipping surface prep both lead to repairs that fail within weeks.
Replace Worn Rubber Heel Caps

This is the most common boot heel fix and works on nearly any boot with a flat, detachable rubber base.
Gather Your Tools and Materials
- Replacement rubber heel pads (3.5mm for dress boots, 4mm for work and hiking boots)
- Box cutter with fresh blades
- Sandpaper or metal file (80–120 grit)
- Isopropyl alcohol wipes
- Strong adhesive like Shoe Goo or Barge Cement
- Rubber bands, duct tape, or heavy objects for clamping
Square pads suit block heels and work boots. Semicircular pads fit tapered dress shoe heels. Choose black, brown, or clear based on the boot color.
Sand and Clean the Heel Surface
Roughen the existing heel with sandpaper until smooth and textured. This removes old glue and gives the new adhesive something to grip. Wipe thoroughly with isopropyl alcohol to strip away oils and dust. Let the surface dry completely before moving on.
Trace and Cut the New Pad
Place the boot heel face-down on the replacement pad and trace the outline with a sharpie. Cut along the line with a box cutter, always cutting away from your body. Test the fit; the pad should sit flush with no overhang or gaps.
Apply Adhesive and Bond the Pad
Coat both the boot heel and the back of the new pad with a generous layer of Shoe Goo. If using Barge Cement, a contact adhesive, let it dry until tacky (about 5–10 minutes) before joining. Press the pad firmly onto the heel and align it precisely. Misalignment affects both wear and balance.
Clamp and Cure for 24 to 72 Hours
Wrap rubber bands around the boot or tape the pad in place. Stack heavy objects like soup cans on top to maintain even pressure. Cure for at least 24 hours; for heavy-duty boots or E6000 adhesive, wait the full 72 hours. Do not wear the boots during curing because premature stress breaks the bond.
Finish and Repeat on the Other Boot
After curing, sand any rough edges to match the original contour. Repeat the entire process on the other boot to keep wear even and posture supported.
Reattach Separated Heels and Soles
When the sole lifts or the heel block detaches, re-bonding restores the boot’s structural integrity.
Clean Both Surfaces Thoroughly
If the sole has lifted, gently separate it further to access both bonding surfaces. Wipe the boot’s attachment edge and the sole’s inner face with a damp cloth, then follow up with isopropyl alcohol to remove grease from rubber or leather. Dry completely because moisture weakens adhesive bonds.
Apply Industrial-Strength Adhesive
For large separations, use Tuff Toe, Shoe Goo, or a two-part epoxy. These create flexible, waterproof bonds that survive flexing and wet weather. Apply a thick, even layer to both surfaces. Two-part epoxy requires mixing equal parts resin and hardener, so follow the package directions closely.
Realign and Apply Consistent Pressure
Press the sole back into its original position. Insert rolled-up towels or soup cans inside the boot directly under the repair zone to push the sole outward. Wrap tightly with duct tape or use clamps. The goal is uniform pressure across the entire bond line.
Cure Fully Before Wearing
Wait 24 hours for minor separations and 48–72 hours for heavy work boots or epoxy repairs. Surface dryness does not mean full strength, so resist the urge to test early. Cure in a well-ventilated area or outdoors because the fumes are strong.
Seal the Repair Against Moisture
After curing, brush a weatherproof sealant along the repair line. This blocks water entry, which is the leading cause of re-separation in winter or wet climates.
Repair Tears and Cracks in Boot Uppers
Small rips grow into big problems if ignored, so patch them early.
Clean and Stabilize the Tear
Wipe the area with isopropyl alcohol and let it dry. Apply duct tape to the inside of the boot over the tear to hold the edges together while you work. This prevents glue from seeping through to the exterior.
Glue with Tuff Toe or E6000
Apply Tuff Toe or E6000 to the edges of the tear and press them firmly together. These adhesives stay flexible after curing and resist cracking under stress. Avoid Aleene’s Tacky Glue because it fails on leather and rubber.
Cure and Condition the Leather
Allow 24–72 hours for full curing depending on tear size. Once dry, apply mink oil or leather conditioner to restore flexibility and protect against future cracking.
Patch Interior Heel Lining Holes
Heel slippage wears holes in the lining of sneakers and leather boots, but the fix is simple.
Use Self-Adhesive Interior Patches
Peel-and-stick interior heel patches cost around $6.95 for four pairs and work in minutes. Clean the area with alcohol, let it dry, then press the patch firmly into place. Skin-toned or black patches stay discreet.
Prevent New Holes from Forming
Wear thicker socks or add heel grips to reduce friction. This single step stops most interior lining wear before it starts.
Choose the Best Adhesive for the Job

The glue you pick determines how long the repair lasts.
Shoe Goo: Best for Rubber and Heavy Use
- Ideal for: Hiking boots, work boots, rubber soles
- Pros: Waterproof, flexible, lasts for years
- Cons: Strong fumes, so use outdoors
- Tip: Apply in thin layers for faster drying
Barge All-Purpose Cement: Superior Leather Bond
- Type: Contact cement
- Process: Apply to both surfaces, wait 5–10 minutes until tacky, then press together
- Result: Permanent, industrial-strength bond
E6000: Multi-Material Mastery
- Bonds: Rubber, leather, plastic, fabric
- Cure Time: 24–72 hours
- Use When: Repairing complex joints or mixed materials
Two-Part Epoxy: Maximum Strength
- Best for: Split heels or large sole separations
- Advantage: Stronger than most factory glue
- Drawback: Less flexible, so reserve it for rigid areas
Avoid Fabric Glues on Soles
Aleene’s Fast Grab Tacky Glue works on canvas uppers but fails on rubber. Using it on soles guarantees re-separation within weeks.
Stock the Right Tools and Safety Gear
A complete repair kit runs between $12.99 and $19.99 and covers most fixes.
Essential Kit Contents
- Cutting tools: Box cutter with spare blades or sharp scissors
- Surface prep: Sandpaper or metal file
- Application aids: Popsicle sticks for spreading glue, sharpie for tracing
- Clamping supplies: Rubber bands, duct tape, heavy books or cans
- Fasteners: Metal shoe nails (40–60 count) for mechanical reinforcement
Follow Basic Safety Rules
- Ventilation: Use Shoe Goo and E6000 outdoors or with strong airflow.
- Blade safety: Always cut away from your body and swap out dull blades because they slip more easily.
- Test first: Try any adhesive on a hidden area if the leather is delicate or exotic.
Prevent Future Heel Damage
Repairing boots is only half the job. Prevention keeps them out of the repair rotation.
Condition Leather on a Schedule
Leather loses moisture over time and becomes brittle. Apply mink oil or leather conditioner every 2–3 months. This single habit prevents most cracking and sole separation.
Rotate Between Pairs
Wearing the same boots every day accelerates wear on the heels. Rotating between two or three pairs lets each pair dry out and recover its shape.
Store Boots Properly
Use boot shapers or stuff them with paper to maintain structure. Store in a cool, dry place because damp basements and hot garages both degrade adhesives and leather.
Apply Weatherproofing After Repairs
After any fix, seal seams and edges with a waterproof spray. This protects against salt, snow, and rain, which are the top causes of adhesive failure.
Repair or Replace: Making the Smart Call
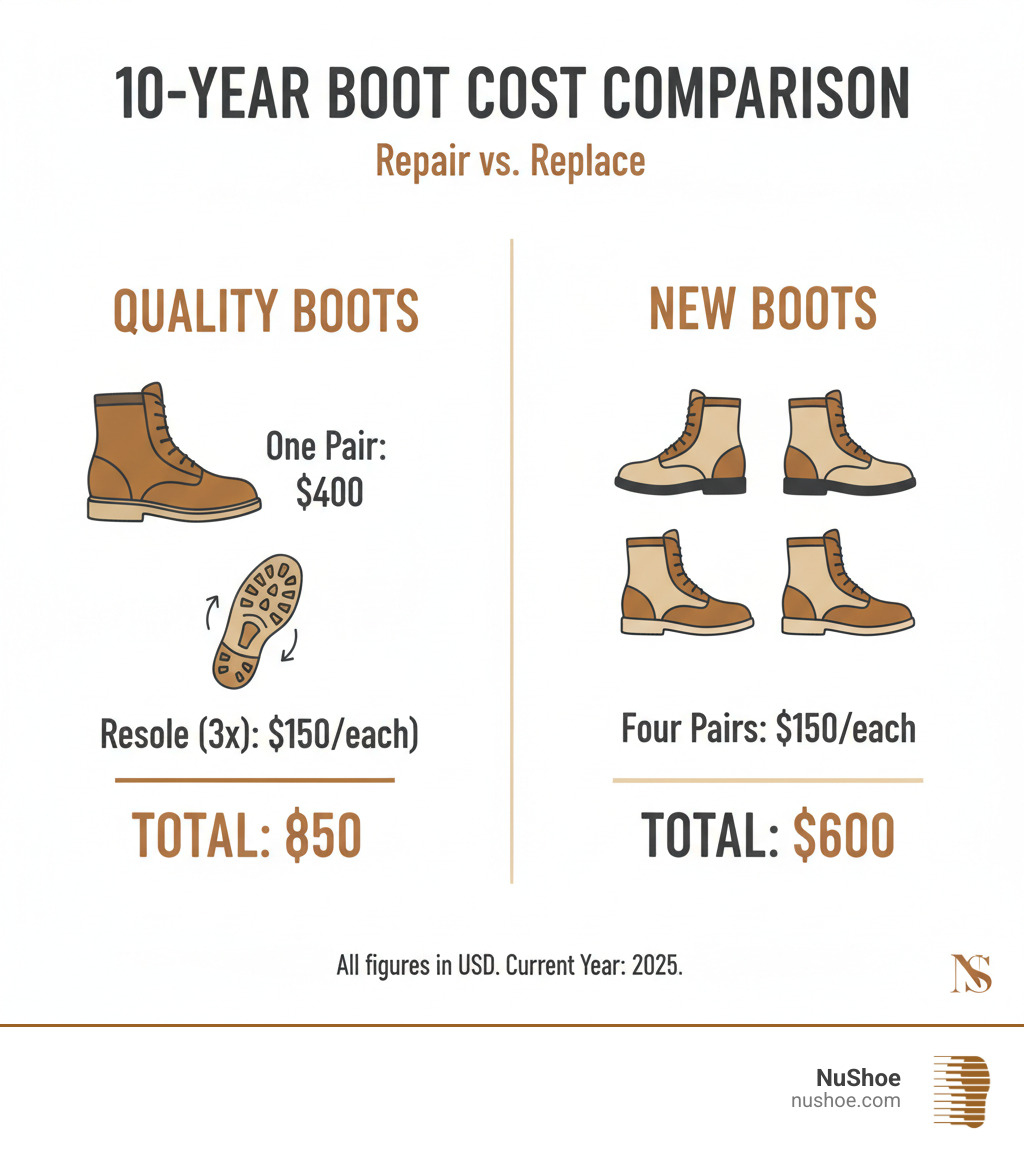
Compare the Costs
| Option | Cost Range | Lifespan After Fix |
|---|---|---|
| DIY Repair Kit | $5 – $20 | 1–3+ years |
| Cobbler Service | $40 – $80 | 1–2 years |
| New Boots | $100 – $300+ | 6 months–2 years |
A $15 kit with Shoe Goo often restores boots to better-than-new condition.
When to DIY and When to Replace
- DIY if: Sole separation is under two inches, the heel cap is worn, or cracks are minor.
- Replace if: The upper is delaminating, the midsole is crumbling, or the structural integrity is shot.
Properly repaired boots frequently outlast new budget pairs.
Pro Tips for a Professional Finish

Match Aesthetics with Clear Pads
For light-colored or fashion boots, clear rubber heel pads blend in and protect without changing the look.
Reinforce with Metal Shoe Nails
After gluing, hammer 2–3 metal shoe nails per pad for industrial durability. This step matters most for work boots.
Score Smooth Pads for Traction
Some replacement pads ship too smooth for wet conditions. Carve shallow grooves with a knife to restore grip.
Pick the Right Thickness
Chunky heels need 4mm pads for full support. Dress boots look sleeker with 3.5mm pads. Semicircular shapes fit tapered heels; square shapes fit block heels.
Frequently Asked Questions About Boot Heel Repair
What is the best glue for fixing boot heels?
Shoe Goo is the top choice for rubber soles and heavy-use boots because it stays flexible and waterproof. Barge All-Purpose Cement works best for leather bonds, while two-part epoxy delivers maximum strength for large sole separations.
How long does it take for boot adhesive to cure?
Most adhesives need 24 hours for a basic cure and 48–72 hours for full strength. E6000 and two-part epoxy always require the full 72-hour window. Surface dryness does not mean the bond has reached full strength.
Can I fix a separated sole without a cobbler?
Yes, if the separation is under two inches and the materials are intact. Clean both surfaces with isopropyl alcohol, apply Shoe Goo or Tuff Toe to both sides, clamp firmly, and cure for 24–72 hours.
How do I stop my boot heels from wearing down so fast?
Rotate between multiple pairs, condition leather every 2–3 months with mink oil, and apply weatherproofing spray. Store boots with shapers and avoid wearing the same pair in harsh conditions daily.
What thickness of rubber heel pad should I use?
Use 4mm pads for work boots and hiking boots that see heavy wear. Use 3.5mm pads for dress boots and casual wear where a sleeker profile matters.
When should I replace boots instead of repairing them?
Replace boots when the upper is delaminating, the midsole is crumbling, or the structural frame is compromised. If the damage is limited to the heel cap, sole separation, or minor cracks, a DIY repair is faster and cheaper.
Key Takeaways for Fixing Boot Heels at Home
Mastering how to fix boot heels comes down to three essentials: diagnose the damage correctly, match the adhesive to the material, and respect the full cure time. A $15 repair kit with Shoe Goo and replacement pads handles most heel issues and lasts for years. Condition leather regularly, rotate your boots, and apply weatherproofing to prevent future problems. Start with a small repair this weekend, and you’ll have the confidence to tackle any heel damage that comes your way.