How to Fix Boot Soles: Quick Steps
A boot that flaps when you walk isn’t just annoying, it’s dangerous. If your boot soles are separating, cracking, or lifting at the edges, you’re facing one of the most common footwear problems. Thousands of people deal with this every year, especially with hiking, work, and leather boots exposed to mud, water, and daily wear. The good news? Most sole separations can be fixed at home if you know the right method and adhesive.
This guide walks you through exactly how to fix boot soles using proven techniques and expert-backed methods. You’ll learn how to diagnose the damage, which glue actually works (spoiler: not super glue), and how to apply it for a repair that lasts months or years, not minutes.
Diagnose the Damage Before You Start
Before reaching for any adhesive, you must identify the cause of the separation. A wrong diagnosis leads to wasted time and a failed repair.
Check for Sole Separation
Look closely at the gap between the upper and the sole. Use a flashlight if needed.
- Minor lift: A small gap (under 1/8 inch) at the toe or heel. Often fixable with DIY glue.
- Full detachment: The sole is completely loose in one or more areas. Still repairable if the rubber is intact.
- Flapping sole: The sole catches on surfaces. This means the bond is gone and needs immediate repair to avoid tearing the upper.
Pro Tip: Press the sole back into place. If it snaps back neatly, the structure is sound. If it resists or crumbles, deeper issues may exist.
Test for Hydrolysis
This is the silent killer of old boots. Hydrolysis is a chemical breakdown of rubber that happens over time, especially in boots over 10 years old.
How to test: Rub your finger on the sole’s edge. If it leaves a black, powdery residue or the rubber feels soft and crumbly, hydrolysis has occurred.
⚠️ Critical: No glue can fix hydrolysis. The rubber itself is dead. You must replace the sole, and this is a job for a professional cobbler.
Inspect for Cracks and Tears
Sometimes sole separation comes with material damage:
- Cracks in leather: Often due to dryness. These must be sealed before or during sole repair.
- Tears in rubber or fabric: Can be backed with tape and glued, but large rips may require patching.
- Delamination: Layers inside the boot are splitting. This weakens support and may require full resoling.
If your boot has multiple issues, address them in order: clean, repair tears, reattach sole, then seal.
Choose the Right Adhesive
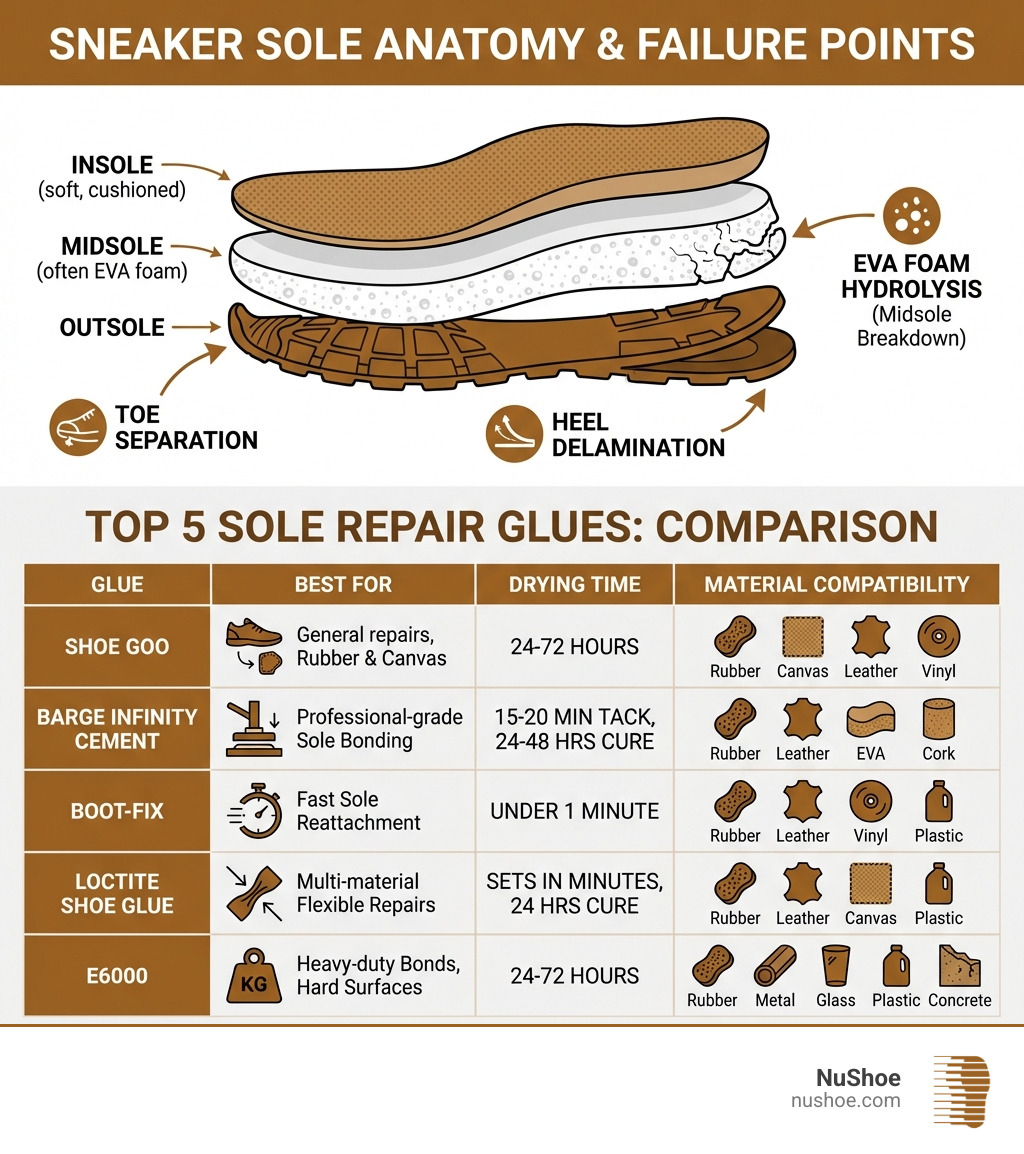
Using the wrong glue is the number one reason boot repairs fail. Most household glues aren’t flexible or waterproof enough for footwear.
Best Glues for Sole Repair
| Adhesive | Best For | Flexibility | Waterproof |
|---|---|---|---|
| Shoe Goo | DIY reattachment, minor lifts | High | Yes |
| Barge Cement | Professional-grade bond | High | Yes |
| Stormsure | Wet environments, rubber soles | High | Yes |
| Tuff Toe | Cracks and sole repair | High | Yes |
| Flexible CA (Insta-Cure IC-2000) | Small, quick fixes | Moderate | Yes |
Shoe Goo is the top choice for most DIYers. It’s flexible, fills gaps, and stays rubbery after drying. Apply it thick because it shrinks slightly as it cures. Properly capped, a tube can last 5–6 years (store it in the freezer to extend shelf life).
Barge Cement is a favorite among cobblers. It creates a permanent bond when used correctly: apply, let dry slightly, then press together.
Avoid These Glues
❌ Standard Super Glue (Cyanoacrylate): Too brittle. Will snap when you walk.
❌ Silicone Sealant: Doesn’t bond well to leather or rubber long-term.
❌ Hot Glue: Not flexible or durable under stress.
❌ Expanding Gorilla Glue: Expands 3–4x as it cures. Can ruin the boot interior if not clamped tightly.
Exception: If you must use polyurethane glue, clamp hard and use sparingly. Wipe excess immediately.
Prepare the Surfaces Properly
Glue only works if the surfaces are clean and rough. This step is non-negotiable.
Remove Dirt and Debris
Use a stiff brush or old toothbrush to scrub away mud, dirt, and loose fibers from both the sole and the boot’s welt (the edge where sole meets upper).
- Focus on the gap and the first half inch of both surfaces.
- For leather, wipe with a damp cloth, then dry.
Clean with Isopropyl Alcohol
After brushing, wipe both surfaces with 70%+ isopropyl alcohol (rubbing alcohol).
- Use a lint-free cloth or paper towel.
- Alcohol removes oils, sweat, and residues that prevent adhesion.
- Let the area air dry for 5–10 minutes.
Remove Old Adhesive
If old glue remains, scrape it off:
- Use a dull knife, screwdriver, or sandpaper (80–120 grit).
- Sand until both surfaces are slightly rough. This helps new glue grip.
- Wipe again with alcohol after sanding.
Warning: Never glue over old, flaky adhesive. It’s the most common cause of quick failure.
Apply the Glue Correctly
Now that surfaces are clean, it’s time to bond them the right way.
Apply to Both Surfaces
For the strongest bond:
- Apply a generous layer of Shoe Goo (or chosen adhesive) to the sole.
- Apply a matching layer to the boot’s welt or upper edge.
- Use a wooden skewer or popsicle stick to spread the glue evenly.
- Push glue into the edges and corners. This seals against water.
Pro Tip: Let the glue become tacky (5–10 minutes) before pressing together. This improves bond strength for some adhesives like Barge Cement.
Support Tears from Inside
If the upper is torn:
- Cut a piece of duct tape slightly larger than the tear.
- Stick it to the inside of the boot, covering the tear.
- This acts as a patch and prevents the glue from leaking in.
Clamp and Cure for Full Strength
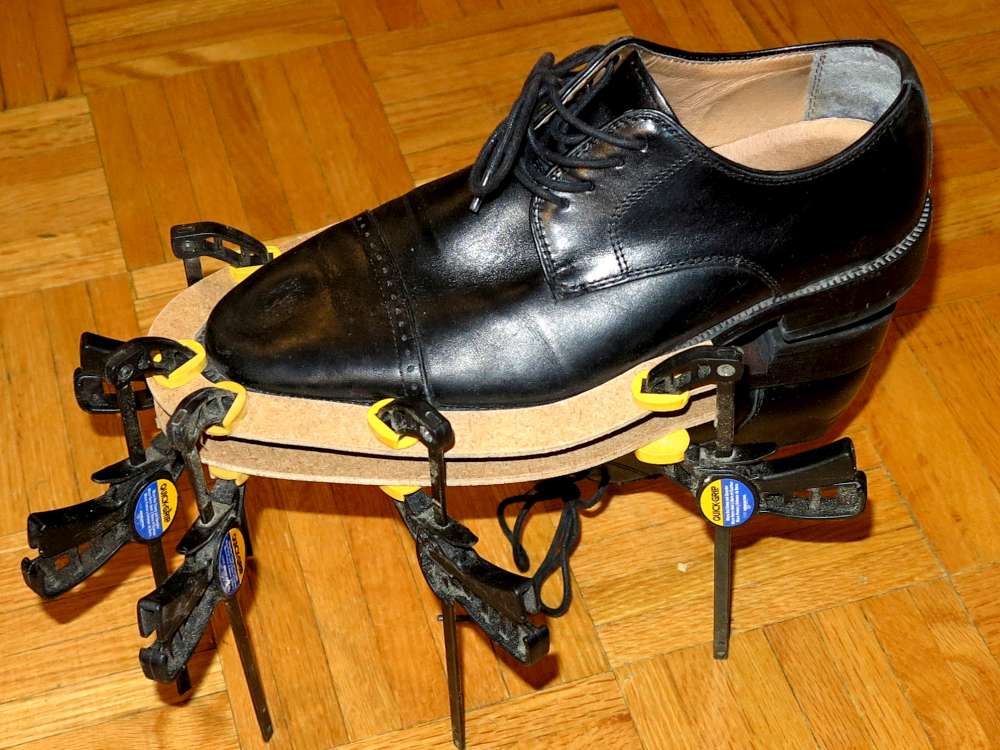
This is where most DIY repairs fail. People either don’t clamp properly or rush the cure.
Press and Clamp Firmly
- Align the sole exactly.
- Press it down hard with your hands.
- Clamp or weight it:
– Best option: Use woodworking clamps around the boot.
– Alternative: Fill the boot with soup cans or heavy books.
– Budget option: Place under a heavy chair or workbench.
Goal: Constant, even pressure across the entire bond line.
Cure Time Matters
- Minimum: 24 hours (for light use).
- Recommended: 48–72 hours (for hiking, work boots, or full separation).
- Do not walk on it until fully cured.
Note: Polyurethane glues expand during cure, so keep clamped the whole time.
Finish and Protect the Repair

A strong bond is only half the battle. Seal it against the elements.
Trim Excess Glue (Optional)
After curing, you may see a bead of glue along the edge.
- If smooth, leave it. It adds strength and waterproofing.
- If lumpy, trim carefully with a sharp knife.
Apply Weatherproof Sealant
Use mink oil, leather conditioner, or a rubber sealant on the entire boot:
- Focus on the repair zone.
- This prevents water intrusion and keeps leather flexible.
- Reapply every few months or after wet exposure.
Pro Tip: For hiking boots, use a silicone-based spray for extra water resistance.
When to See a Cobbler
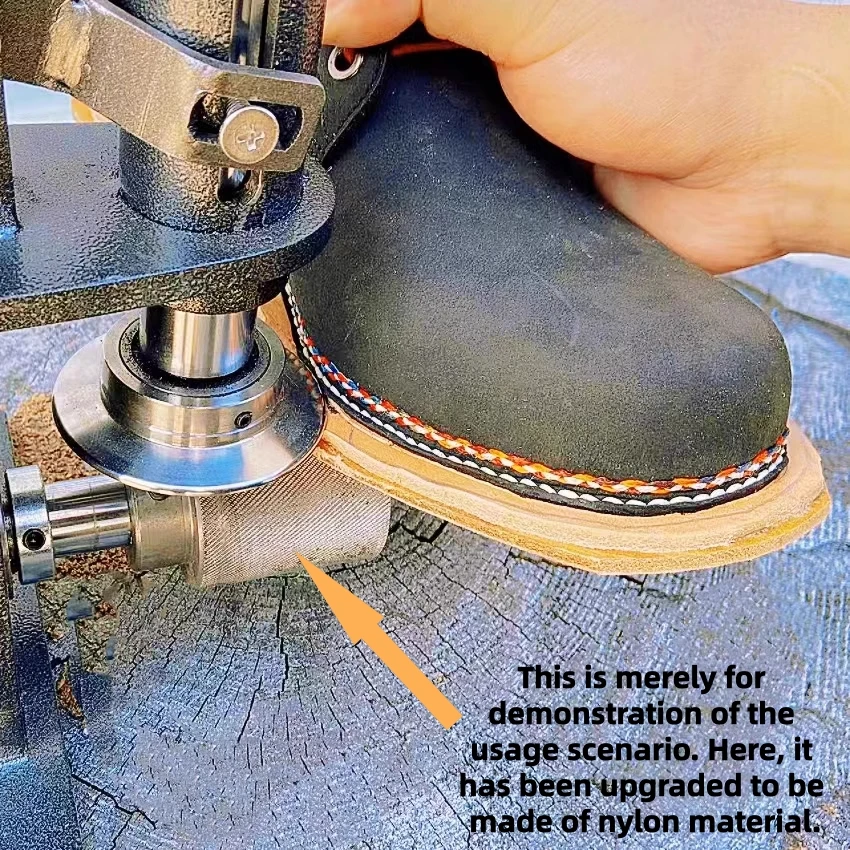
DIY works for minor to moderate separation, but some cases need a pro.
Get Professional Help If:
✅ Hydrolysis is present (crumbly rubber)
✅ The sole is completely detached and misshapen
✅ The boot has Gore-Tex or sealed lining (glue or stitching could damage it)
✅ You need full sole replacement
Cost: Around $13 USD (12 EUR) per boot, about 20% of a new pair’s price.
Lifespan: A pro repair can last over 100 km and several years.
Bonus: Cobblers use industrial adhesives and heat-press equipment for unbreakable bonds, often completing re-gluing in about 30 minutes (excluding cure time).
Prevent Future Sole Separation
Fixing is one thing. Keeping it fixed is better.
Clean After Every Use
- Remove mud and dirt with a damp cloth.
- Let boots dry naturally, never by a heater.
Condition Leather Regularly
Dry leather pulls away from the sole.
- Apply mink oil or leather conditioner every 1–2 months.
- This keeps the upper flexible and bonded.
Store Properly
- Keep boots in a cool, dry place.
- Avoid garages, basements, or cars where temperature swings degrade rubber and glue.
Rotate Your Boots
Wearing the same pair daily accelerates wear. Rotate between 2–3 pairs to extend life.
Fix Common Repair Mistakes
Even careful attempts fail sometimes. Here’s how to fix the most common errors.
Glue Leaked Inside the Boot
Cause: Too much polyurethane glue or poor clamping.
Fix: Use non-expanding glue (Shoe Goo) next time. For now, wipe excess with alcohol before it cures.
Repair Failed After One Day
Cause:
– Not enough cure time (under 24 hours)
– Dirty or oily surfaces
– Old glue not removed
Fix: Reopen, clean with alcohol, sand, and reapply with a 72-hour cure.
Sole Still Loose
Cause:
– Hydrolysis (rubber is dead)
– Rigid glue used (like super glue)
Fix: Replace the sole professionally.
Water Gets In After Repair
Cause: Glue didn’t reach the edge or gaps remain.
Fix: Use a skewer to push glue into seams. Apply external sealant after curing.
Frequently Asked Questions About Fixing Boot Soles
Can I use super glue to fix a boot sole?
Standard super glue is too brittle for boot soles and will snap under the stress of walking. You need a flexible, waterproof adhesive like Shoe Goo, Barge Cement, or a rubber-toughened cyanoacrylate like Insta-Cure IC-2000.
How long does it take for boot glue to dry?
The minimum cure time is 24 hours for light use. For heavy-duty boots, hiking boots, or full sole separation, allow 48–72 hours for maximum strength. Walking on the repair too early is a common cause of failure.
What is hydrolysis and can it be glued?
Hydrolysis is a chemical breakdown of rubber that makes soles crumbly and powdery, common in boots over 10 years old. It cannot be fixed with glue because the rubber itself has deteriorated. You need professional sole replacement.
How much does it cost to get soles professionally repaired?
Professional re-gluing costs approximately $13 USD (12 EUR) per boot, which is about 20% of the price of new boots. A professional repair can last over 100 km and several years if the upper is sound.
Is Shoe Goo better than Gorilla Glue for boots?
Shoe Goo is generally better for DIY boot repair because it doesn’t expand during curing like Gorilla Glue (a polyurethane adhesive). Gorilla Glue can seep into the boot interior and cause mess if not clamped perfectly. However, Barge Cement and Stormsure are also excellent flexible, waterproof options.
Can I fix a boot sole without clamps?
Yes, for minor repairs you can fill the boot with heavy objects like soup cans or books, or place it under a heavy chair. However, woodworking clamps provide the most consistent pressure for serious repairs.
Key Takeaways for a Lasting Boot Sole Repair
Fixing boot soles comes down to four critical steps: proper diagnosis, the right adhesive, clean surfaces, and patience during curing. Always test for hydrolysis before attempting any glue repair, because no adhesive can fix crumbly rubber. Choose flexible, waterproof glues like Shoe Goo or Barge Cement, and avoid standard super glue at all costs. Take time to clean both surfaces with isopropyl alcohol and remove all old adhesive before applying new glue. Finally, clamp firmly and wait the full 72 hours before walking on your repair.
Your next step: Gather your materials (Shoe Goo, isopropyl alcohol, sandpaper, and clamps), diagnose your boots using the methods above, and start your repair this weekend. A few hours of work can add years of life to your favorite boots.