How to Clean Mud Off Hiking Boots
There’s nothing quite like the satisfaction of finishing a challenging hike—except, perhaps, the mess left behind on your boots. After trudging through muddy trails, it’s easy to let your hiking boots sit neglected until the next adventure. But cleaning mud off hiking boots isn’t just about appearances. It’s a crucial step in maintaining performance, preventing long-term damage, and extending the life of your gear. Dried mud adds weight, clogs treads, traps moisture, and can degrade materials over time—especially if left unattended.
Done improperly, cleaning can be just as harmful as neglecting them altogether. Harsh scrubbing, hot water, or tossing boots in the washing machine might seem like quick fixes, but they often lead to warped soles, cracked leather, or compromised waterproofing. The good news? With the right method, you can safely and effectively remove even the most stubborn mud without damaging your footwear.
This step-by-step guide walks you through the best practices for cleaning muddy hiking boots, based on expert recommendations and real-world hiker experiences. From letting mud dry to reapplying waterproofing, you’ll learn how to restore your boots to top condition—no matter if they’re made of synthetic fabric, full-grain leather, or insulated winter materials.
Let Mud Dry Completely Before Cleaning
Why You Should Never Clean Wet Mud
The first and most important rule: never try to clean wet mud off hiking boots. Attempting to scrub or rinse while the mud is still wet only spreads it deeper into the fabric, seams, and lugs. Worse, rinsing too early can trap moisture inside the boot, especially if the insole isn’t removed. This increases drying time and raises the risk of mold and odor.
Instead, let the mud dry fully. Dried mud hardens and flakes off easily, reducing the need for aggressive scrubbing. It also minimizes the chance of pushing dirt into sensitive areas like mesh panels or stitching.
Pro Tip: Store muddy boots in a garage, shed, or outside to avoid tracking mud indoors. Allow 12–24 hours for complete drying, depending on humidity.
Remove Laces and Insoles Early
Before any scrubbing begins, take out the laces and insoles. This gives you full access to hidden dirt pockets and prevents moisture from being trapped inside. Laces can be hand-washed in warm, soapy water and air-dried. Insoles should be cleaned separately with mild soap and a soft brush.
Replace insoles if they no longer rebound when pressed or continue to smell after cleaning—damp, worn insoles are the leading cause of persistent boot odor.
Knock Off Dried Mud Chunks Safely
Bang Boots Together to Loosen Debris
Once the mud is dry, head outside and gently bang your boots together or tap them against a hard surface like a porch step or fence post. This dislodges large clumps of dried mud without damaging the outsole. Avoid using excessive force—your goal is to remove bulk, not chip away at the rubber.
Scrape Stubborn Mud From Deep Treads
For mud stuck in deep lugs, use a butter knife, old spoon, or dedicated boot scraper. Work from heel to toe, prying out debris without gouging the rubber. For tight spots around eyelets or rands, a blunt pick or toothbrush handle works best.
Visual Cue: Stop when only fine dust or embedded particles remain—these will be removed during scrubbing.
Use the Right Brush for Each Surface

Stiff Nylon Brush for General Cleaning
A stiff nylon brush is ideal for scrubbing synthetic uppers, midsoles, and outsoles. It’s strong enough to lift dirt but gentle enough to avoid scratching. Never use metal-bristled brushes—they can fray fabric and damage waterproof coatings.
Old Toothbrush for Precision Work
Switch to an old toothbrush for detailed cleaning. This is essential for areas like stitching, lace loops, and mesh panels where dirt accumulates. Dip it in soapy water to help lift grime from tight crevices.
Expert Note: Replace worn brushes regularly. Frayed bristles lose effectiveness and may scratch surfaces.
Prepare a Safe Cleaning Solution
Mix Warm Water With Mild Soap
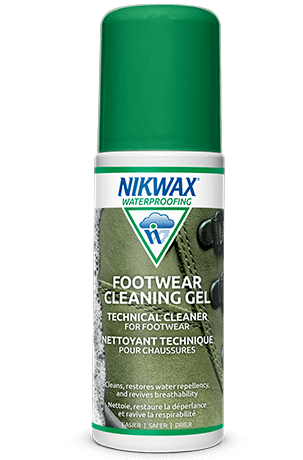
Fill a bucket or sink with warm (not hot) water and add a few drops of mild dish soap like Dawn. Alternatively, use a specialized footwear cleaner such as:
– Nikwax Footwear Cleaning Gel
– Granger’s Footwear Cleaner
– Collonil Universal Cleaner
These products are pH-balanced for outdoor gear and won’t strip waterproof coatings.
Avoid Harsh Chemicals
Never use bleach, ammonia, or laundry detergents. They contain enzymes and brighteners that degrade technical fabrics and compromise Durable Water Repellency (DWR). Stick to gentle, gear-specific cleaners.
Scrub Boot Surfaces Thoroughly
Clean One Section at a Time
Dip your nylon brush into the soapy solution and begin scrubbing the upper, starting at the toe and working backward. Focus on high-mud zones: sides, heel collar, and midsole. For mesh boots, support the inner wall with one hand while scrubbing to prevent tearing.
Target Seams and Stitching
Use the toothbrush to gently agitate dirt around lace holes, tongue attachments, and stitching. Re-wet the brush as needed, but avoid oversaturating the boot.
Warning: Never soak boots—especially leather or waterproof models. Prolonged water exposure weakens adhesives and can damage internal membranes.
Rinse Without Damaging Your Boots
Use Running Water, Not a Soak
Hold boots under a tap or low-pressure hose to rinse away soap and loosened dirt. Point them downward to encourage natural drainage. Quick rinsing is safe; full submersion is not.
Avoid Submerging Waterproof Boots
Even if your boots have Gore-Tex or similar liners, don’t soak them. While the membrane resists water entry, seams and stitching can absorb moisture over time. Use a sink sprayer for controlled rinsing.
User Feedback: Many hikers prefer using a handheld shower nozzle for precise cleaning.
Dry Boots the Right Way
Air Dry at Room Temperature
Always dry boots naturally—never near radiators, fireplaces, or in direct sunlight. Heat warps synthetic parts, cracks leather, and weakens glue bonds, potentially separating the sole.
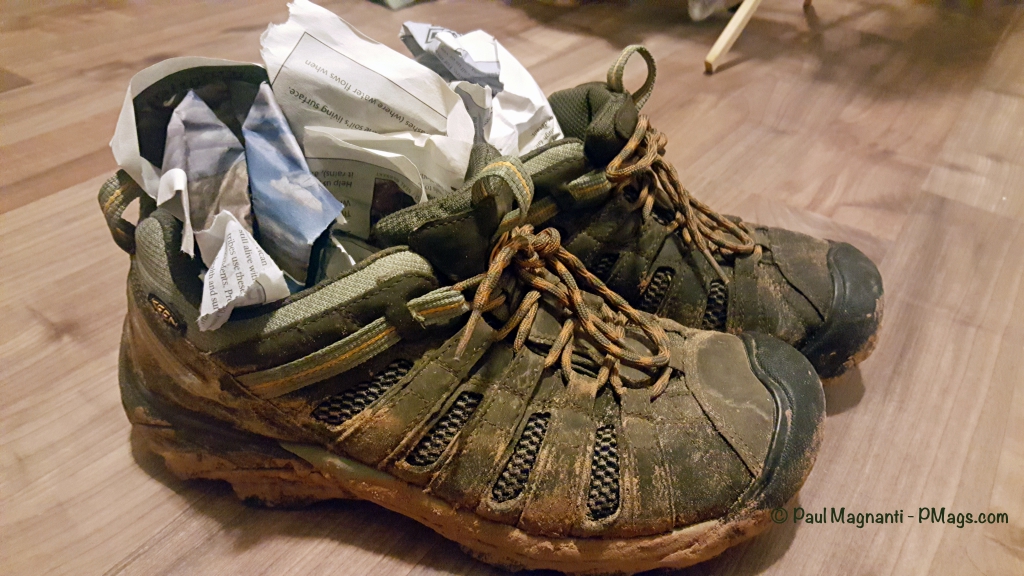
Stuff With Newspaper or Towels
Fill boots with crumpled newspaper, paper towels, or clean dishtowels. These absorb moisture and help maintain shape. Replace every few hours as they become damp. For better wicking, some users insert a microfiber cloth first, then add newspaper.
How Long Does Drying Take?
Most boots take 4 to 24 hours to dry fully, depending on material, thickness, and airflow. Ensure they’re completely dry before re-lacing or storing.
Pro Tip: Place boots near a fan in a well-ventilated room to speed up drying—just avoid direct heat.
Re-Waterproof After Every Clean
Why DWR Protection Matters
Cleaning removes the Durable Water Repellency (DWR) layer—the invisible coating that makes water bead up. Without it, your boots absorb moisture, become heavier, and lose breathability. Reapplying waterproofing restores performance and protects against future stains.
Apply When Slightly Damp
The best time to treat boots is after cleaning, when they’re still slightly damp. This opens fabric pores for better product absorption. Never apply to soaking-wet or hot surfaces.
Choose the Right Waterproofing Product
| Boot Material | Recommended Product | Format |
|---|---|---|
| Synthetic, mesh, nubuck | Nikwax Nubuck & Suede Proof | Spray |
| Fabric uppers | Granger’s Fabsil Waterproofer | Spray |
| Full-grain leather | Nikwax Leather Grease or Granger’s Leather Protector | Cream/wax |
Avoid silicone-based sprays—they clog pores and reduce breathability.
Apply and Wipe Off Excess
- Shake the spray well.
- Hold 6 inches from the boot and apply evenly.
- Wait 2 minutes, then wipe off excess with a microfiber cloth.
- Let dry overnight.
- Repeat for added protection.
Note: Some waxes darken leather slightly but improve durability and cleanability over time.
Prevent Odors and Bacteria Buildup
Clean Insoles Thoroughly
Wash insoles with mild soap and air-dry completely. Replace if they no longer rebound or retain odor.
Use Baking Soda Overnight
Sprinkle baking soda inside each boot, focusing on the toe box. Let sit overnight, then shake out. It neutralizes acids and absorbs odors.
Spray With Odor Eliminator
Use a disinfectant boot spray like Granger’s Odour Eliminator. Remove insoles first, then mist the interior. Allow several hours to air out.
Expert Tip (Shannon Elliott, Columbia Sportswear): Wipe boots with a damp cloth after every hike to prevent deep-set grime and bacterial growth.
Avoid These Common Cleaning Mistakes
❌ Machine washing or drying – Destroys glue, warps materials, voids warranties
❌ Using hot water – Loosens adhesives and damages membranes
❌ Drying in direct sun or near heat – Causes cracking and fit issues
❌ Soaking boots – Traps moisture, risks mold
❌ Using bleach or solvents – Degrades dyes and fibers
Maintain Boots Based on Material
Synthetic and Mesh Boots
- Clean with warm soapy water and soft brush
- Spot-clean heavily soiled areas
- Never machine wash
Leather Boots
- Clean with saddle soap or mild detergent
- Condition after drying to prevent cracking
- Focus on flex zones: ankle and toe box
Faux Fur Lined Boots
- Spot clean only with damp cloth
- Never immerse or machine dry
- Air-dry slowly with minimal stuffing
Store Boots Properly After Cleaning
Keep cleaned, dry boots in a cool, dry place. Use boot shapers or rolled paper to maintain shape. Re-waterproof before long-term storage to protect against moisture damage.
Final Note: Cleaning mud off hiking boots doesn’t have to be complicated—but doing it right makes all the difference. By letting mud dry first, using the right tools, avoiding heat, and reapplying DWR, you’ll keep your boots lightweight, odor-free, and ready for the next adventure. Follow this routine after every muddy trail, and your boots will last for years.