How to Wash Merrell Hiking Boots: Cleaning Guide
After a muddy trail, rainy trek, or dusty desert hike, your Merrell hiking boots take a serious beating. While they’re built for rugged terrain, skipping proper cleaning can drastically shorten their lifespan and compromise performance. Knowing how to wash Merrell hiking boots correctly keeps them waterproof, odor-free, and trail-ready. Many hikers make the mistake of tossing their boots in the washing machine or speeding up drying with a heater—both of which can destroy glue, warp midsoles, and ruin waterproof membranes like Gore-Tex. This guide delivers a step-by-step, material-specific method to safely clean, dry, and reprotect your Merrells without causing damage. Whether you own leather Moabs, nubuck Chameleons, or breathable mesh hybrids, you’ll learn exactly how to restore and maintain them—so they last for thousands of trail miles.
Remove Laces and Insoles for a Deep Clean
Begin every cleaning session by pulling out the laces and insoles. This simple step gives you full access to hidden dirt, moisture, and odor buildup trapped under the tongue and along the collar. It also speeds up drying and ensures thorough cleaning. Set both aside—you’ll clean them separately. While you’re at it, inspect them: frayed or stiff laces should be replaced, and worn, smelly insoles may need upgrading.
Clean Insoles by Hand to Eliminate Odor
Insoles absorb sweat and bacteria, making them a breeding ground for odor. Wash them in lukewarm water with a drop of mild soap. Use a soft brush—like an old toothbrush—to gently scrub stained areas. Rinse thoroughly; leftover soap attracts more dirt. Then air dry them completely for at least 24 hours before reinserting. To fight lingering smells, sprinkle baking soda inside overnight and tap it out the next day.
Wash Laces Separately to Restore Freshness
Soak laces in soapy water or hand-wash them alongside the insoles. If they’re caked with dirt, scrub with a toothbrush. Rinse well and air dry. If your laces are faded, stiff, or unraveling, replace them. Fresh laces not only improve fit and comfort but also give your boots a clean, revitalized look.
Brush Off Dry Mud and Surface Debris First
Never soak boots with dried-on mud. Start dry. Tap the boots together outside to dislodge loose chunks. Then use a soft or semi-firm brush—like a shoe brush, vegetable brush, or toothbrush—to sweep away surface grime. Focus on high-wear zones: the toe cap, eyelets, heel counter, and especially the outsole lugs. Clogged treads lose grip on slippery or uneven terrain.
Scrape Thick Mud from Deep Treads Safely
For mud packed deep into the lugs, use a butter knife or dull tool to gently pry it out. Avoid sharp objects that could slice the rubber. For extra-caked areas, lightly dampen with a cloth first—never blast with a hose or soak the boots, as this can saturate the lining and degrade materials.
Wash Merrell Hiking Boots by Hand Only
Never machine wash Merrell hiking boots. The agitation breaks down glue bonds, damages foam midsoles, and compromises waterproof liners like Gore-Tex. Instead, hand-wash them carefully using gentle techniques.
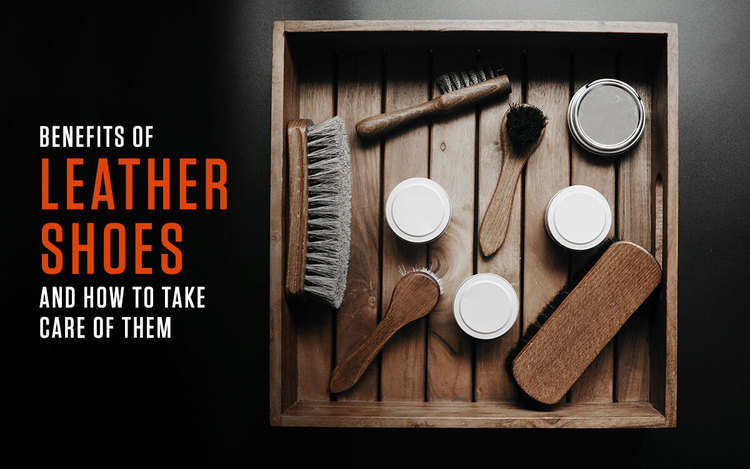
Use Mild Soap or a Specialized Cleaner
Mix lukewarm water with a small amount of mild dish soap or a dedicated cleaner like Nikwax Footwear Cleaning Gel. Avoid bleach, strong detergents, or bar soaps—they strip finishes and fade colors. Dip a soft brush or cloth into the solution and scrub in gentle circular motions. Focus on stained areas: the sides, around the laces, and the toe box.
Avoid Soaking and Submersion at All Costs
Do not dunk your boots. Instead, dampen them under a gentle stream from a sink or hose. Keep water away from the shaft of high-cut models to prevent soaking the interior lining. Work quickly to minimize moisture exposure—especially with nubuck or suede, which absorb water easily and can stain or stiffen.
Rinse Thoroughly to Prevent Residue Buildup
After scrubbing, rinse your boots under clean running water until all suds disappear and the water runs clear. Leftover soap residue attracts dirt and can degrade materials over time. Use a clean cloth to wipe off any remaining film, but avoid sponges that may leave lint behind.
Dry Boots the Right Way to Prevent Damage
Improper drying is the leading cause of boot failure. Heat exposure can crack leather, melt adhesives, and warp EVA midsoles—often beyond repair.
Stuff With Newspaper or Paper Towels to Speed Drying
Wipe the exterior with a towel, then stuff the insides loosely with crumpled newspaper or paper towels. These absorb internal moisture and help boots retain their shape. Replace the paper as it becomes damp—this significantly speeds up drying.
Air Dry at Room Temperature Only
Place boots in a well-ventilated room (68–72°F). Keep them away from radiators, fireplaces, hair dryers, and direct sunlight. Drying takes 4 to 24 hours, depending on how wet they are. Never rush the process—patience preserves performance.
Never Use Heat Sources—Even Campfires
REI Expert Advice: “Do not use a heat source (fireplace, radiator, heater, etc.). High heat weakens adhesives and prematurely ages leather.”
One hiker shared: “There is no recovering from that.” Even residual warmth from a campfire can warp glue and ruin waterproofing. Always let boots dry naturally.
Re-Waterproof After Cleaning to Restore Protection

Once boots are 100% dry, reapply a waterproofing treatment. Cleaning strips away the existing protective layer, leaving your boots vulnerable to moisture and stains.
For Full-Grain Leather Boots
If the leather looks dry or cracked, apply a conditioner like Nikwax Leather Restorer. Use sparingly with a cloth and wipe off excess—too much softens the leather and reduces support. Then use a waterproofing spray designed for leather. Avoid mink oil—it over-softens hiking boot leather and weakens structural integrity.
For Nubuck and Suede
Do not use oil-based conditioners. Instead, apply a nubuck- or suede-specific protector like Nikwax Nubuck & Suede Proof. Spray while boots are slightly damp (after rinsing, before drying). Hold 6 inches away, apply evenly, wait 2 minutes, then wipe off surplus with a microfiber cloth.
Merrell Recommendation: “Apply to wet footwear… wipe away surplus with a damp clean cloth and allow to dry.”
For Mesh and Synthetic Uppers
Use a lightweight fabric protector spray. These maintain breathability while repelling water and stains. Spray evenly, avoid soaking, and test on a hidden spot first (like the inside tongue) to check for discoloration.
Clean by Material Type for Best Results
Each Merrell upper material requires tailored care. Using the wrong method can damage texture, performance, or durability.
Full-Grain Leather Care
- Examples: Chameleon 7 Slam Lunar, Convoy AC
- Smooth, durable, naturally water-resistant
- Clean with saddle soap or mild soap + water
- Condition when dry or cracked
- Re-waterproof with spray or wax
Expert Note: Full-grain leather needs conditioning; suede and nubuck do not.
Nubuck Leather Maintenance
- Examples: Moab Adventure Lace, Chameleon II Leather
- Velvety texture, easily scuffed
- Clean with soft brush or nubuck eraser
- Spot clean with damp cloth—never soak
- Use nubuck-specific spray for waterproofing—never wax or oil
User Tip: “If they’re leather, I might re-treat the leather if it looks dry.”
Suede Cleaning Tips
- Examples: Cham 7, Chameleon 7 Mid Calved Waterproof
- Soft, fuzzy finish—prone to water spots
- Clean like nubuck: use suede brush and eraser
- Minimal water only
- After drying, brush in one direction to revive the nap
- Use suede-specific protector spray
Caution: Water can stain or stiffen suede. Always use the lightest touch.
Mesh and Knit Upper Care
- Examples: Merrell trail runners, hybrid hiking shoes
- Lightweight and breathable—but traps dirt and odor
- Hand wash only with soft brush and soapy water
- Never twist or wring
- Dry with paper stuffing—no heat
- Remove insoles for separate odor treatment
Warning: Even if they feel like running shoes, do not machine wash—glue, foam, and fabric integrity will fail.
Remove Scuffs and Stains Without Damaging the Surface
Surface marks are inevitable. Here’s how to fix them safely.
Use a Cleaning Sponge for Rubber and Synthetics
A Magic Eraser-style sponge works well on rubber midsoles and synthetic overlays. Dampen slightly and rub in smooth strokes. Removes scuff marks, dirt streaks, and toe cap grime. Avoid on suede or nubuck—it can flatten the nap.
Try a Suede Eraser or Cleaning Block for Nubuck and Suede
For nubuck and suede, use a dedicated eraser or cleaning block. Rub gently on stains or salt lines. Follow with brushing to restore texture. Effective for light scuffs and dirt marks.
Avoid Common Cleaning Mistakes That Destroy Boots
Even experienced hikers damage boots with avoidable errors.
| Mistake | Consequence |
|---|---|
| Machine wash | Destroys glue, foam, waterproof membranes |
| Heat drying | Cracks leather, warps soles, melts adhesives |
| Bleach or harsh cleaners | Fades colors, weakens fibers |
| Soaking boots | Saturates leather, promotes mold |
| Skipping insole removal | Traps moisture, causes odor |
| Storing wet boots | Leads to mold, mildew, permanent stink |
| Over-conditioning | Over-softens leather, reduces support |
| Using mink oil | Compromises leather structure |
Merrell Official Guidance: “Avoid washing them in the machine, as this can damage fastenings and glue.”
Store Boots Properly to Extend Lifespan
How you store your boots matters just as much as how you clean them.
Keep in a Cool, Dry, Ventilated Place
Avoid hot trunks, damp garages, or sealed plastic bins. Store in a closet with airflow. Always ensure boots are completely dry before storage to prevent mold and odor.
Maintain Shape With Stuffing
Use shoe trees or crumpled paper to keep boots from collapsing. Loosen the laces to reduce strain on eyelets.
Final Checklist: Post-Hike Boot Care Routine
✅ Remove laces and insoles
✅ Knock off loose dirt and tap boots together
✅ Brush outsoles and uppers
✅ Wash with mild soap or specialized cleaner
✅ Rinse thoroughly—no soap residue
✅ Wipe dry, stuff with paper
✅ Air dry at room temperature—no heat
✅ Once dry, recondition (if leather) and re-waterproof
✅ Reinsert insoles, re-lace
✅ Sprinkle powder for odor control (optional)
✅ Store in cool, dry, ventilated area
Final Note: Your Merrell hiking boots are an investment in comfort, safety, and adventure. How to wash Merrell hiking boots isn’t complicated—but it must be done right. Skip the machine, avoid the heat, and clean by hand using material-appropriate methods. Reapply waterproofing, dry slowly, and store properly. Do this after every few hikes, and your boots will stay supportive, dry, and trail-ready for years. Treat them well, and they’ll carry you farther—mile after mile.